- 1 Create a new Scratch project
- 2 Add a character
- 3 Shrink the dinosaur
- 4 Make the dinosaur move up and down
- 5 Make the dinosaur move left and right
- 6 Add the Beetle sprite
- 7 Make the beetle move on it's own
- 8 Catch and eat the beetle
- 9 Add sound effects
- 10 Keep track of your score
- 11 Add a backdrop
- 12 Improve the game?
Open the Scratch website in a new tab and create a new project. Delete the cat sprite from the project.
Go to the Scratch website using the link below and click on the 'Create' link in the blue bar at the top.
By default, each new project starts with the cat sprite already added. To delete the cat click on the x in the blue circle beside the cat in the sprite list.
In the game we are going to make a dinosaur move around by using the arrow keys on our keyboard.
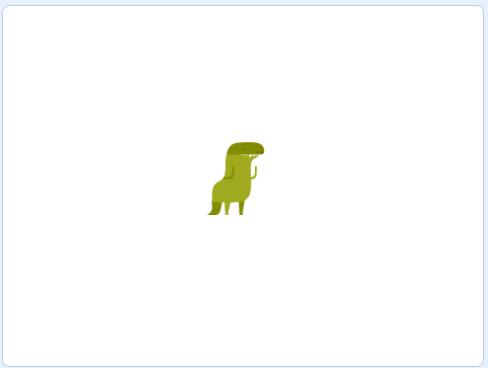
But first let's add the Dinosaur4 sprite from the sprite library.
To add a sprite from the sprite library follow these steps:
- Put your mouse over the Choose a Sprite button
- Click on the magnifying glass
- Find the sprite you want in the library
- Click on your chosen sprite
You can use search box or the filter links (Animals, People, Fantasy etc) to locate your sprite.
When the dinosaur sprite gets added to our project, it's a bit too big for our game so let's add some code to shrink it and make it smaller.
Add the following code to the dinosaur sprite:
when green flag clicked
set size to (50) %
Click on the green flag and the dinosaur sprite will shrink to half it's normal size.
Next we will program the dinosaur sprite to move up and down when we press the up and down arrow keys on our keyboard.
Each time we press an arrow key, we will point the dinosaur in that direction and then make them move 10 steps.
Add the following code to the dinosaur sprite:
when [up arrow v] key pressed
point in direction (0)
move (10) steps

when [down arrow v] key pressed
point in direction (180)
move (10) steps
Once you've added the code test that it works by pressing the up and down arrow keys and checking that the dinosaur moves in the correct direction. If the dinosaur goes in the wrong direction, check that you have the right numbers in the code blocks.
If you're using a tablet or iPad without a physical keyboard, you won't be able to use keyboard keys like the arrow keys in your project. Instead, we'll add simple on-screen buttons (using sprites) that you can tap to do the same things. This keeps your project working great! Just follow these steps wherever the lesson talks about pressing a key.
First, add a new sprite for your button:
- Click the "Choose a Sprite" button in the bottom right.
- Pick a simple shape, like an arrow or a circle. Make it small and place it on the screen where it's easy to tap, like the bottom corner.
Now, program your button sprite to make things happen when you tap it. Here's how it works for different situations:
Example 1: If the lesson uses a key to trigger an action on a specific sprite (like making something move, turn, or jump)
Instead of code like this on your target sprite:
when [left arrow v] key pressed
change x by (-10)  // or any action
Or this:
if < key [left arrow v] pressed? > then
change x by (-10)  // or any action
end
Add this code to your new button sprite:
when this sprite clicked
broadcast [do action v]
Then, on your target sprite, add this to receive the message:
when I receive [do action v]
change x by (-10)  // or any action
Tap the button on the screen, and the action will happen, just like pressing the key! Use a unique broadcast name for each different action or key.
Example 2: If the lesson uses a key to change a variable (like adding to a score or setting a value)
Instead of code like this:
when [space v] key pressed
change [score v] by (1)
Or this:
if < key [space v] pressed? > then
change [score v] by (1)
end
Add a new button sprite. Then, put this code on the button sprite:
when this sprite clicked
change [score v] by (1)
(If the variable is "for this sprite only," make sure it's set to "for all sprites" so the button can change it.)
Tap the button, and the variable changes, no message needed since it's something shared!

Now we will program the dinosaur sprite to move left and right when we press the left and right arrow keys on our keyboard.
Each time we press an arrow key, we will point the dinosaur in that direction and then make them move 10 steps.
Add the following code to the dinosaur sprite:
when [left arrow v] key pressed
point in direction (-90)// notice that this is MINUS 90 (-90)
move (10) steps

when [right arrow v] key pressed
point in direction (90)
move (10) steps
Once you've added the code test that it works by pressing the left and right arrow keys and checking that the dinosaur moves in the correct direction. If the dinosaur goes in the wrong direction, check that you have the right numbers in the code blocks.
You will notice that the dinosaur goes upside down when you make it move left. We can fix this by using the "set rotation style [left-right]" code block. Add it underneath the "set size to (50) %" block:
when green flag clicked
set size to (50) % // add it under here
set rotation style [left-right v]
If you're using a tablet or iPad without a physical keyboard, you won't be able to use keyboard keys like the arrow keys in your project. Instead, we'll add simple on-screen buttons (using sprites) that you can tap to do the same things. This keeps your project working great! Just follow these steps wherever the lesson talks about pressing a key.
First, add a new sprite for your button:
- Click the "Choose a Sprite" button in the bottom right.
- Pick a simple shape, like an arrow or a circle. Make it small and place it on the screen where it's easy to tap, like the bottom corner.
Now, program your button sprite to make things happen when you tap it. Here's how it works for different situations:
Example 1: If the lesson uses a key to trigger an action on a specific sprite (like making something move, turn, or jump)
Instead of code like this on your target sprite:
when [left arrow v] key pressed
change x by (-10)  // or any action
Or this:
if < key [left arrow v] pressed? > then
change x by (-10)  // or any action
end
Add this code to your new button sprite:
when this sprite clicked
broadcast [do action v]
Then, on your target sprite, add this to receive the message:
when I receive [do action v]
change x by (-10)  // or any action
Tap the button on the screen, and the action will happen, just like pressing the key! Use a unique broadcast name for each different action or key.
Example 2: If the lesson uses a key to change a variable (like adding to a score or setting a value)
Instead of code like this:
when [space v] key pressed
change [score v] by (1)
Or this:
if < key [space v] pressed? > then
change [score v] by (1)
end
Add a new button sprite. Then, put this code on the button sprite:
when this sprite clicked
change [score v] by (1)
(If the variable is "for this sprite only," make sure it's set to "for all sprites" so the button can change it.)
Tap the button, and the variable changes, no message needed since it's something shared!


Join our club 😃
To view the remaining 7 steps and access hundreds of other coding projects please login or create an account.
This lesson is copyright of Coding Ireland. Unauthorised use, copying or distribution is not allowed.
Scratch is developed by the Lifelong Kindergarten Group at the MIT Media Lab. It is available for free at https://scratch.mit.edu