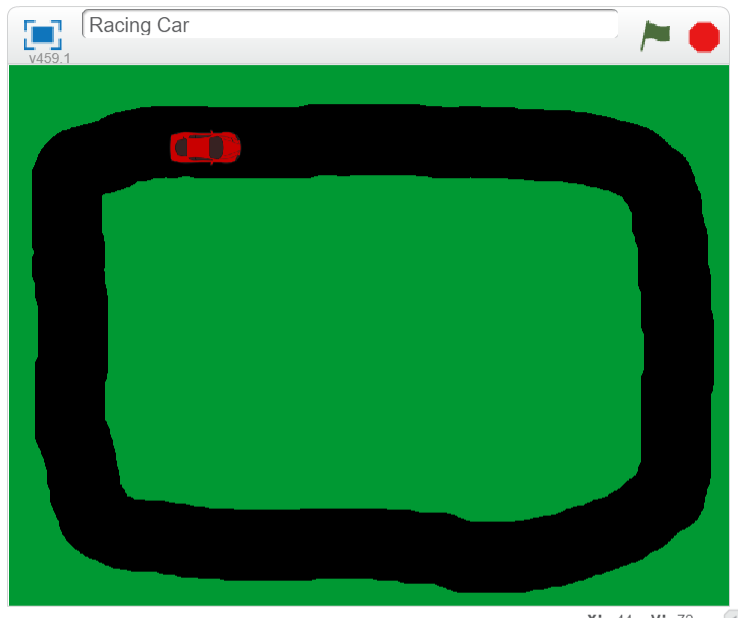
1 - Open the Racing Car Scratch project
In this project we're going to record some of our own sounds and add them to the Racing Car project.
If you completed the Racing Car project in the Driving and Traffic Lights pack then open your completed project in Scratch. We'll add the sound effects to your project.
If you haven't completed this project then you can use this starter project which has the Racing Car code already completed.
2 - Turn down the volume
The first change we're going to make is to turn down the volume from 100% and set it to 30%.
Add the set volume to 30 % block to the car sprite, underneath the point in direction 90 block.
when green flag clicked
set size to (10) %
go to x:(0) y:(0)
point in direction (90)
set volume to (30) % // add this block here
forever
if < touching color [#3db000]? > then
set [speed v] to (2)
else
set [speed v] to (6)
end

if < key [up arrow v] pressed? > then
move (speed) steps
end

if < key [down arrow v] pressed? > then
move (-2) steps
end

if < key [left arrow v] pressed? > then
turn ccw (5) degrees
end

if < key [right arrow v] pressed? > then
turn cw (5) degrees
end

end
If you're using a tablet or iPad without a physical keyboard, you won't be able to use keyboard keys like the arrow keys in your project. Instead, we'll add simple on-screen buttons (using sprites) that you can tap to do the same things. This keeps your project working great! Just follow these steps wherever the lesson talks about pressing a key.
First, add a new sprite for your button:
- Click the "Choose a Sprite" button in the bottom right.
- Pick a simple shape, like an arrow or a circle. Make it small and place it on the screen where it's easy to tap, like the bottom corner.
Now, program your button sprite to make things happen when you tap it. Here's how it works for different situations:
Example 1: If the lesson uses a key to trigger an action on a specific sprite (like making something move, turn, or jump)
Instead of code like this on your target sprite:
when [left arrow v] key pressed
change x by (-10)  // or any action
Or this:
if < key [left arrow v] pressed? > then
change x by (-10)  // or any action
end
Add this code to your new button sprite:
when this sprite clicked
broadcast [do action v]
Then, on your target sprite, add this to receive the message:
when I receive [do action v]
change x by (-10)  // or any action
Tap the button on the screen, and the action will happen, just like pressing the key! Use a unique broadcast name for each different action or key.
Example 2: If the lesson uses a key to change a variable (like adding to a score or setting a value)
Instead of code like this:
when [space v] key pressed
change [score v] by (1)
Or this:
if < key [space v] pressed? > then
change [score v] by (1)
end
Add a new button sprite. Then, put this code on the button sprite:
when this sprite clicked
change [score v] by (1)
(If the variable is "for this sprite only," make sure it's set to "for all sprites" so the button can change it.)
Tap the button, and the variable changes, no message needed since it's something shared!
3 - Record the "on your marks" sound
The first sound we are going to record and add to the project is the race starter saying the words "On your marks, get set, go!".
Record a new sound of you saying "On your marks, get set, go!".
Once you've recorded it, rename the sound from "recording1" to "on your marks".
Using the microphone on your computer you can record sounds and add them to your Scratch project.
To record a sound in Scratch follow these steps:
- Click on the Sounds tab on the top left.
- Put your mouse over the Choose a Sound button.
- Click on Record.
- Your web browser might ask if it can have permission to use your microphone, if it does click Yes or Allow.
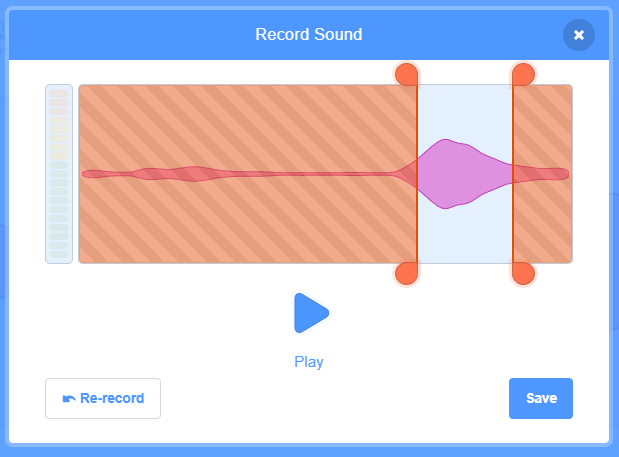
- A Record Sound box will appear, to start recording click the orange circle (Record).
- When you are finished recording click the orange square (Stop recording).
- You can trim your recording and play it back if you want.
- Click on the Save button to save your recording. You can now use it in your project by selecting it in a sound block.
4 - Add the "on your marks" sound
Now that you've recorded the sound, make it play at the start by adding the play sound [on your marks] until done block underneath the set volume to 30 % block.
when green flag clicked
set size to (10) %
go to x:(0) y:(0)
point in direction (90)
set volume to (30) %
play sound (on your marks v) until done // add this block here
forever
if < touching color [#3db000]? > then
set [speed v] to (2)
else
set [speed v] to (6)
end

if < key [up arrow v] pressed? > then
move (speed) steps
end

if < key [down arrow v] pressed? > then
move (-2) steps
end

if < key [left arrow v] pressed? > then
turn ccw (5) degrees
end

if < key [right arrow v] pressed? > then
turn cw (5) degrees
end

end
Click on the green flag and test that your sound plays OK. Notice that you can't make your car move until the sound has finished playing.
If you're using a tablet or iPad without a physical keyboard, you won't be able to use keyboard keys like the arrow keys in your project. Instead, we'll add simple on-screen buttons (using sprites) that you can tap to do the same things. This keeps your project working great! Just follow these steps wherever the lesson talks about pressing a key.
First, add a new sprite for your button:
- Click the "Choose a Sprite" button in the bottom right.
- Pick a simple shape, like an arrow or a circle. Make it small and place it on the screen where it's easy to tap, like the bottom corner.
Now, program your button sprite to make things happen when you tap it. Here's how it works for different situations:
Example 1: If the lesson uses a key to trigger an action on a specific sprite (like making something move, turn, or jump)
Instead of code like this on your target sprite:
when [left arrow v] key pressed
change x by (-10)  // or any action
Or this:
if < key [left arrow v] pressed? > then
change x by (-10)  // or any action
end
Add this code to your new button sprite:
when this sprite clicked
broadcast [do action v]
Then, on your target sprite, add this to receive the message:
when I receive [do action v]
change x by (-10)  // or any action
Tap the button on the screen, and the action will happen, just like pressing the key! Use a unique broadcast name for each different action or key.
Example 2: If the lesson uses a key to change a variable (like adding to a score or setting a value)
Instead of code like this:
when [space v] key pressed
change [score v] by (1)
Or this:
if < key [space v] pressed? > then
change [score v] by (1)
end
Add a new button sprite. Then, put this code on the button sprite:
when this sprite clicked
change [score v] by (1)
(If the variable is "for this sprite only," make sure it's set to "for all sprites" so the button can change it.)
Tap the button, and the variable changes, no message needed since it's something shared!
5 - Record an "engine" sound
The next sound we are going to record and add to the project is the sound of the engine.
Record a new sound of you making an engine noise. Use the trim tool to make it a VERY short sound as it will be playing over and over again quickly as your car moves forwards.
Once you've recorded it, rename the sound from "recording1" to "engine".
Using the microphone on your computer you can record sounds and add them to your Scratch project.
To record a sound in Scratch follow these steps:
- Click on the Sounds tab on the top left.
- Put your mouse over the Choose a Sound button.
- Click on Record.
- Your web browser might ask if it can have permission to use your microphone, if it does click Yes or Allow.
- A Record Sound box will appear, to start recording click the orange circle (Record).
- When you are finished recording click the orange square (Stop recording).
- You can trim your recording and play it back if you want.
- Click on the Save button to save your recording. You can now use it in your project by selecting it in a sound block.

Join our club 😃
To view the remaining 4 steps and access hundreds of other coding projects please login or create an account.
This lesson is copyright of Coding Ireland. Unauthorised use, copying or distribution is not allowed.
Scratch is developed by the Lifelong Kindergarten Group at the MIT Media Lab. It is available for free at https://scratch.mit.edu