- 1 Create a new project
- 2 Creating Artwork Using Techniques Learned in Previous Lessons
- 3 Exporting Artwork Using the "Export As" Feature
- 4 Choosing a File Format Based on the Purpose of Your Artwork
- 5 Adjusting File Format Settings as Needed
- 6 Choosing a Destination Folder and File Name for Exported Artwork
- 7 Exporting Artwork in the Chosen File Format
- 8 Comparing File Formats and Quality
- 9 Testing Your Exported Artwork
1 - Create a new project
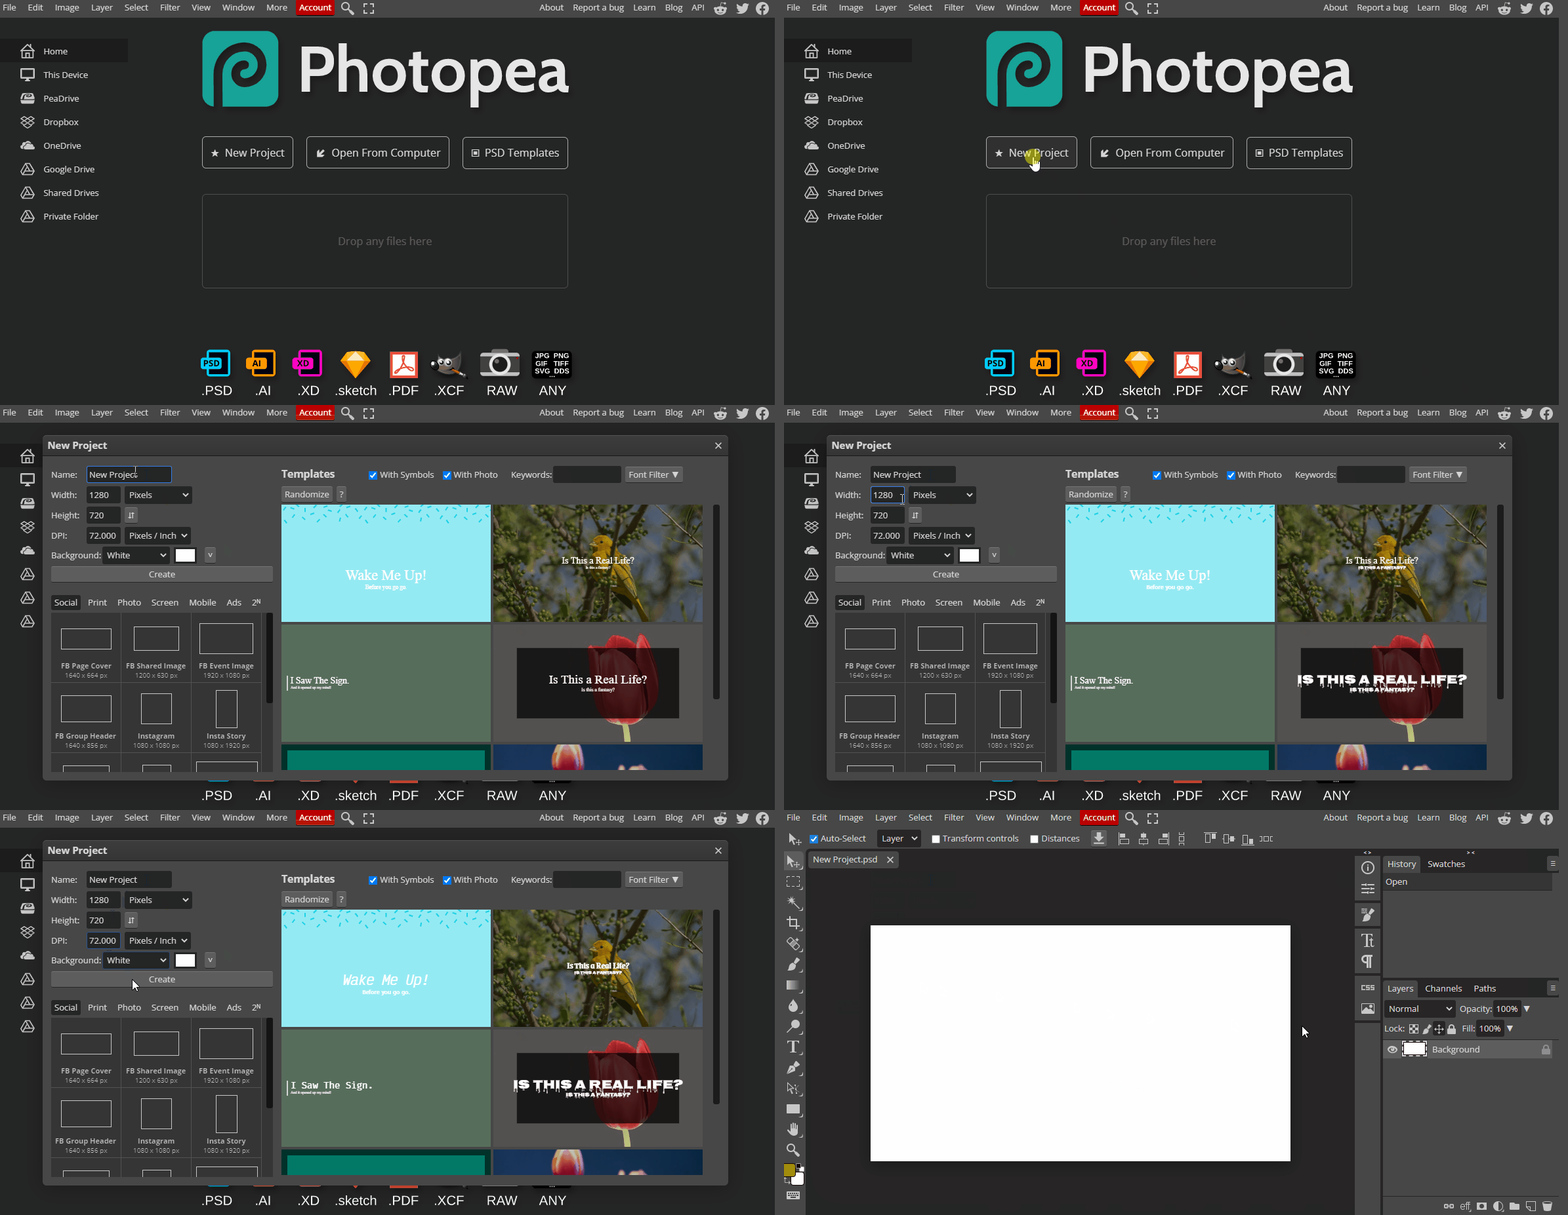
Let's take a look and try out some digital software called Photopea. Open the website photopea.com and create a new project.
To create a new project in Photopea, open the website photopea.com and:
- Click the New Project button
- You can give your project a name and choose what size the image will be.
- Click the "Create" button.

2 - Creating Artwork Using Techniques Learned in Previous Lessons
Before exporting your artwork, you must first create it using the techniques you have learned in previous lessons. These techniques may include using different tools, layers, effects, and other features available in Photopea.
3 - Exporting Artwork Using the "Export As" Feature
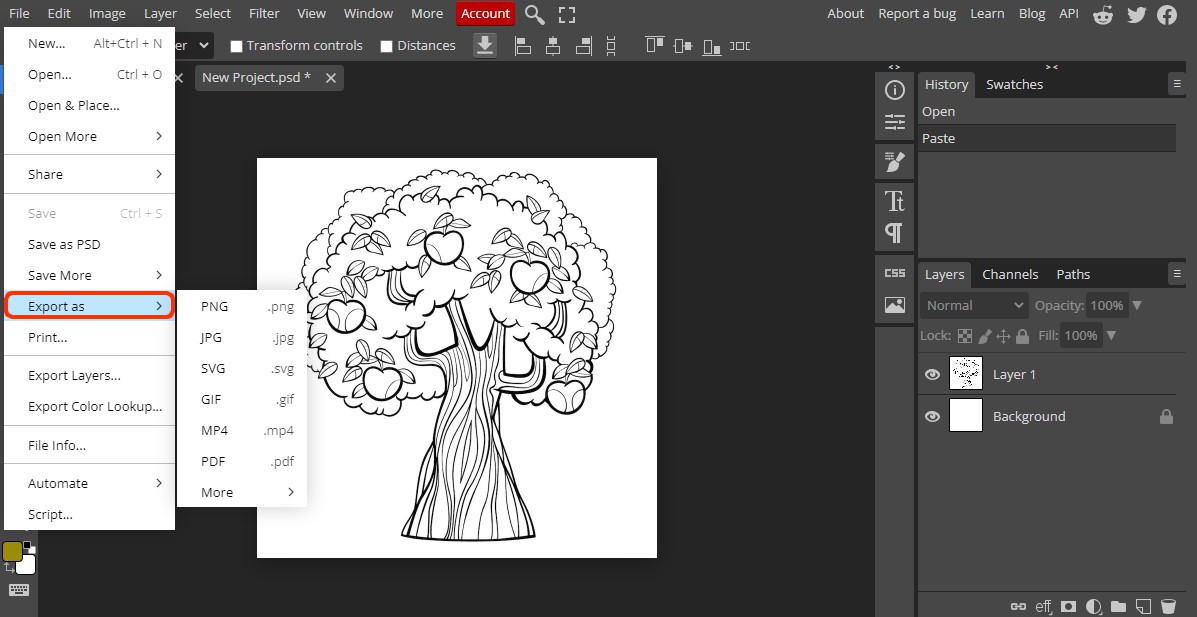
Once you have created your artwork, you can export it in various file formats using the "Export As" feature in Photopea. This allows you to save your artwork in a format that is suitable for its intended use.
To export your artwork, follow these steps:
- Click on "File" in the top left corner of the screen.
- Select "Export As" from the drop-down menu.
- A window will appear with various file formats to choose from.

4 - Choosing a File Format Based on the Purpose of Your Artwork
When exporting your artwork, it is important to choose a file format that is appropriate for its intended use. Different file formats have different strengths and weaknesses, such as file size, image quality, and compatibility with different devices and software.
To choose a file format for your artwork, consider the following:
- Web use: If you are exporting your artwork for use on the web, consider using a format that is optimized for the web, such as JPEG, PNG, or GIF. These formats offer a balance between file size and image quality.
- Printing: If you are exporting your artwork for printing, consider using a format that offers high resolution and color depth, such as TIFF or PDF. These formats ensure that your artwork will be printed with the highest quality.
- Sharing: If you are sharing your artwork with others, consider using a format that is widely supported, such as JPEG or PNG. These formats can be opened by most devices and software, making it easier to share your artwork with others.
5 - Adjusting File Format Settings as Needed
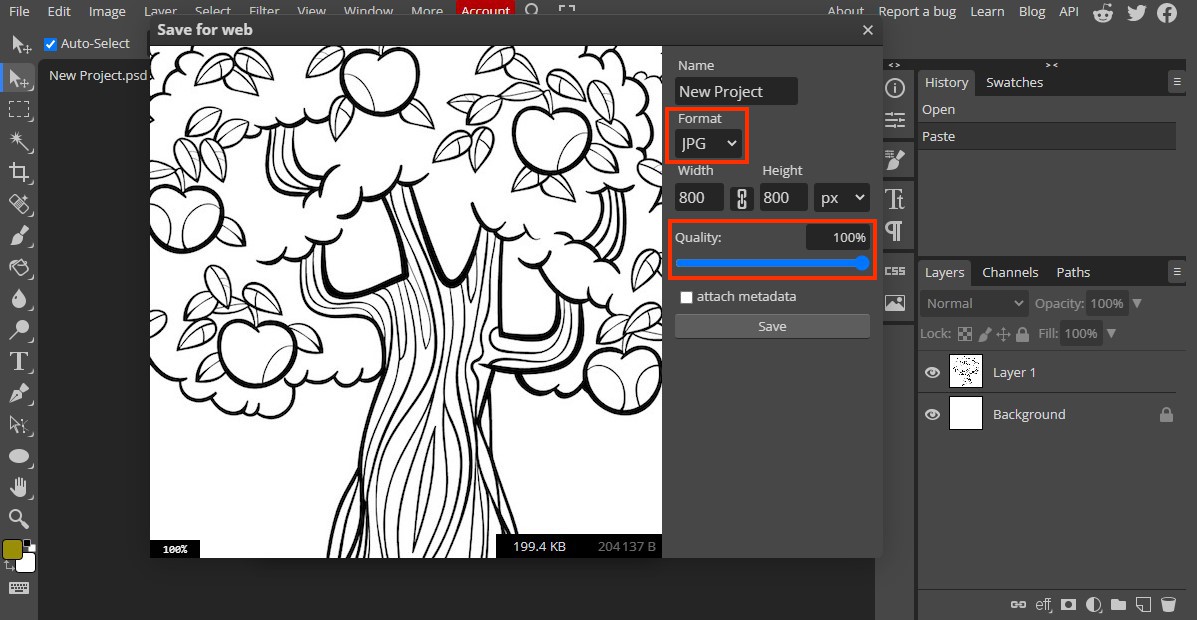
After choosing a file format for your artwork, you may need to adjust the settings to optimize the file for its intended use. Some file formats offer different settings that can affect image quality, file size, and other factors.
To adjust the settings of the chosen file format, follow these steps:
- Select the desired file format from the "Export As" window.
- Look for any settings or options that may be available for that format.
- Adjust the settings as needed to optimize the file for its intended use.
- Preview the changes to ensure that they meet your needs.
For example, when exporting a JPEG file, you may have the option to adjust the image quality level. Higher quality levels will result in larger file sizes, while lower quality levels may result in lower image quality.

This lesson is copyright of Coding Ireland. Unauthorised use, copying or distribution is not allowed.
