Today, we are going to learn about conduction.
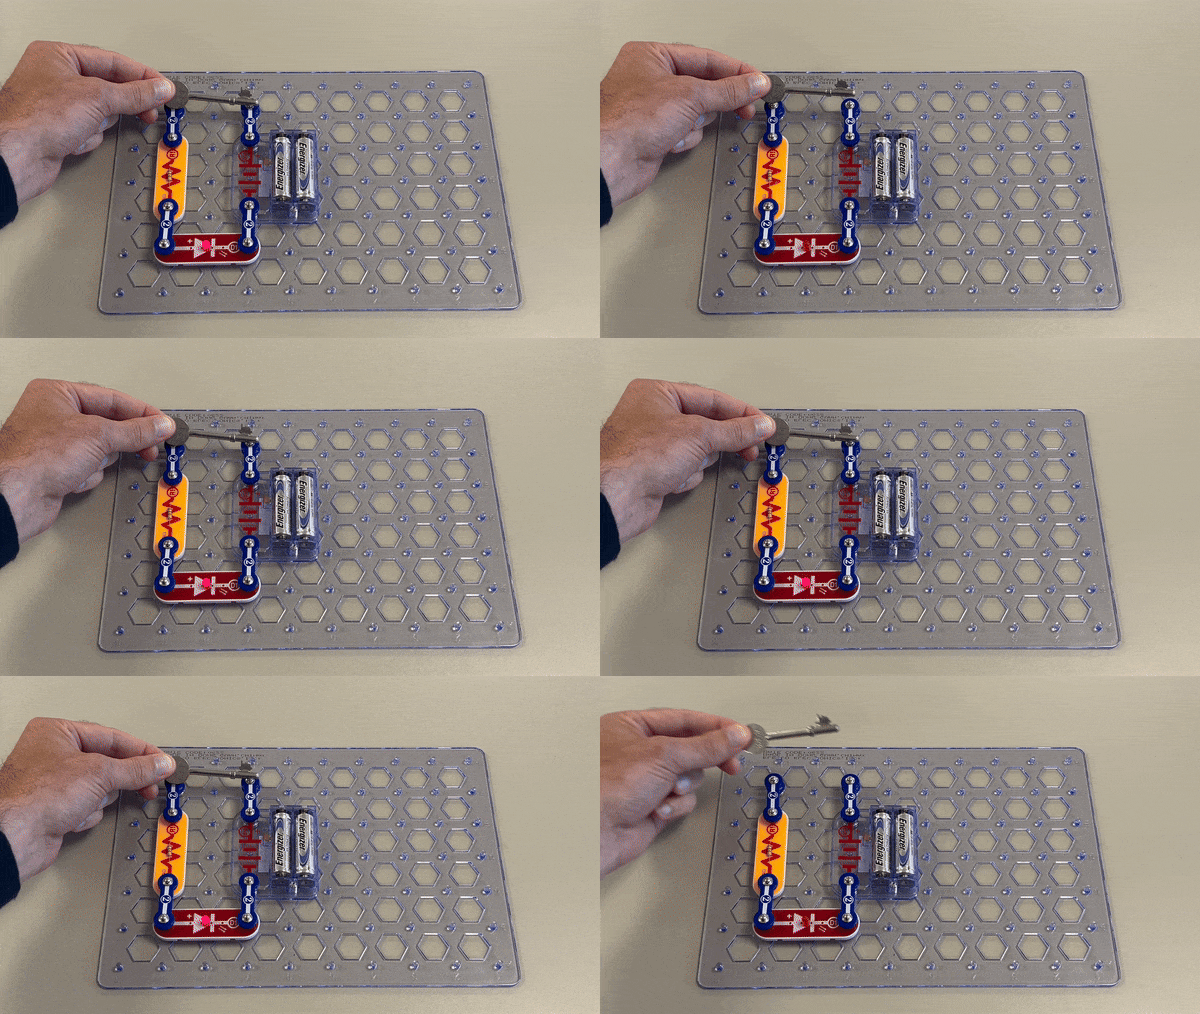
Explain to your students that today we will be making a circuit with the red LED light and then testing different objects and materials to see if they conduct electricity.
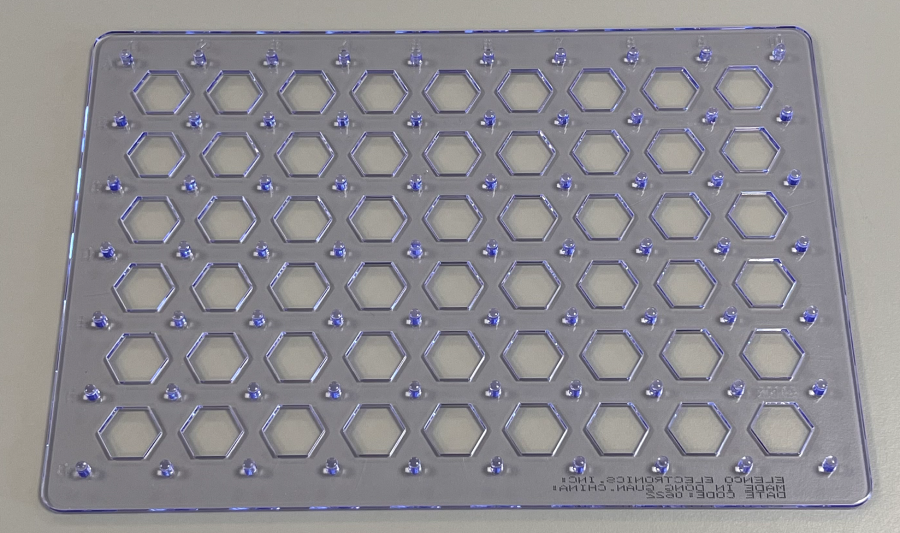
Instruct your students to place the base grid on a flat, stable surface. Make sure each group has enough space to work comfortably. This is an important step to ensure the stability of the snap circuits they will build.
At this stage, we need to ensure that the batteries are in the battery holder. If they are not already there, please insert them now. Each Snap Circuits set you are using will need its own set of batteries. So, if you are using multiple sets, make sure each one has its batteries properly inserted in the battery holder. This is crucial for the functioning of the circuits we will be building.
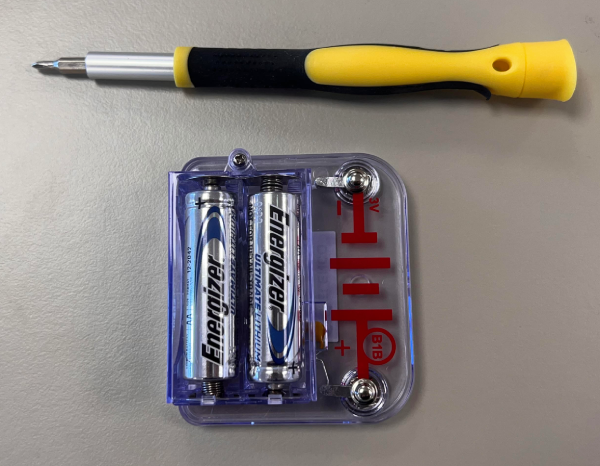
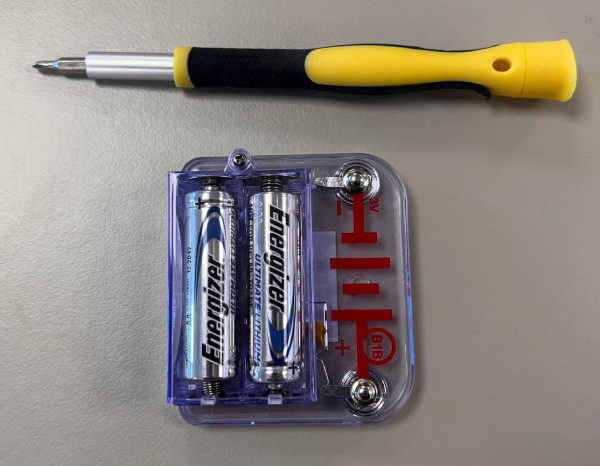
To power your Snap Circuits you will need to put two AA batteries into the battery holder. To do this you will need a small Phillips head screwdriver.
First, unscrew the battery holder (B1) using the screwdriver. Next, insert the two AA batteries into the holder, making sure to follow the direction (positive and negative) indicated inside the holder.
Once the batteries are properly placed, screw the battery holder back together. Remember, safety first! Always handle batteries and tools carefully.
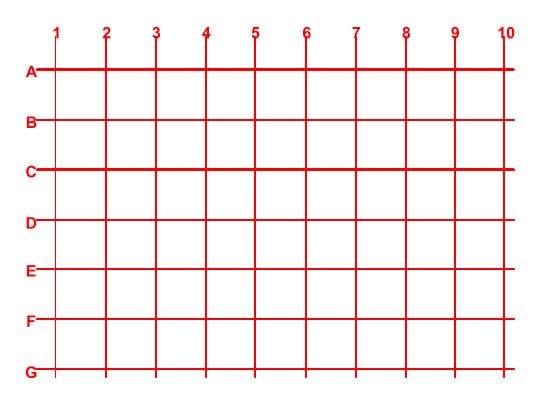
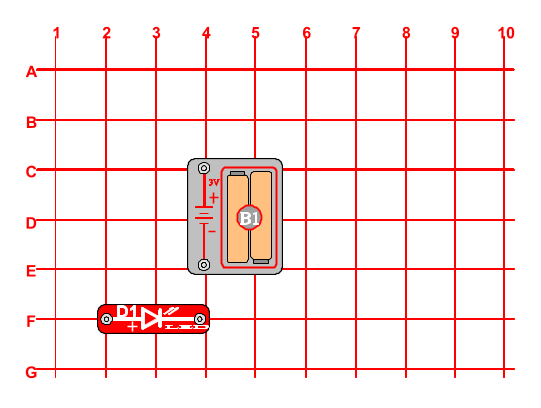
Now, let's place the battery holder on our base grid. Tell your students to find the spot marked as C4 on the grid, this is where we will place the battery holder (B1).
Once they have placed the battery holder correctly, they should press it gently to snap it into place.
Now, it's time to add the red LED light block (D1) to our circuit. Instruct your students to find the red LED light block (D1). This block should be placed on the grid (F2 to F4).
.png)
.png)
.png)