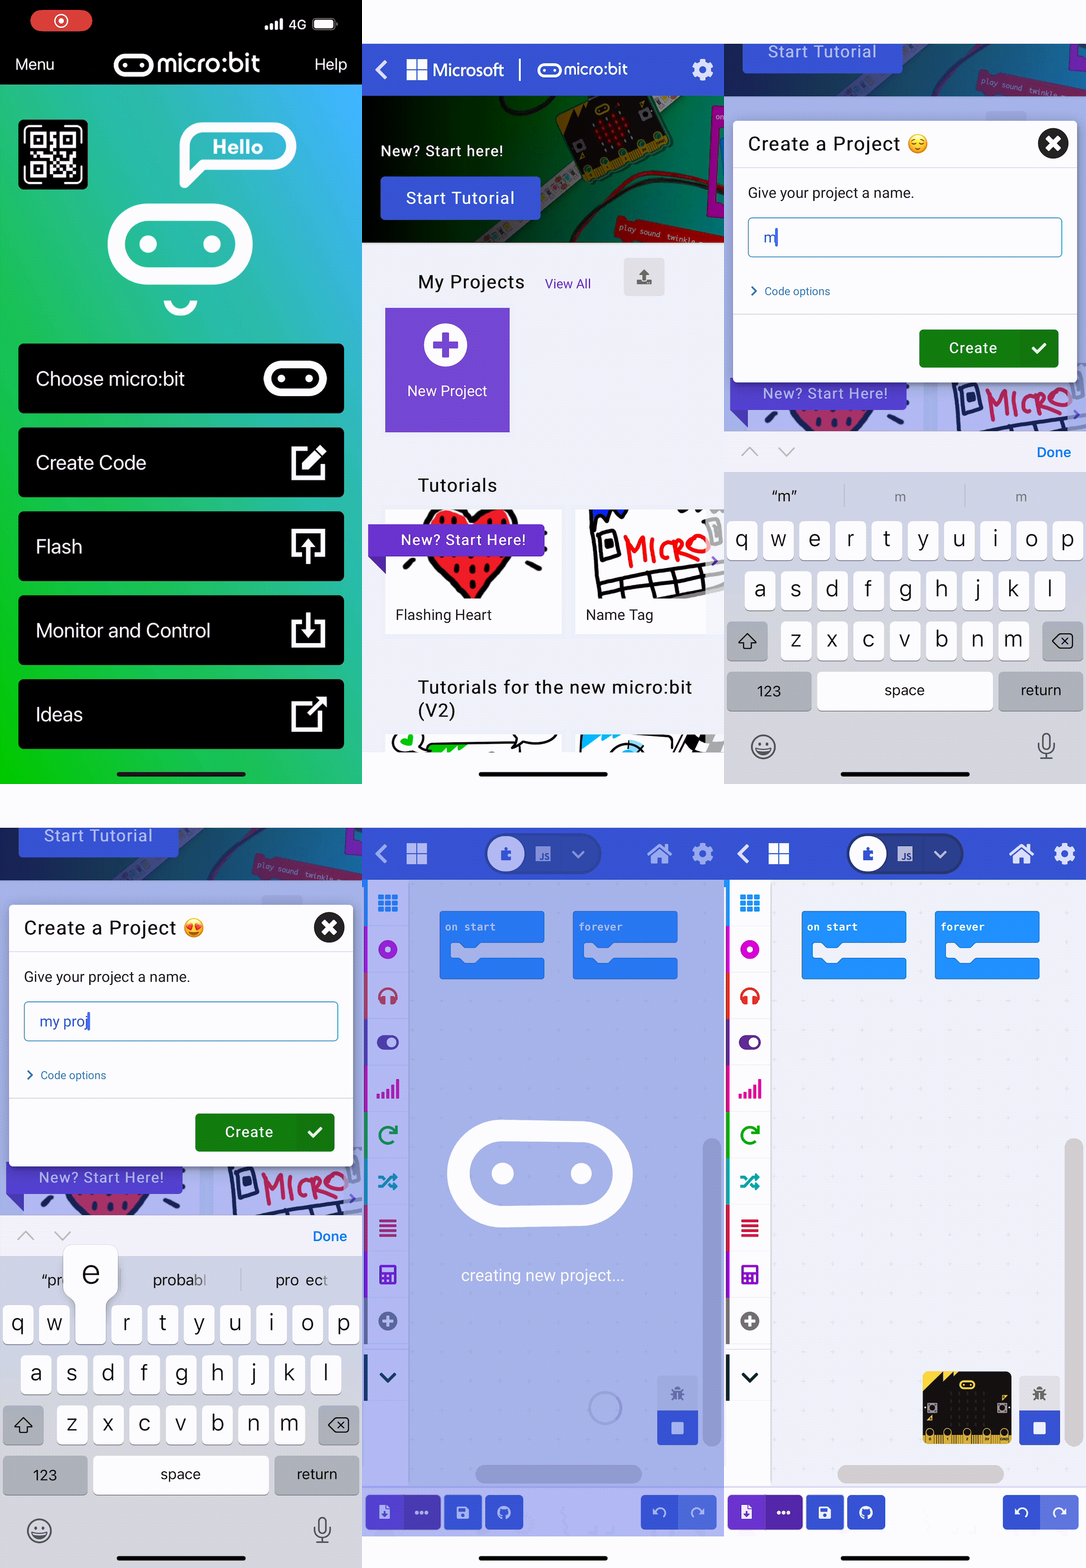
Start by creating a new project. Visit the Microbits MakeCode editor at the following link: https://makecode.microbit.org/. Click on 'New Project' and give it a name, such as 'Microbits Alarm System'.
Go to the Makecode.com Microbit website using the link below and click on the 'New Project' button underneath the 'My Projects' heading.
https://makecode.microbit.org/
Install the micro:bit app on your iPad or tablet.
Open the app, tap 'Create code' and then create a new project.

In this step, you will create two variables: 'soundThreshold' and 'lightThreshold'. These variables will hold the threshold values for sound and light. When the sound or light detected by the Microbits sensors exceeds these thresholds, your alarm system will be activated.
To setup these variables, you need to add the following code:
let soundThreshold = 128
let lightThreshold = 128
The values '128' are the initial threshold levels for sound and light. You can adjust these values based on your environment and how sensitive you want your alarm system to be.
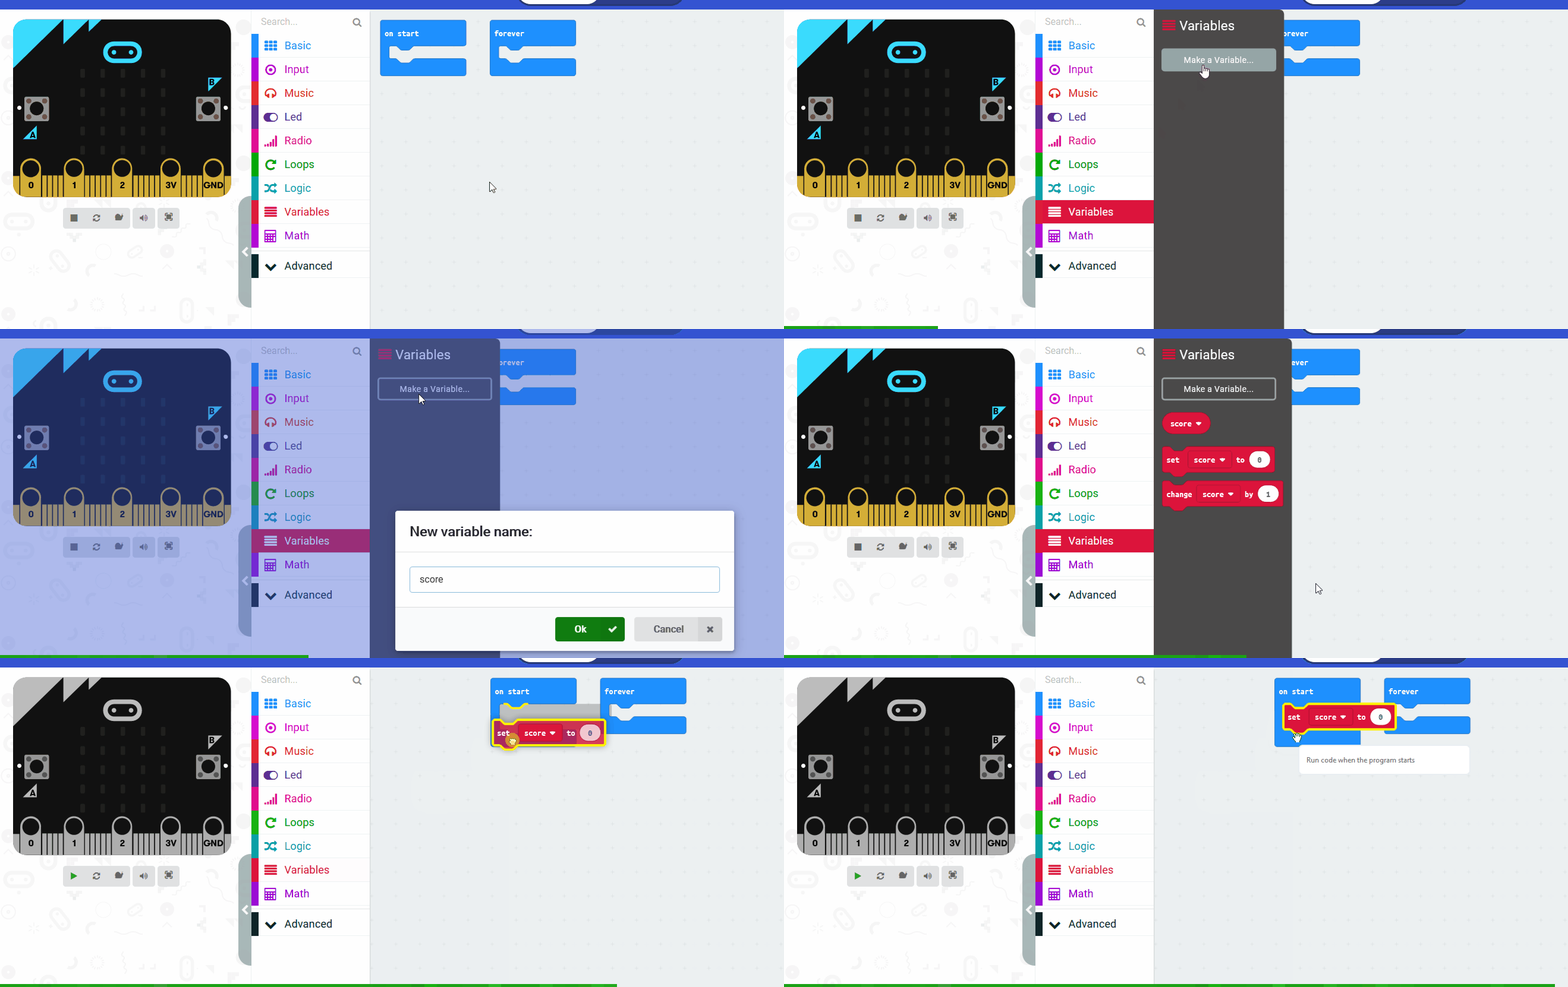
In the Variables toolbox, create a new variable by clicking the 'Make a Variable' button.
Once you click this button a box will appear asking what you want to call your variable. Give it a name that reminds you what you will be using it for. For example, if you wanted to keep track of your score in a game, you would create a variable called 'score'.
In this step, you will create a variable called 'armed' and set it to false at the start. This variable will be used to determine if the alarm system is active or not. When you press the A button on your Microbit, it will set this variable to true, indicating that the alarm system is armed and ready to detect movement or sound.
Start by declaring the 'armed' variable at the top of your code, outside any functions, and set its initial value to false:
let soundThreshold = 128
let lightThreshold = 128
let armed = false
Next, you'll create a function that will be triggered when the A button is pressed. Inside this function, you'll set the 'armed' variable to true. Add the following code:
input.onButtonPressed(Button.A, function () {
    armed = true
})
The 'input.onButtonPressed' function listens for the A button being pressed. When this happens, the code inside the function is executed, which in this case sets the 'armed' variable to true. Now, whenever you press the A button, your alarm system will be armed.
In this step, you will create a way to disarm the alarm. You'll do this by setting the 'armed' variable to false when the B button on the Microbit is pressed. This means that even if the sensors detect movement or sound, the alarm won't go off because it's not armed.
Add the following code:
input.onButtonPressed(Button.B, function () {
    armed = false
})
This code uses the 'input.onButtonPressed' function to check if the B button has been pressed. If it has, the function inside the brackets is run. This function sets the 'armed' variable to false, effectively disarming the alarm.
In programming, a function is a block of reusable code that performs a specific task. Functions provide better modularity for your application and a high degree of code reusing. In this step, we will define a function to sound and flash the alarm. This function will be called whenever the alarm is triggered.
Add the following code:
function soundAlarm () {
    music.play(music.builtinPlayableSoundEffect(soundExpression.soaring), music.PlaybackMode.UntilDone)
    basic.showIcon(IconNames.Skull)
}
This code defines a function named 'soundAlarm'. Inside this function, we use the 'music.startMelody' function to play an alarm melody and 'basic.showIcon' function to display a skull icon on the Microbits LED display whenever the function is called.
Functions are useful if you have some code/instructions that you want to use again and again.
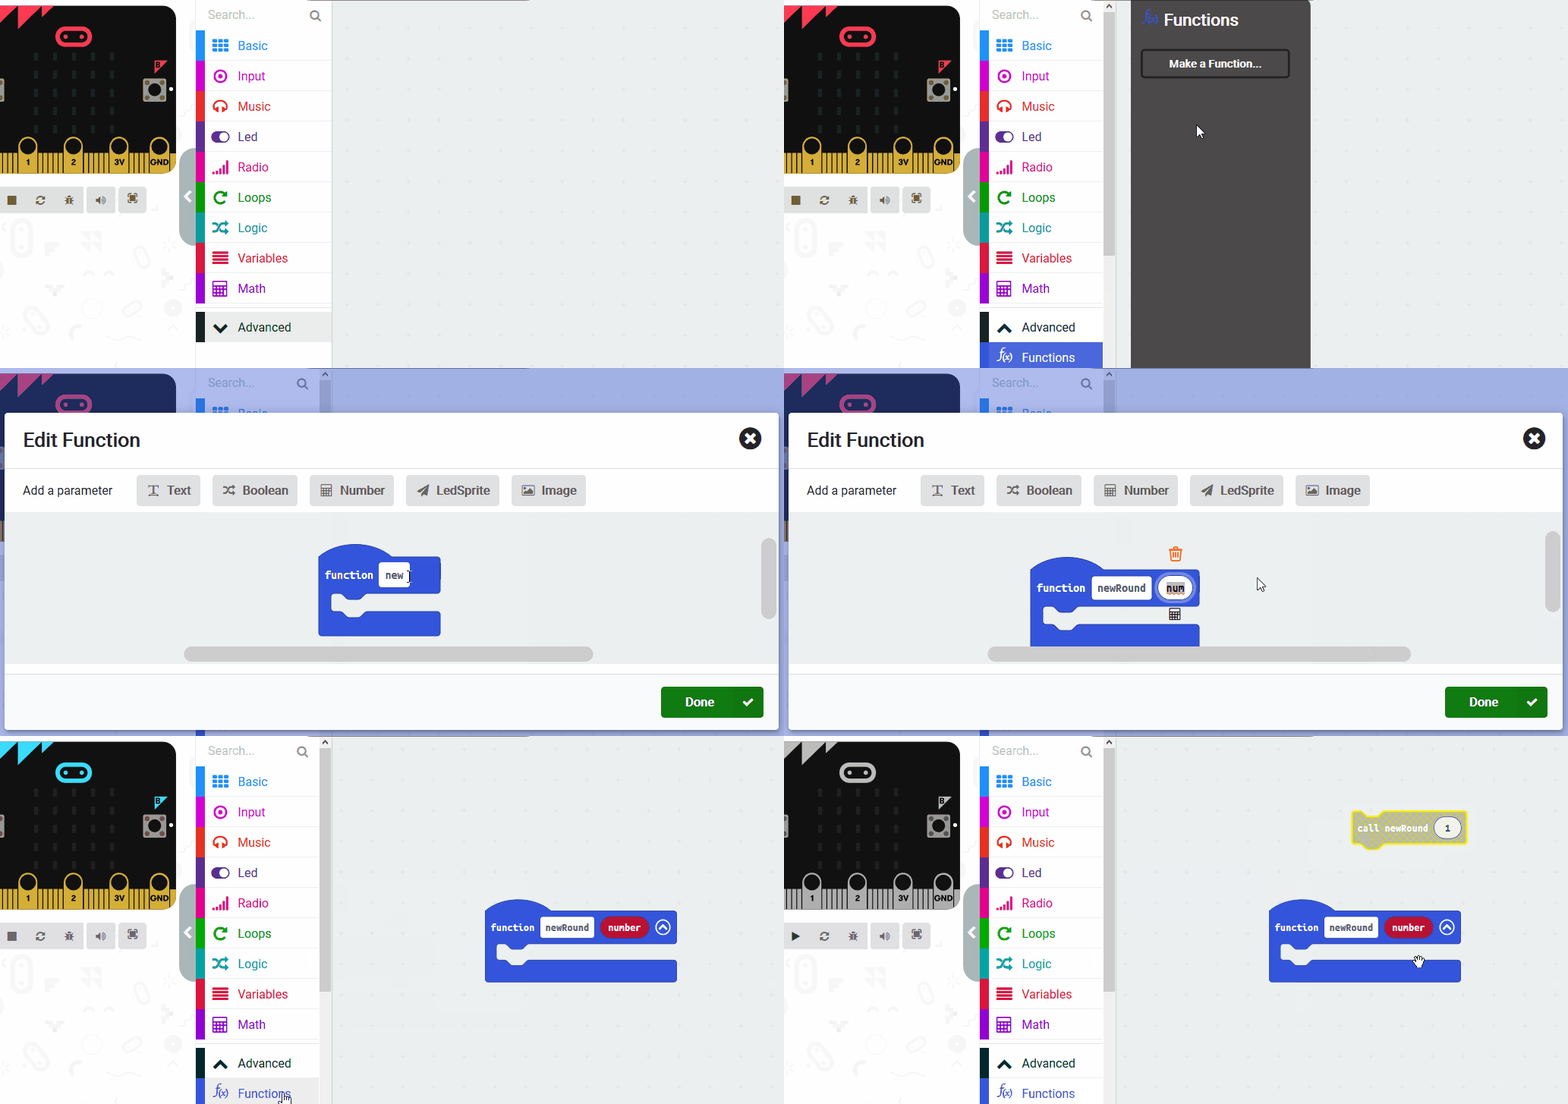
To create a function go to the Advanced > Functions toolbox and click 'Make a Function'.
Give your function a name that makes sense and choose whether to pass anything into the function. In this example we will pass in a number.

