Today, we're hitting the court to program a flawless basketball dribble. Your mission is to take Scratch the Cat and a basketball and make them move just like a professional player!
To do this, we'll be tackling two important coding challenges:
Creating the Bounce: You'll use a precise sequence of blocks to make the ball move up and down, simulating a real bounce.
Parallel Coding: You'll learn how to write two separate programs—one for the bouncing and one for the forward movement—that run simultaneously, making the dribble look perfectly smooth.
Get ready to sync your sequence and code the game-winning shot!
Begin the lesson by starting a discussion about different ways a ball moves. This grounds the coding activity in a real-world context.
Ask your students to think about balls they play with and prompt them with questions like:
"What happens when you throw a ball up in the air?"
"How does it move when you dribble it on the ground?"
"Does a ball move the same way on grass as it does on a hard floor?"
Guide the conversation to focus specifically on the action of bouncing. Emphasise that a ball always goes up and then comes down, and today, they’ll be programming a basketball in Scratch Jr. to bounce exactly like it would on a real court!
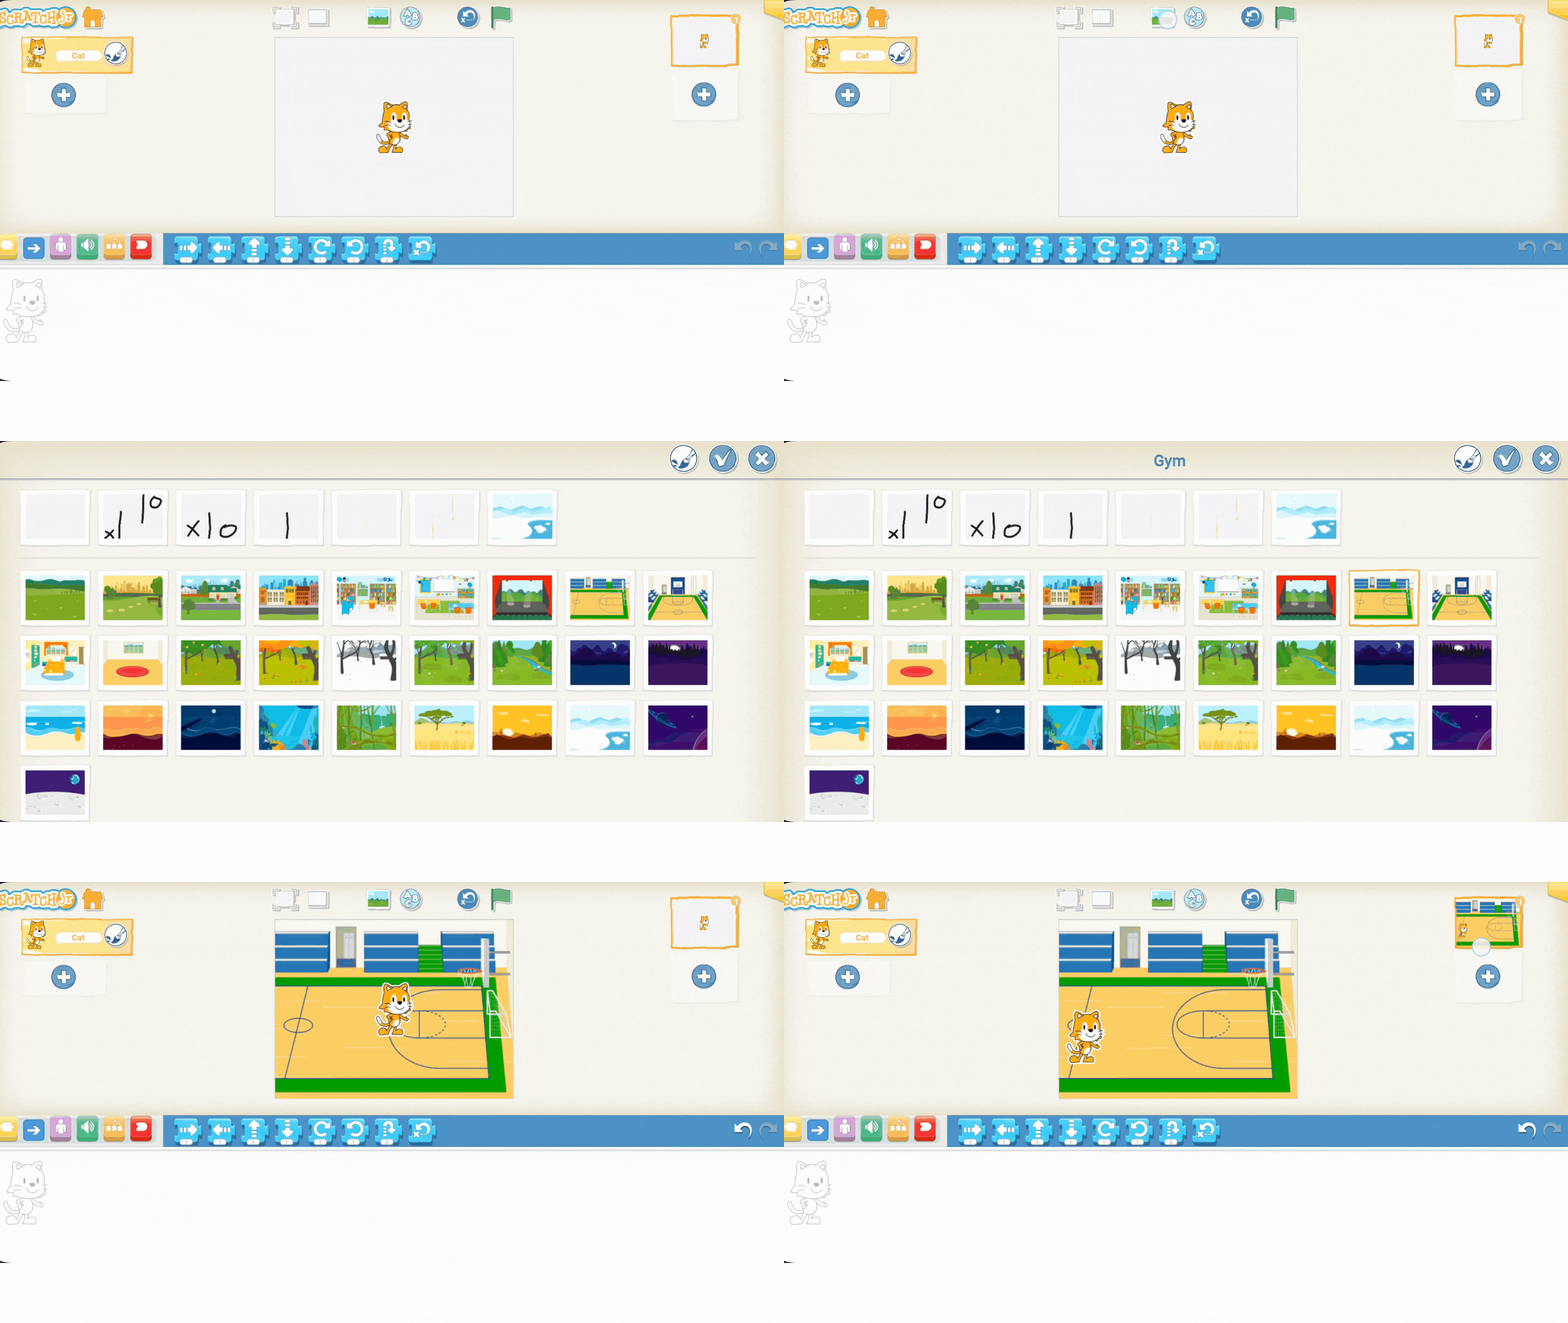
Now that you've discussed how a ball bounces, it's time to set up the scene in Scratch Jr. for the dribbling project.
Instruct the students to choose the perfect court for their basketball action:
Tap on the background icon (the small landscape picture) above the stage area.
Browse through the options and choose the basketball court background. This sets the stage for the action.
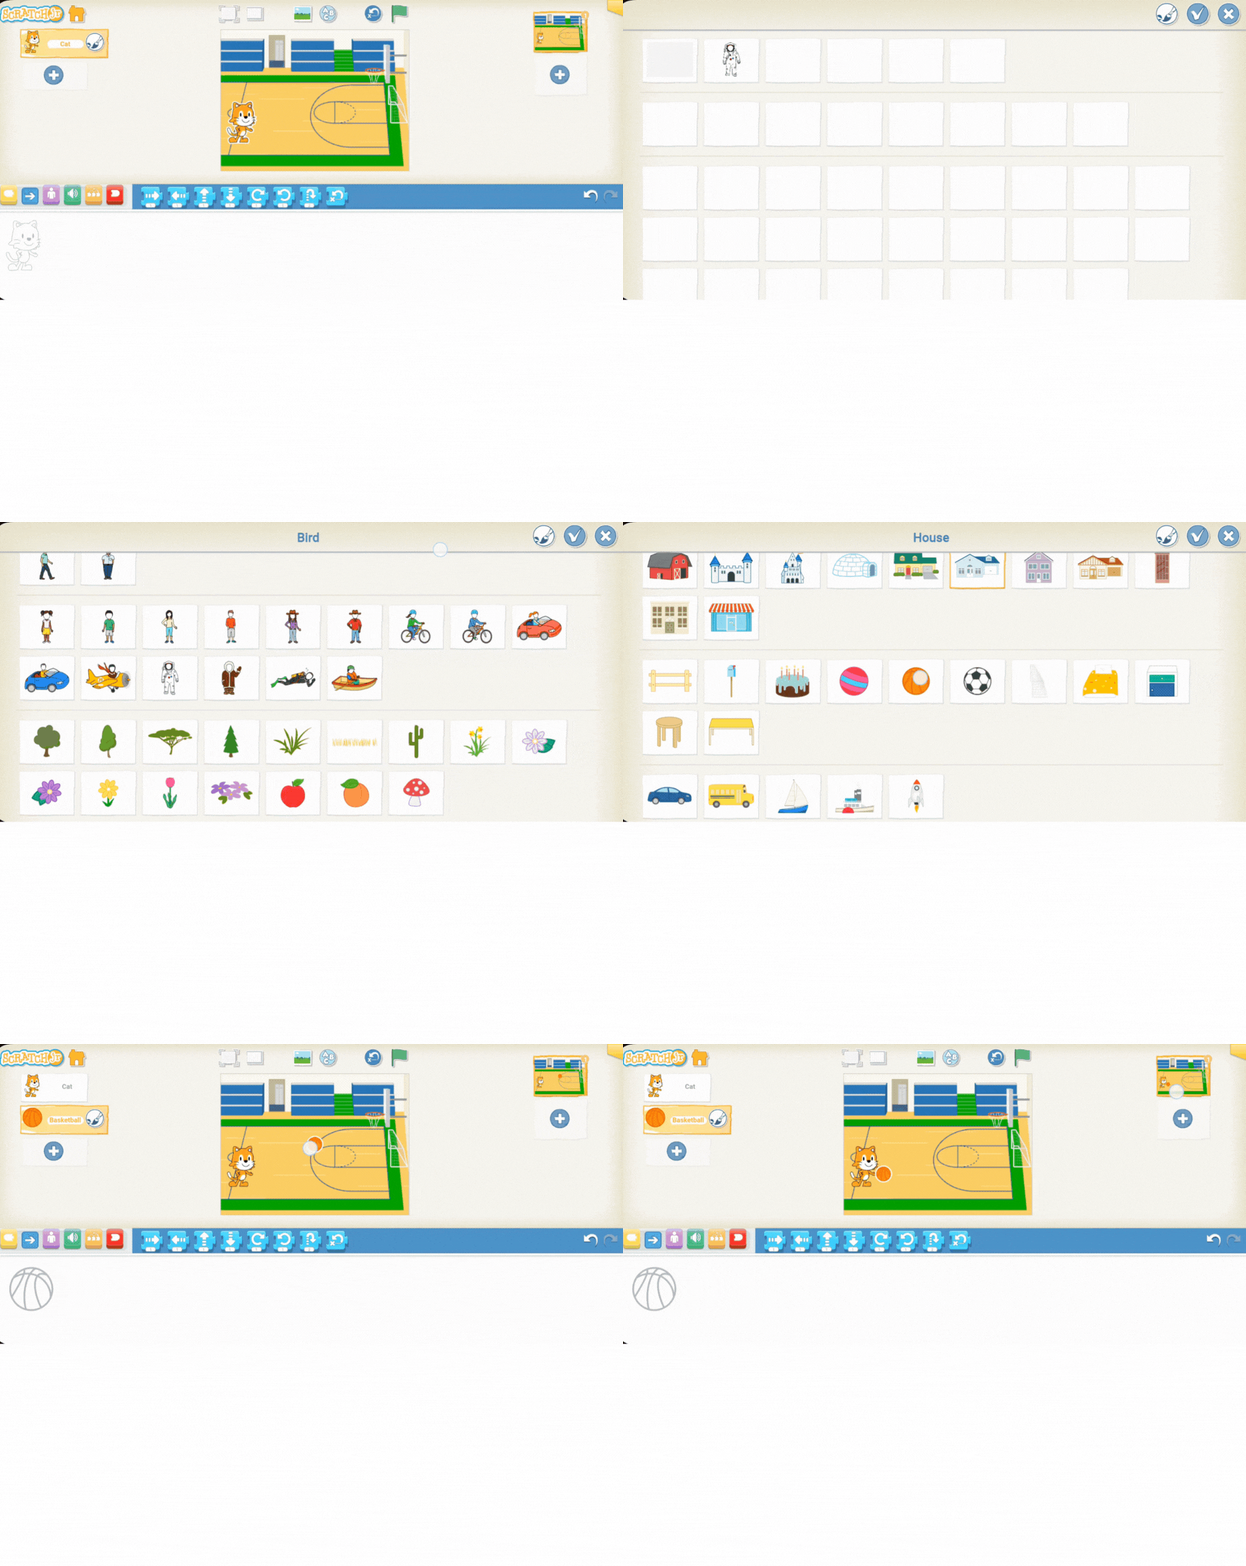
Guide the students to add the two main characters:
Add the Basketball: Tap the plus icon (+) in the character area. Select the basketball sprite from the library. Make sure it is placed near the starting point.
Add Scratch the Cat: Have the students also add Scratch the Cat (or any other character they like) to the scene. They should place the character right next to the basketball, as if ready to start dribbling.
The scene is now perfectly set for them to begin coding!
Now that the court is set, it's time to program the physics! Demonstrate how to use the blue Motion blocks to create the bouncing motion, which is a key sequence in this project.
The goal is to teach the students that a bounce requires two opposite instructions: up and down.
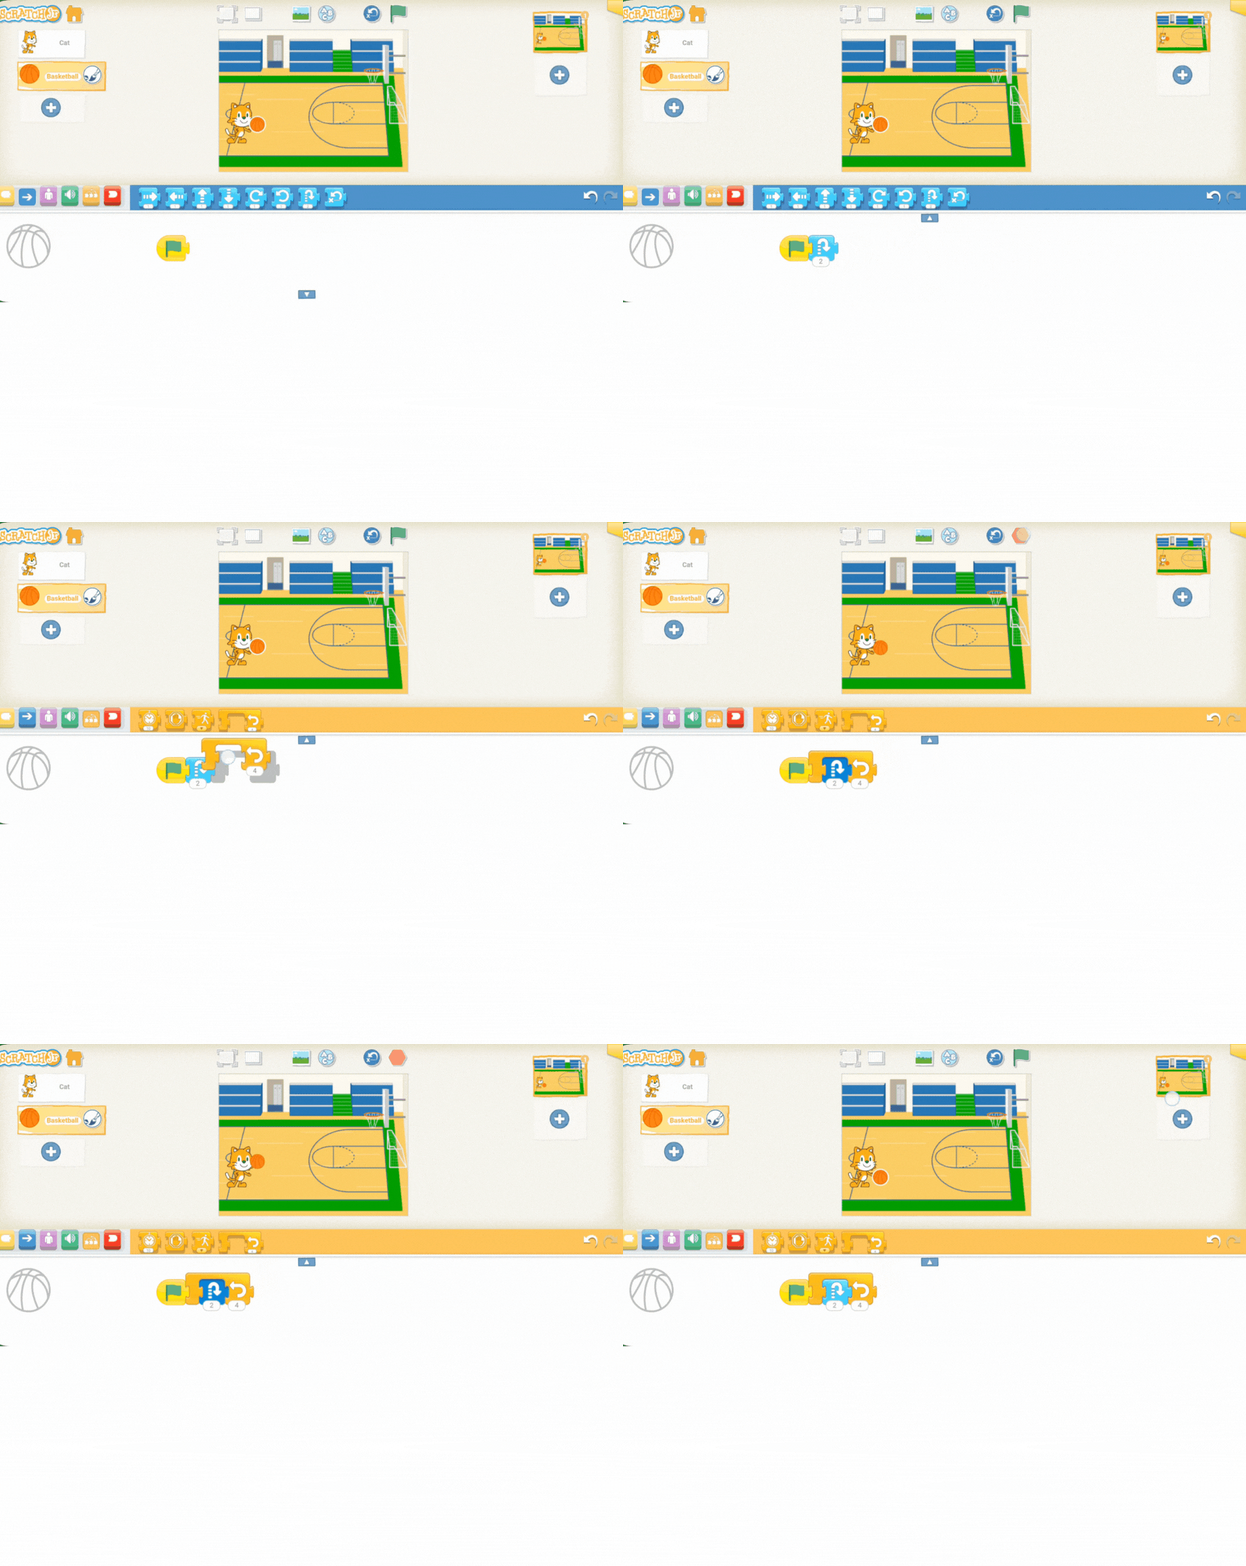
Start the Code: Remind the students that all programs start with the green flag block (the yellow start block).
Move Up: Drag a "move up" block onto the coding area and snap it after the green flag. You can set the number of steps to 1 or 2 for a slight bounce.
Move Down: Immediately snap a "move down" block after the "move up" block, using the same number of steps. This completes one full bounce cycle.
Test the Sequence: Have the students click the green flag to watch the basketball bounce once.
Emphasise that the order—up then down—is critical. If the instructions are reversed, the ball will start by moving into the ground, showing a mistake in the algorithm. This is a great opportunity to reinforce the importance of sequencing!
Now, let's make the basketball move across the court while it bounces! This introduces the important coding concept of parallel execution.
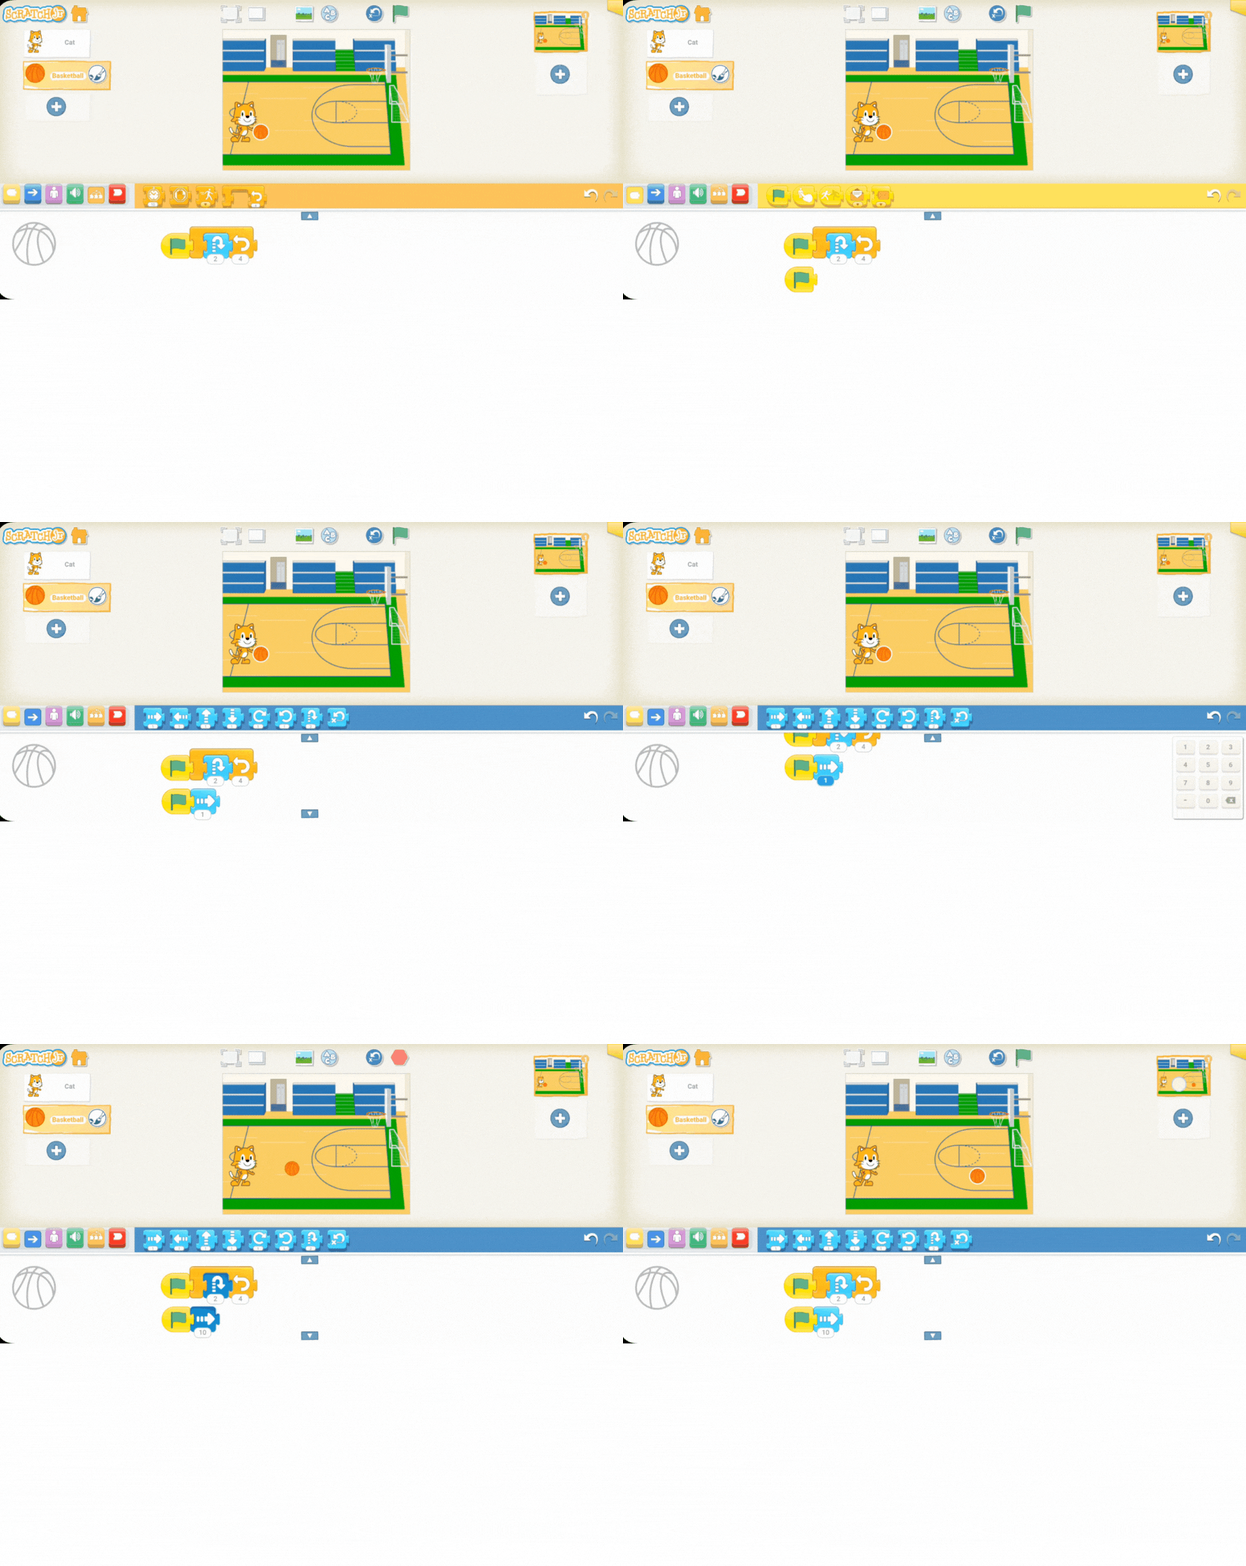
First, guide the students to add a "move forward" block (blue right arrow) to the code area.
Explain that if they simply attach the move forward block after the bounce sequence, the ball will bounce once, and then move forward. That's not dribbling!
Explain that to make the basketball bounce at the same time as it moves forward, they need to create two separate sequences—this is called parallel coding.
Set Up the Sequences: Have the students drag a second green flag block onto the coding area.
Assign the Actions:
Sequence 1 (The Bounce): Keep the Up/Down blocks attached to the first green flag.
Sequence 2 (The Travel): Attach the "move forward" block to the second green flag.
Test: Instruct the students to click the green flag button. Since both sequences start with a green flag, the ball will now start bouncing and moving forward at the exact same time!
Emphasise that parallel coding allows a character to do two or more different actions simultaneously, making the animation much more lifelike.


