Scratch Jr
Beginner
30 mins
Teacher/Student led
120 points
What you need:

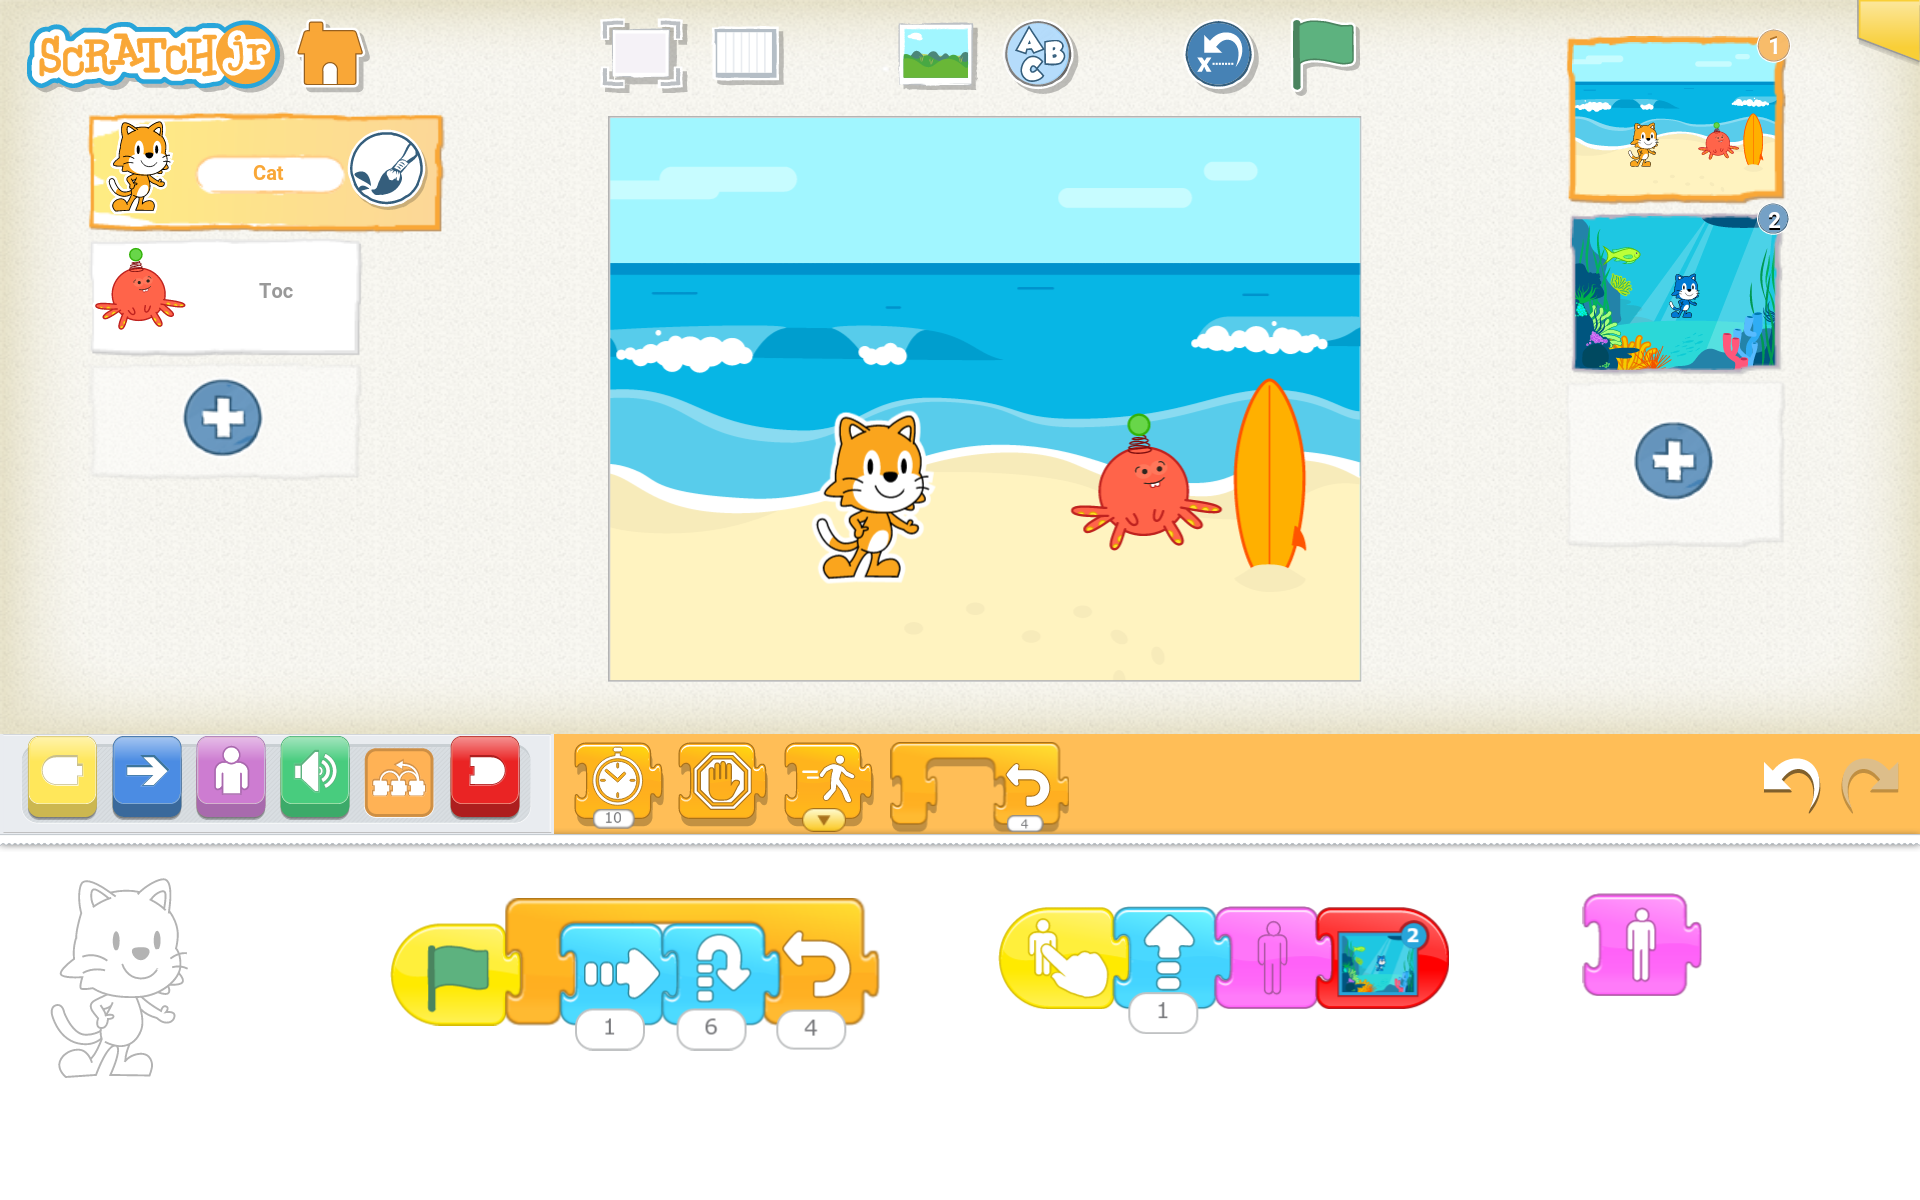
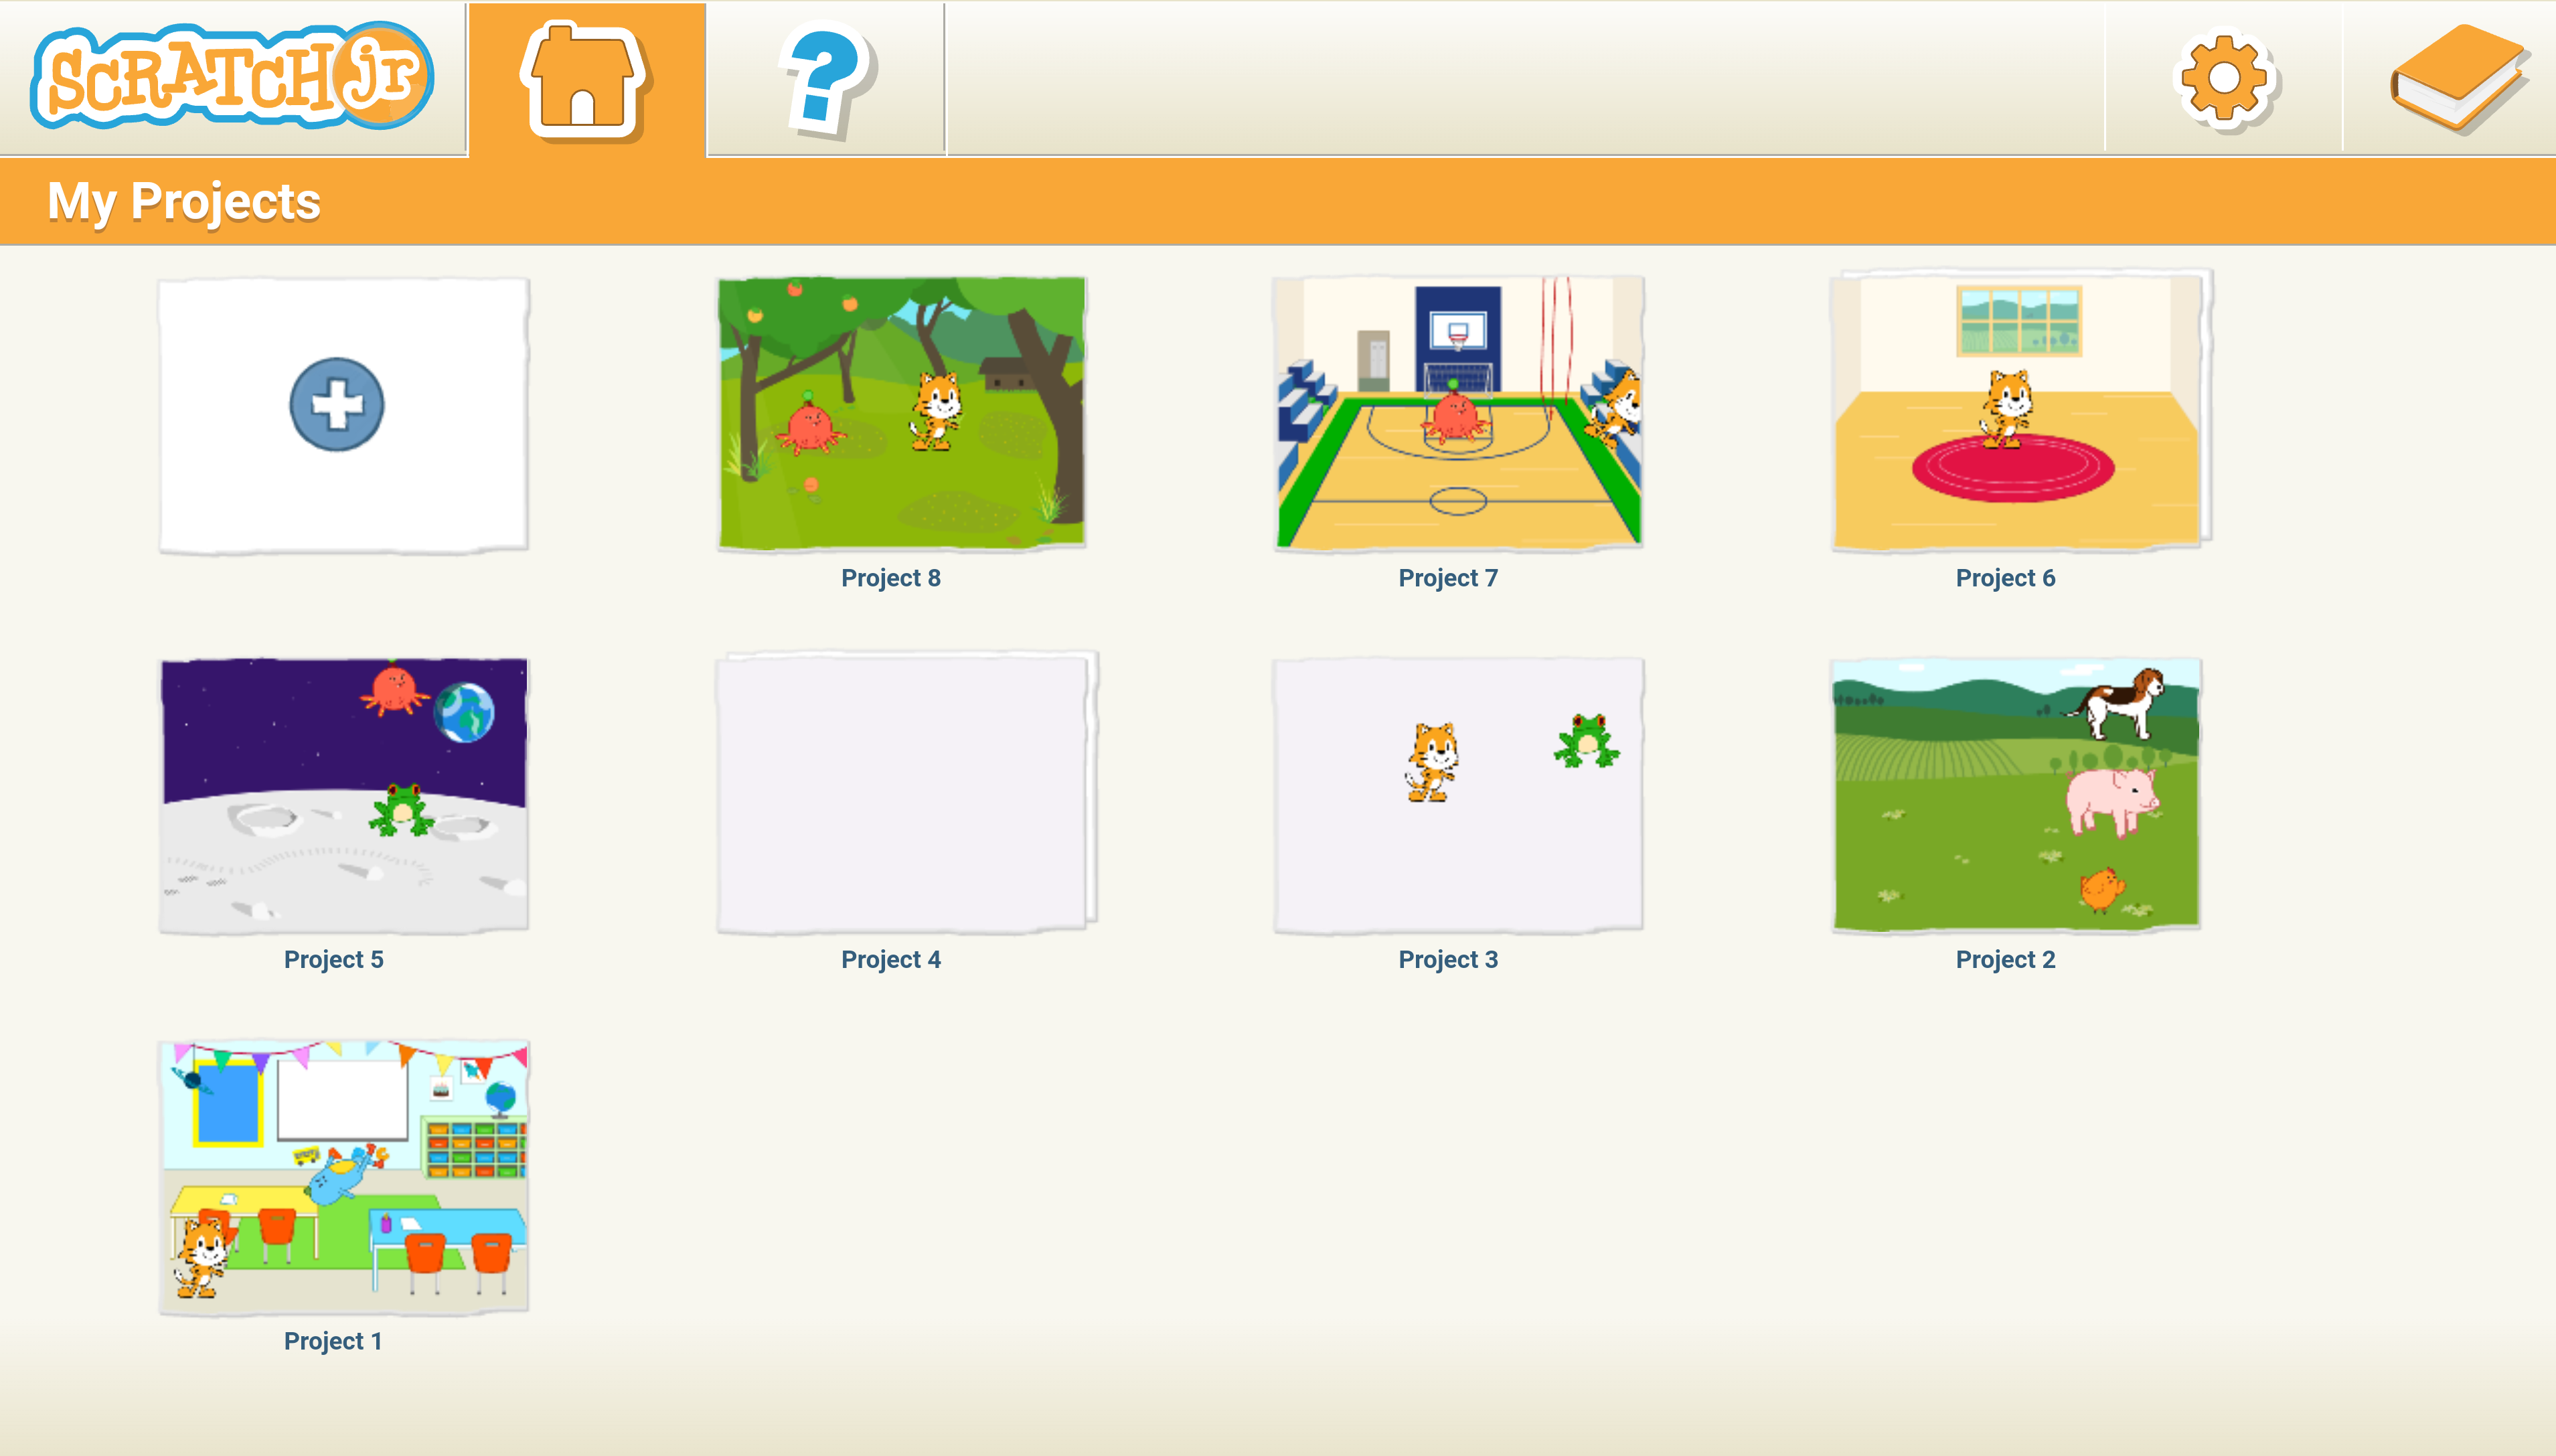
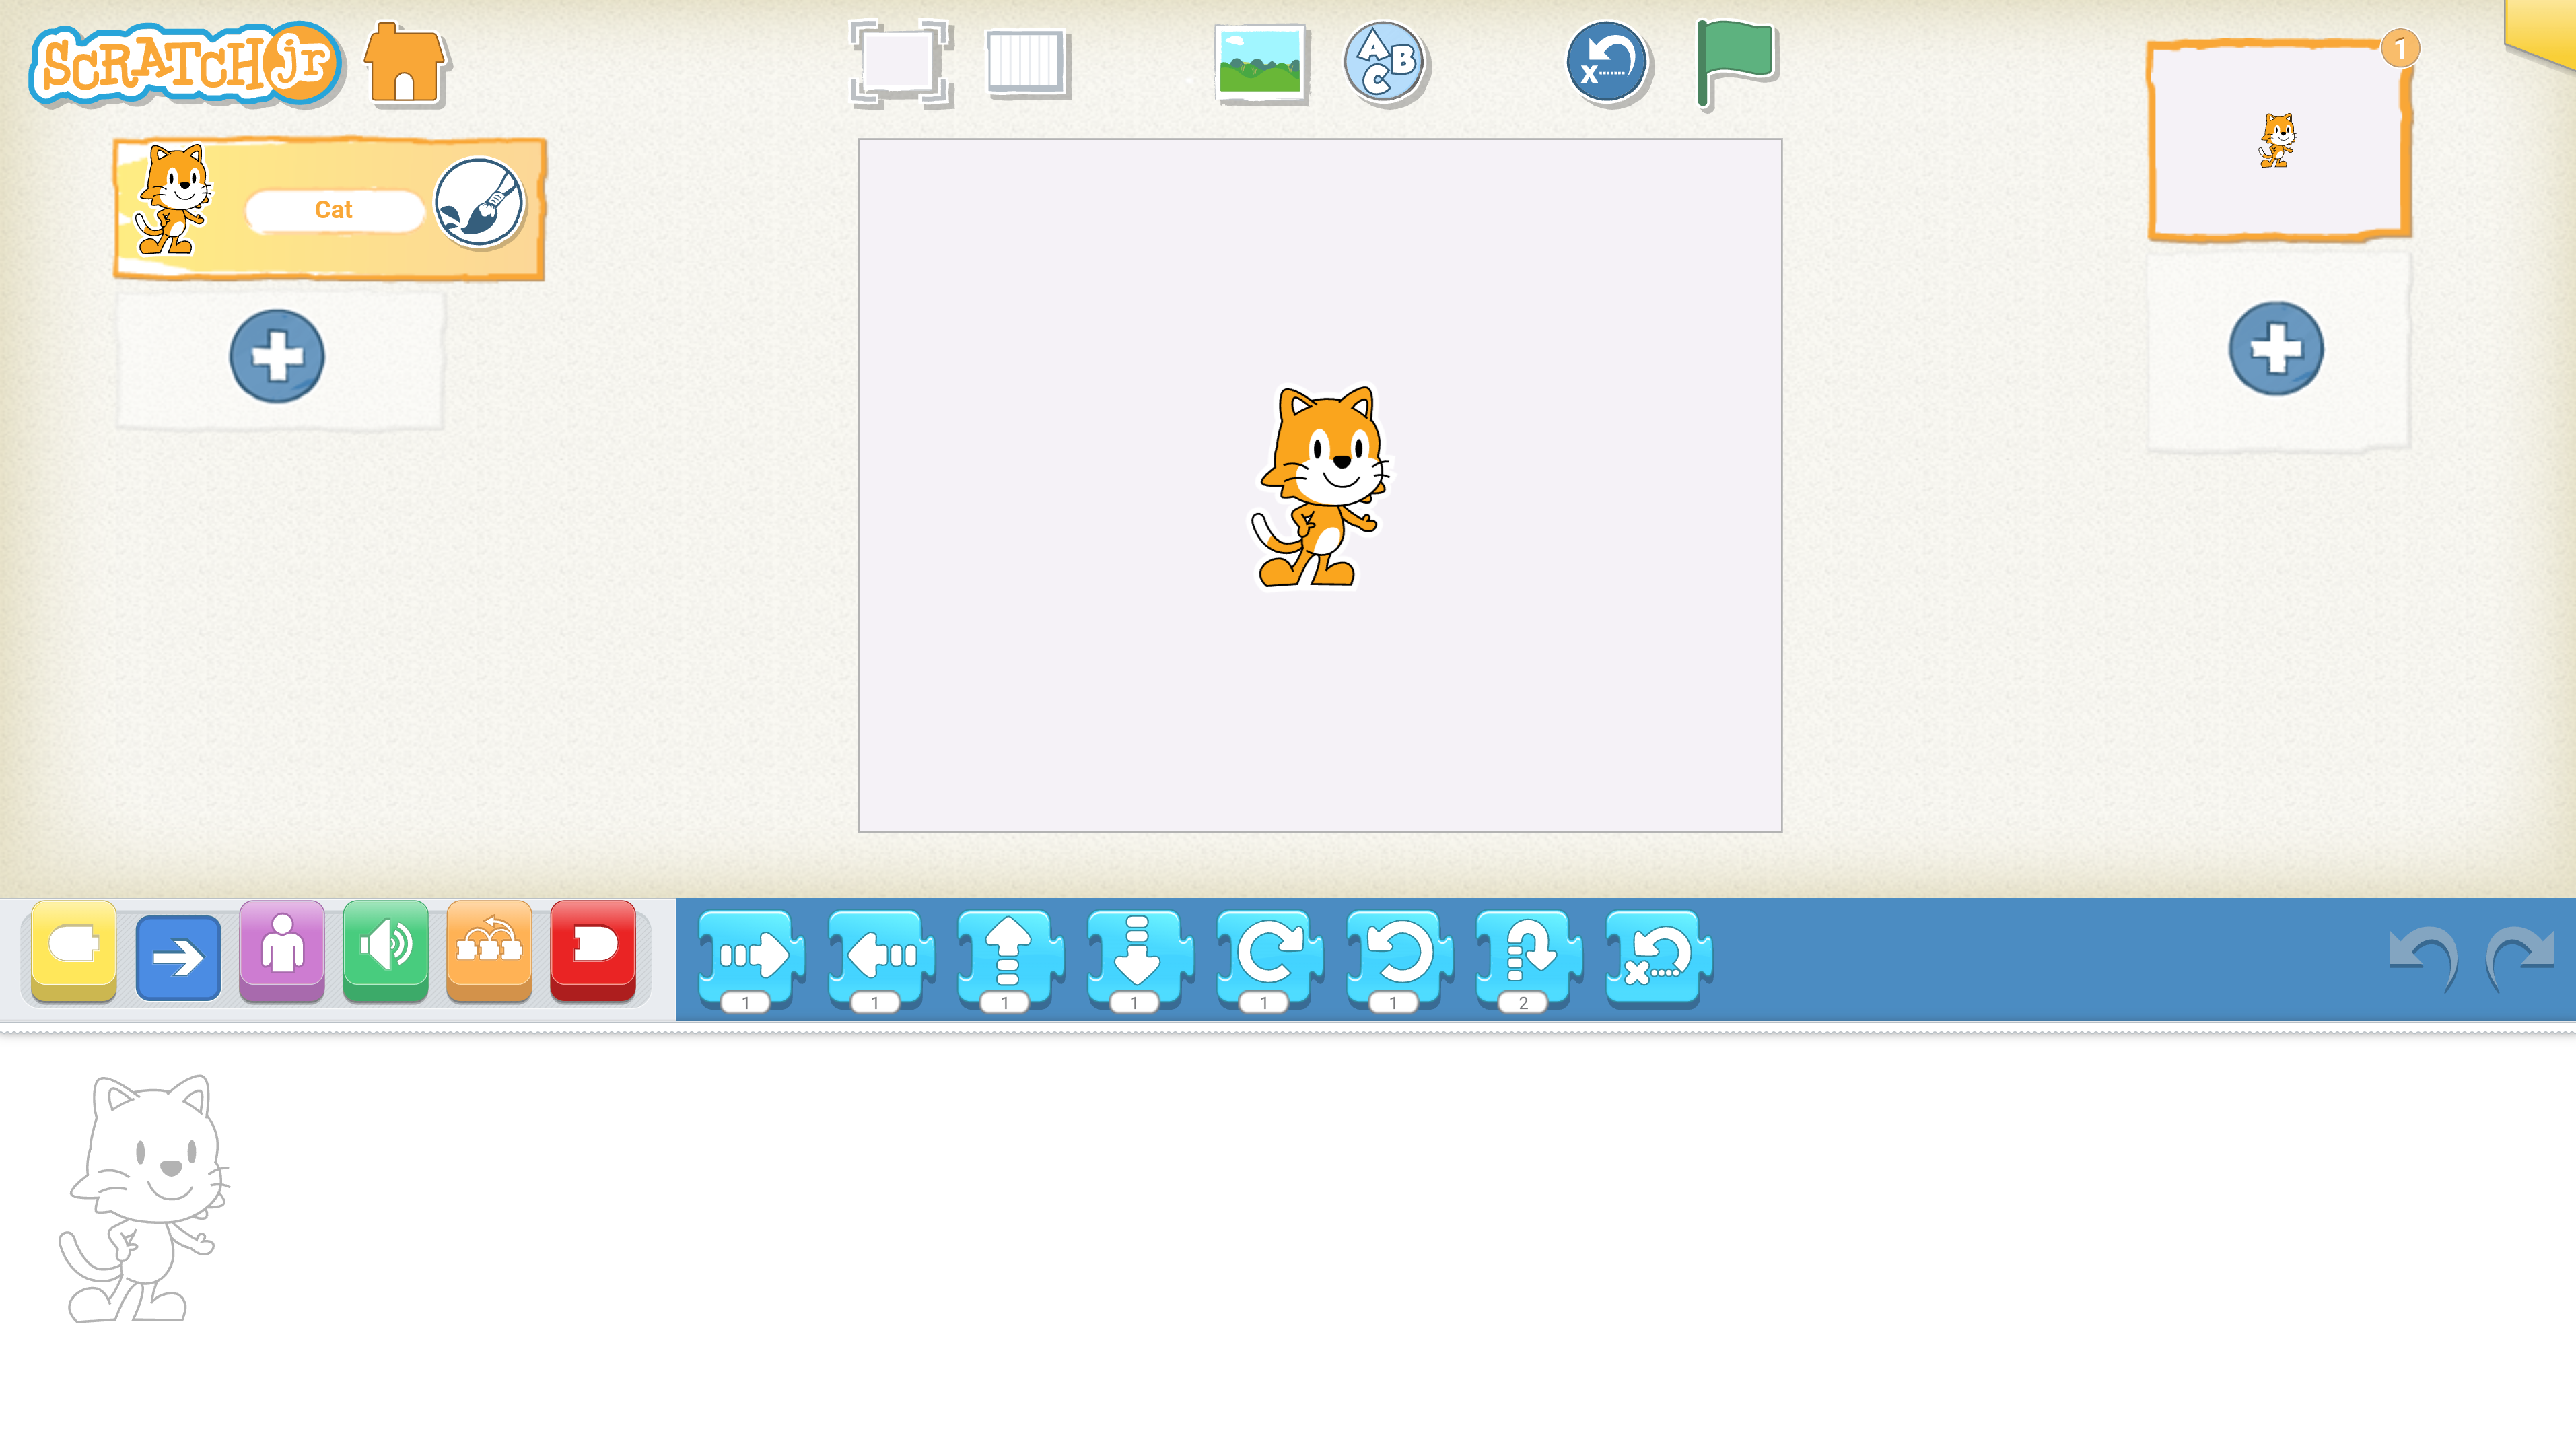
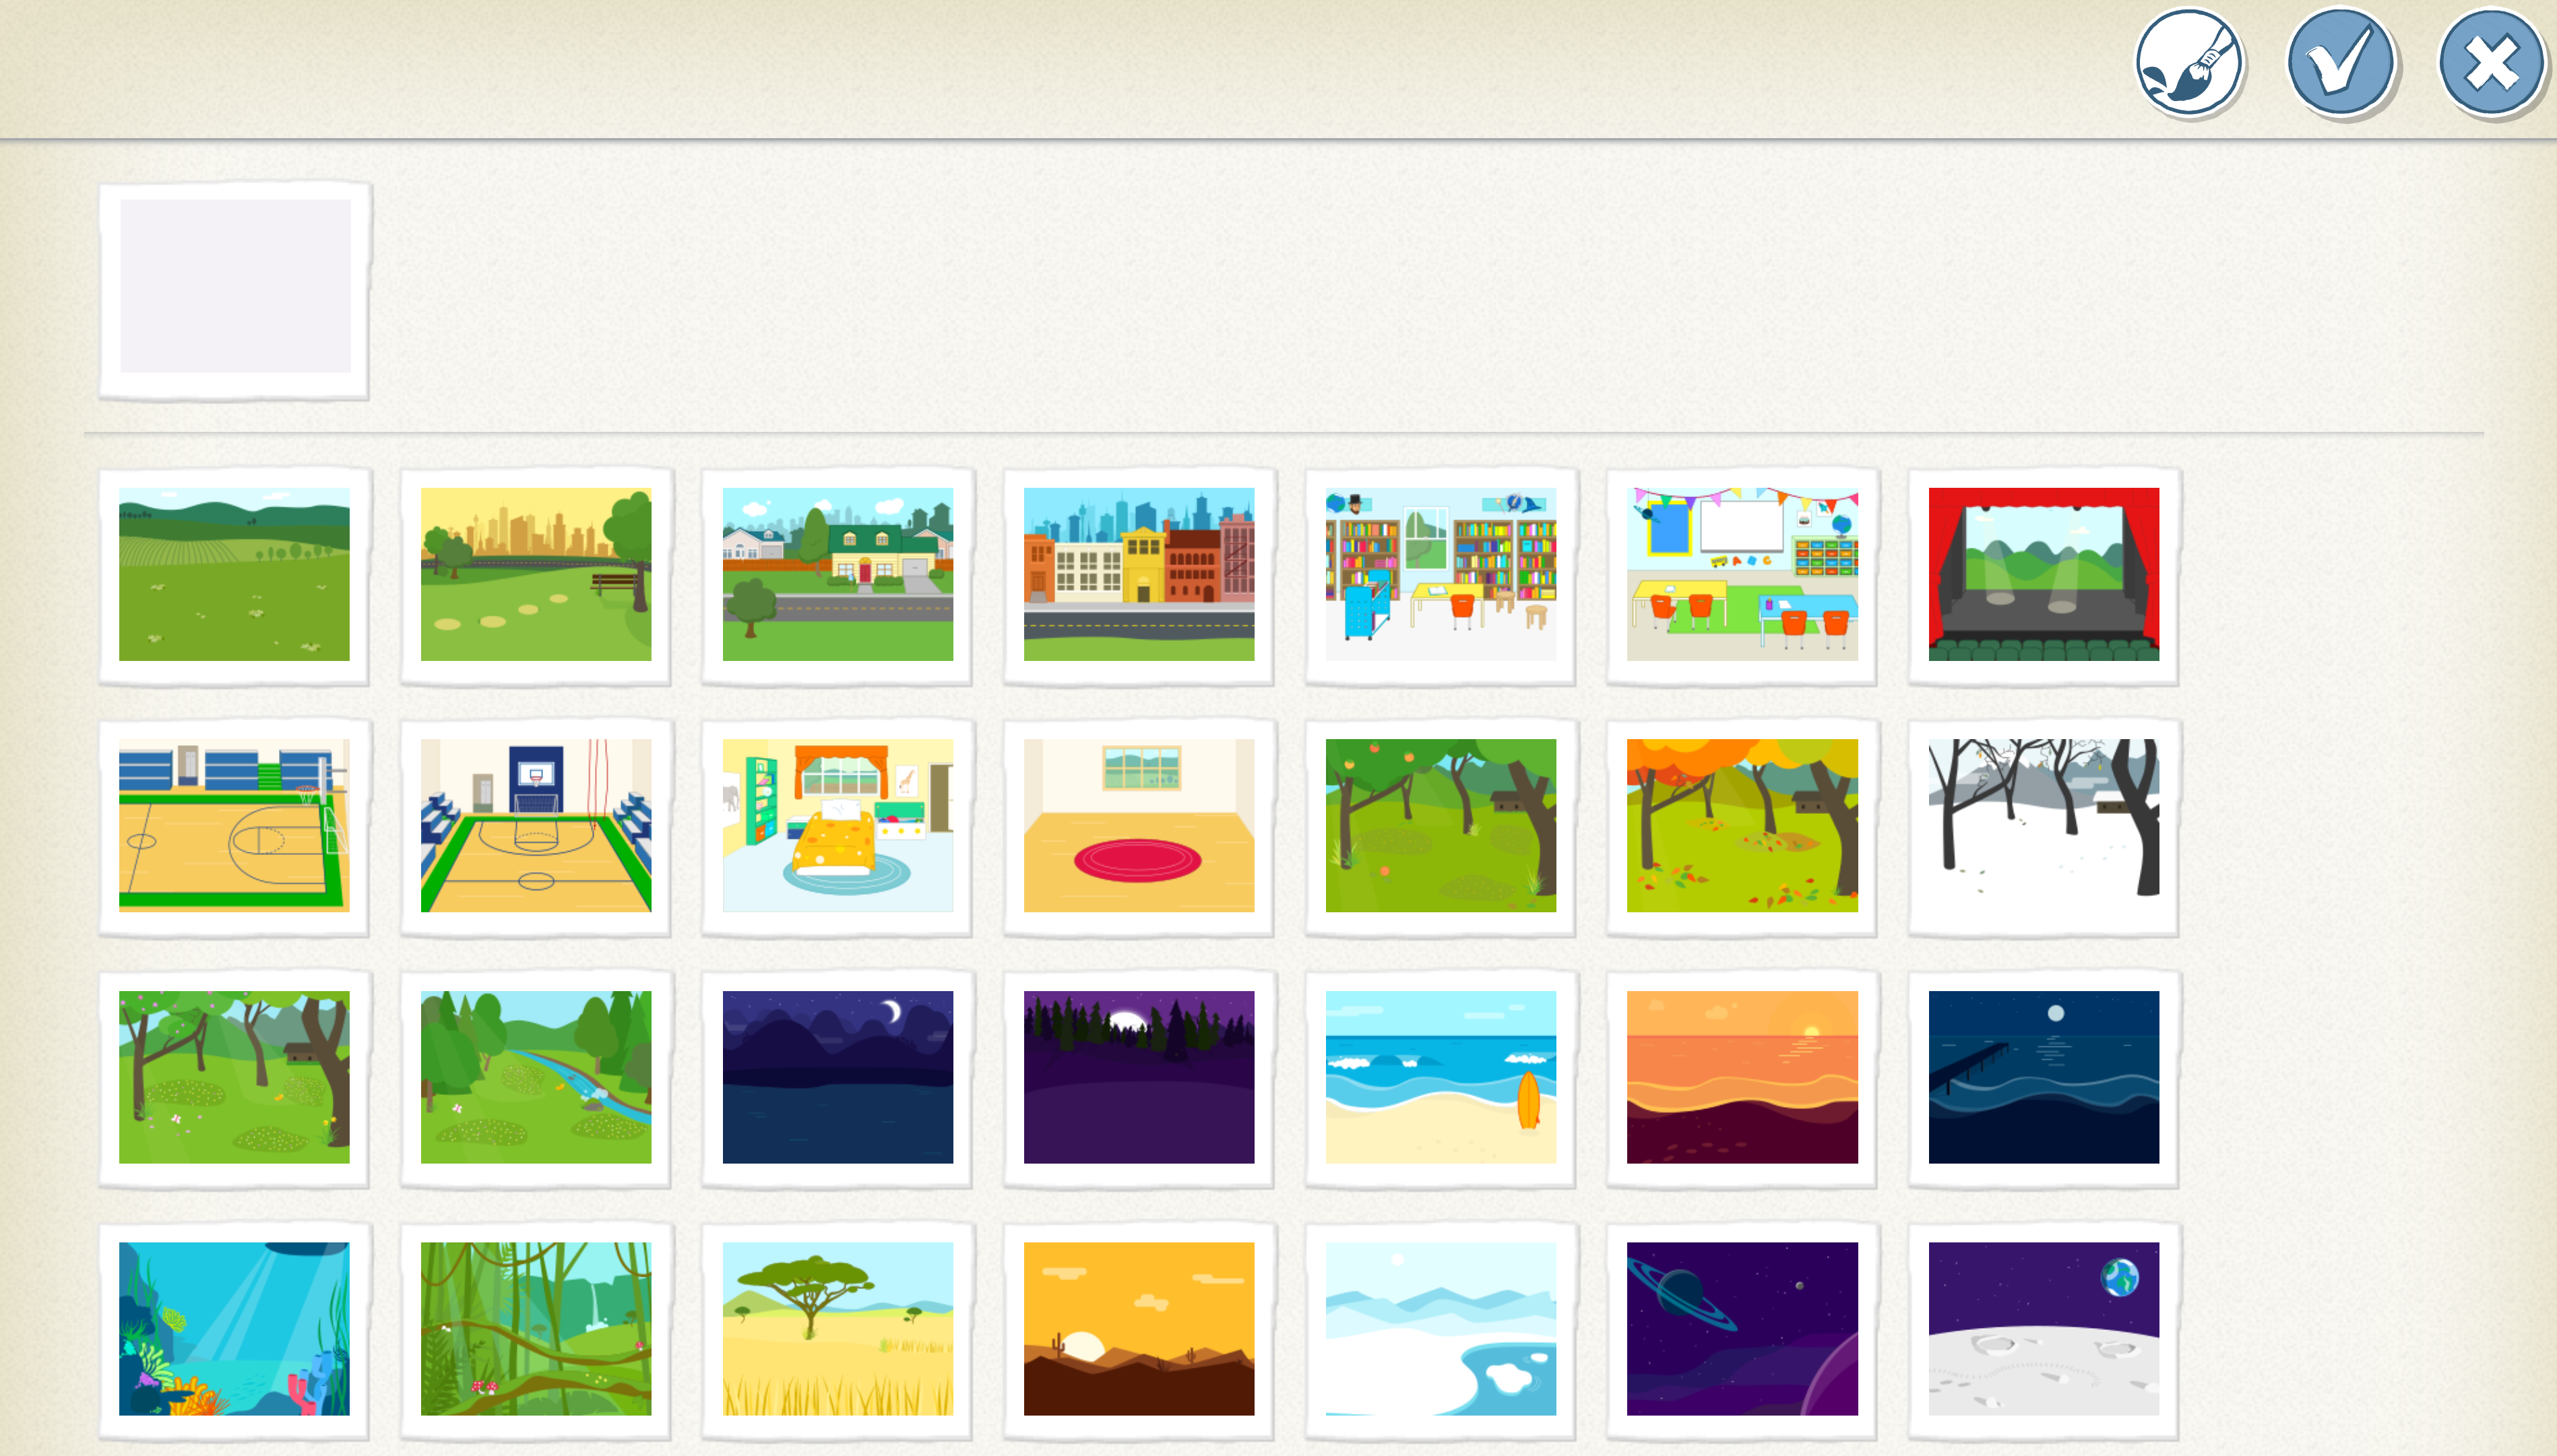
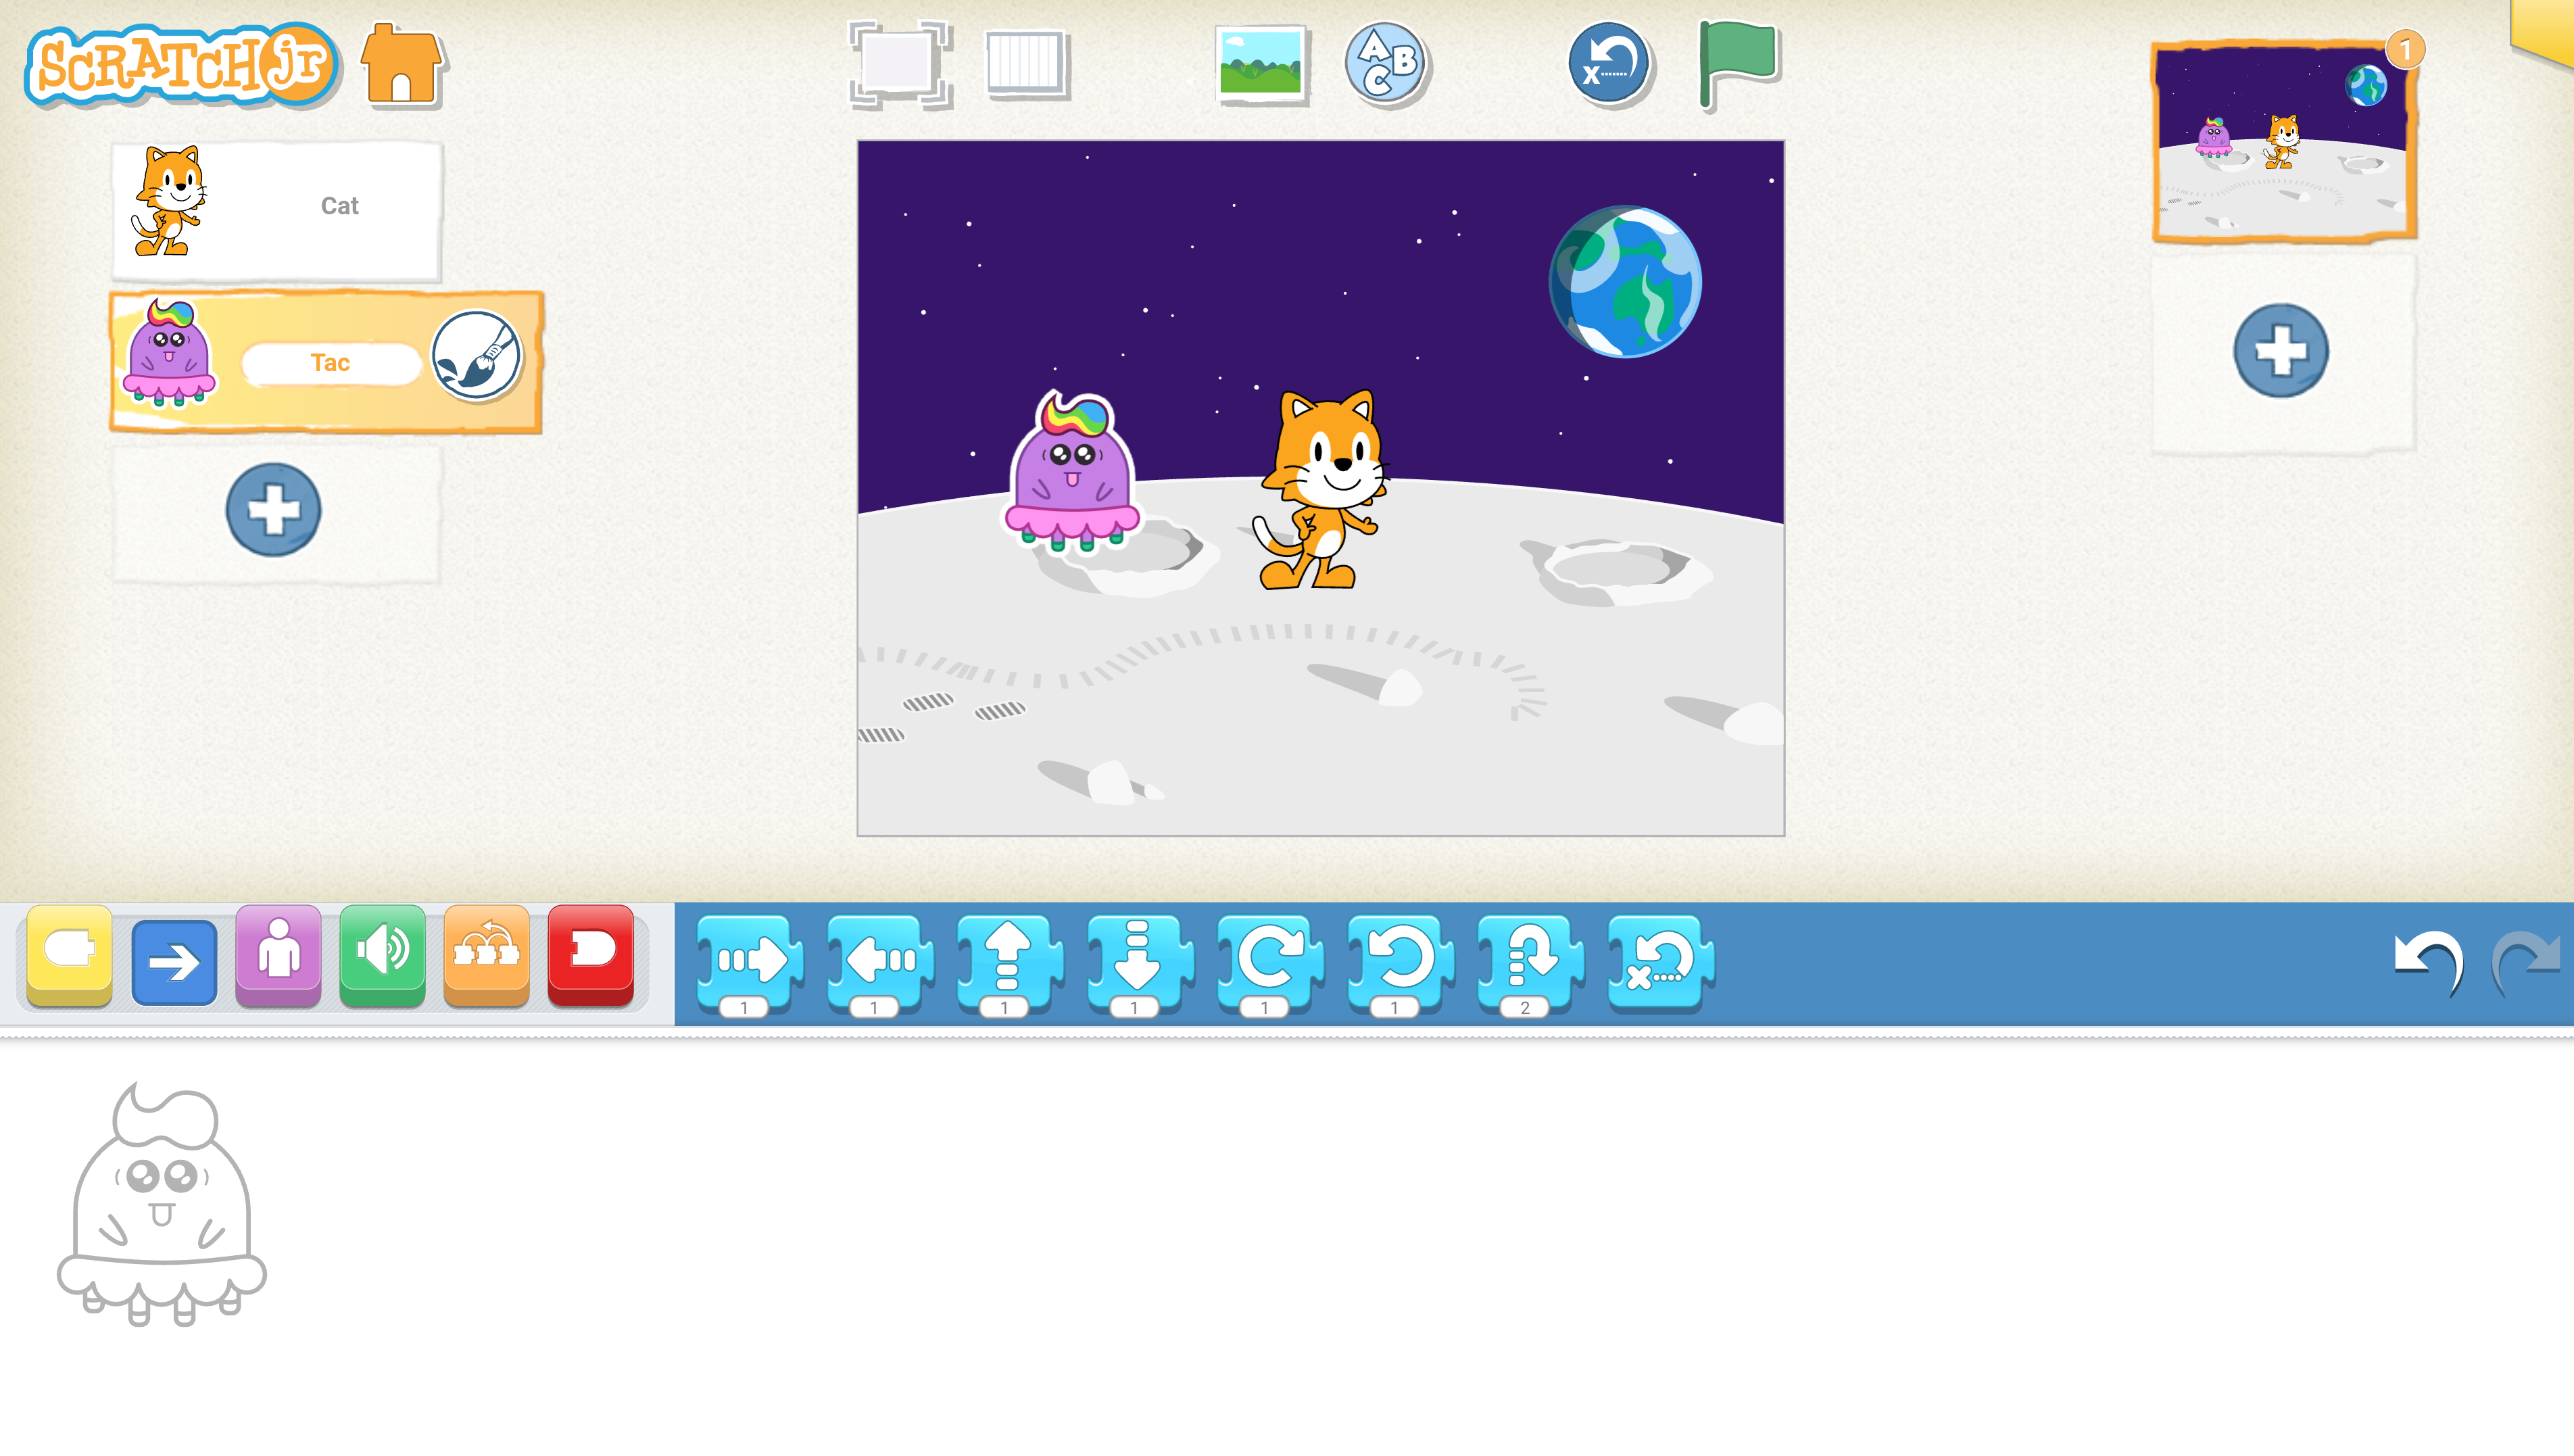
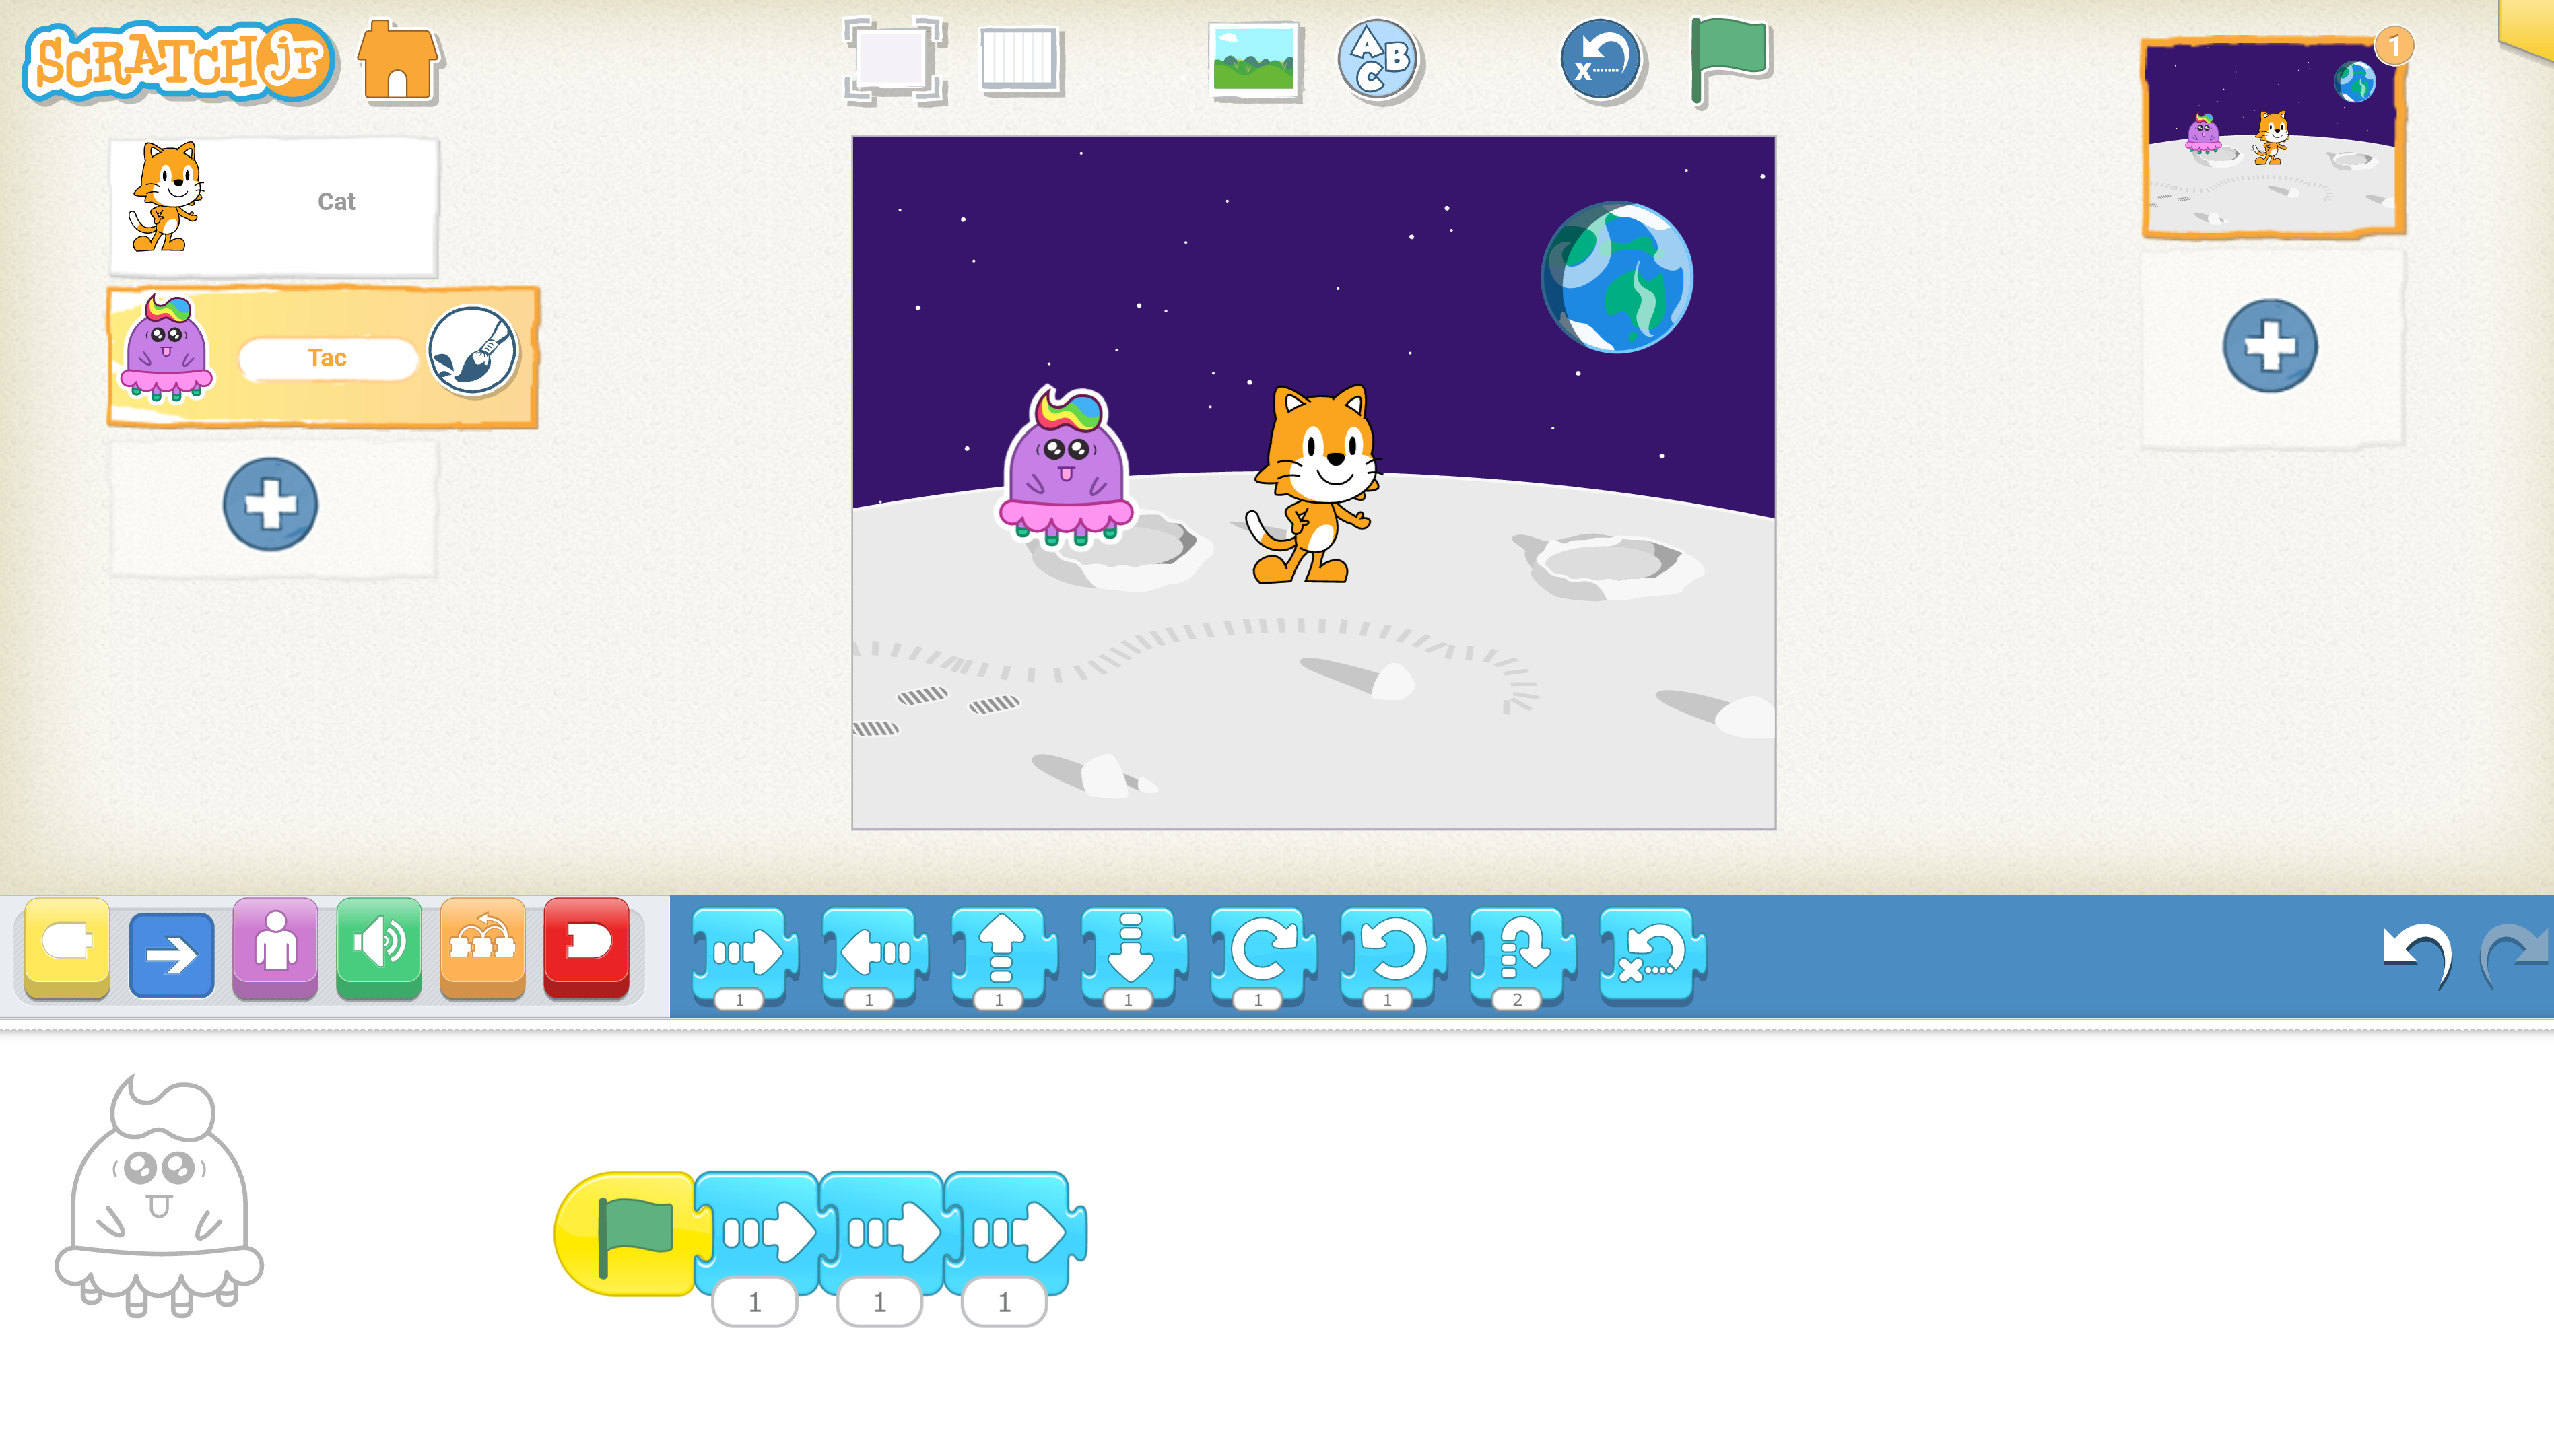
Introduction to Scratch Jr.

In this fun lesson, you will learn how to use the Scratch Jr. app to create your very own interactive stories and games!
Teacher Notes

Live Class Feed

This is a live feed of the latest activity by your students on this lesson. It will update in real-time as they work on the lesson.
Load previous activity

    1 - Getting to Know Scratch Jr.

    Explain what Scratch Jr is – a programming language designed for young children that allows them to create their own interactive stories and games. 


    2 - Starting with the App

    Guide students to open the Scratch Jr app on their tablets and navigate through the main interface. Ask them to tap the '+' button to start a new project.


    3 - Understanding the Interface

    In this step, we will explore the Scratch Jr. interface. The interface is divided into three main areas:

    • Stage Area: This is the area in the middle. This is where your characters will move and interact. You can change the background to set the scene for your story or game.
    • Blocks Toolbox: This is the area near the bottom, where you will find different blocks. Each block represents a different action or instruction for your characters. You can drag and drop these blocks to control what your characters do.
    • Code Area: This is the area at the bottom. This is where you place the blocks to create your code. You can arrange the blocks in different orders to make your characters do different things.

    4 - Creating Characters and Backgrounds

    Alright little explorers, it's time to bring your story to life! To add a new character, look for a '+' button on the left side of your screen. Tap it and you will see many different characters to choose from. Pick your favorite one and it will appear on your screen. You can move it around by dragging it with your finger.

    Now, let's change the background to set the scene for your story. Do you see the 'Scenery' button at the top of your screen? Tap it and you will see many different backgrounds. Choose the one you like the most and it will appear behind your character. Now your character is ready for their adventure! Remember, you can always change your character and background if you want to tell a different story. Have fun creating!


    5 - Moving Characters

    Introduce the function of basic motion blocks. Show them how to drag a motion block to the programming area and connect it to the start block. Allow them to create a simple script to make their character move across the screen.


    Unlock the Full Learning Experience

    Get ready to embark on an incredible learning journey! Get access to this lesson and hundreds more in our Digital Skills Curriculum.

    Copyright Notice
    This lesson is copyright of Coding Ireland. Unauthorised use, copying or distribution is not allowed.
    🍪 Our website uses cookies to make your browsing experience better. By using our website you agree to our use of cookies. Learn more