Start by explaining to your students that a maze is simply a puzzle made up of a set of confusing paths or turns.
Then, give them a chance to share their own understanding: "Can anyone tell me in their own words what a maze is? What's the point of a maze?"
Listen to their answers, and then guide the conversation to these key ideas: A maze is like a special puzzle path with walls! When you start a maze, you have to follow the lines and try to find the only way to get from the beginning to the end without hitting any of the dead ends or walls.
Think of it like being lost in a big cornfield or trying to find your way through a giant toy store. A maze is designed to be tricky and make you stop and think about which way to turn. Today, you're going to be the designers who build those tricky paths right inside Scratch Jr.!
Now that you know what a maze is, let's become the designers! The first step is to use the Background Editor in Scratch Jr. to draw the path for your character.
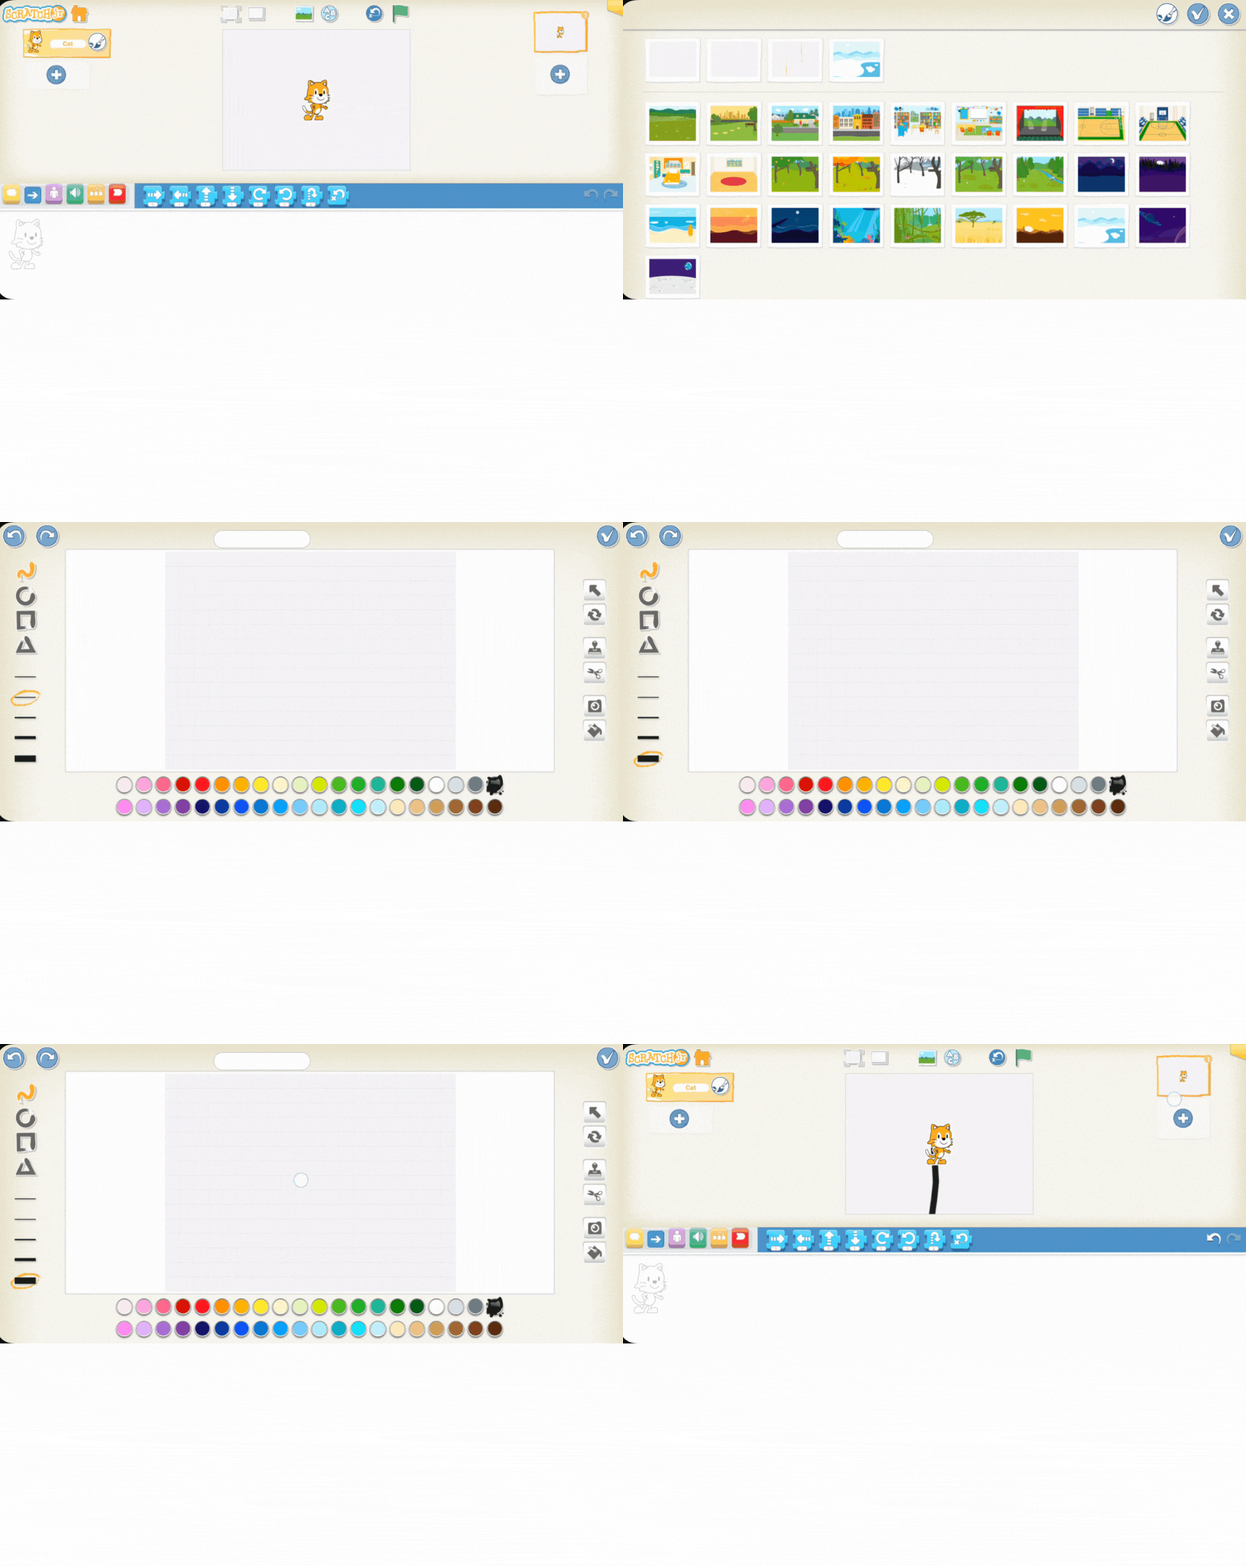
Select the Icon: Show your students how to select the background icon (the small landscape picture) just above the stage area.
Choose to Edit: Guide them to choose the "edit" option (the paintbrush icon) usually found in the top right corner of the background selection screen. This takes them into the drawing studio.
In the editor, we'll draw a simple barrier to start:
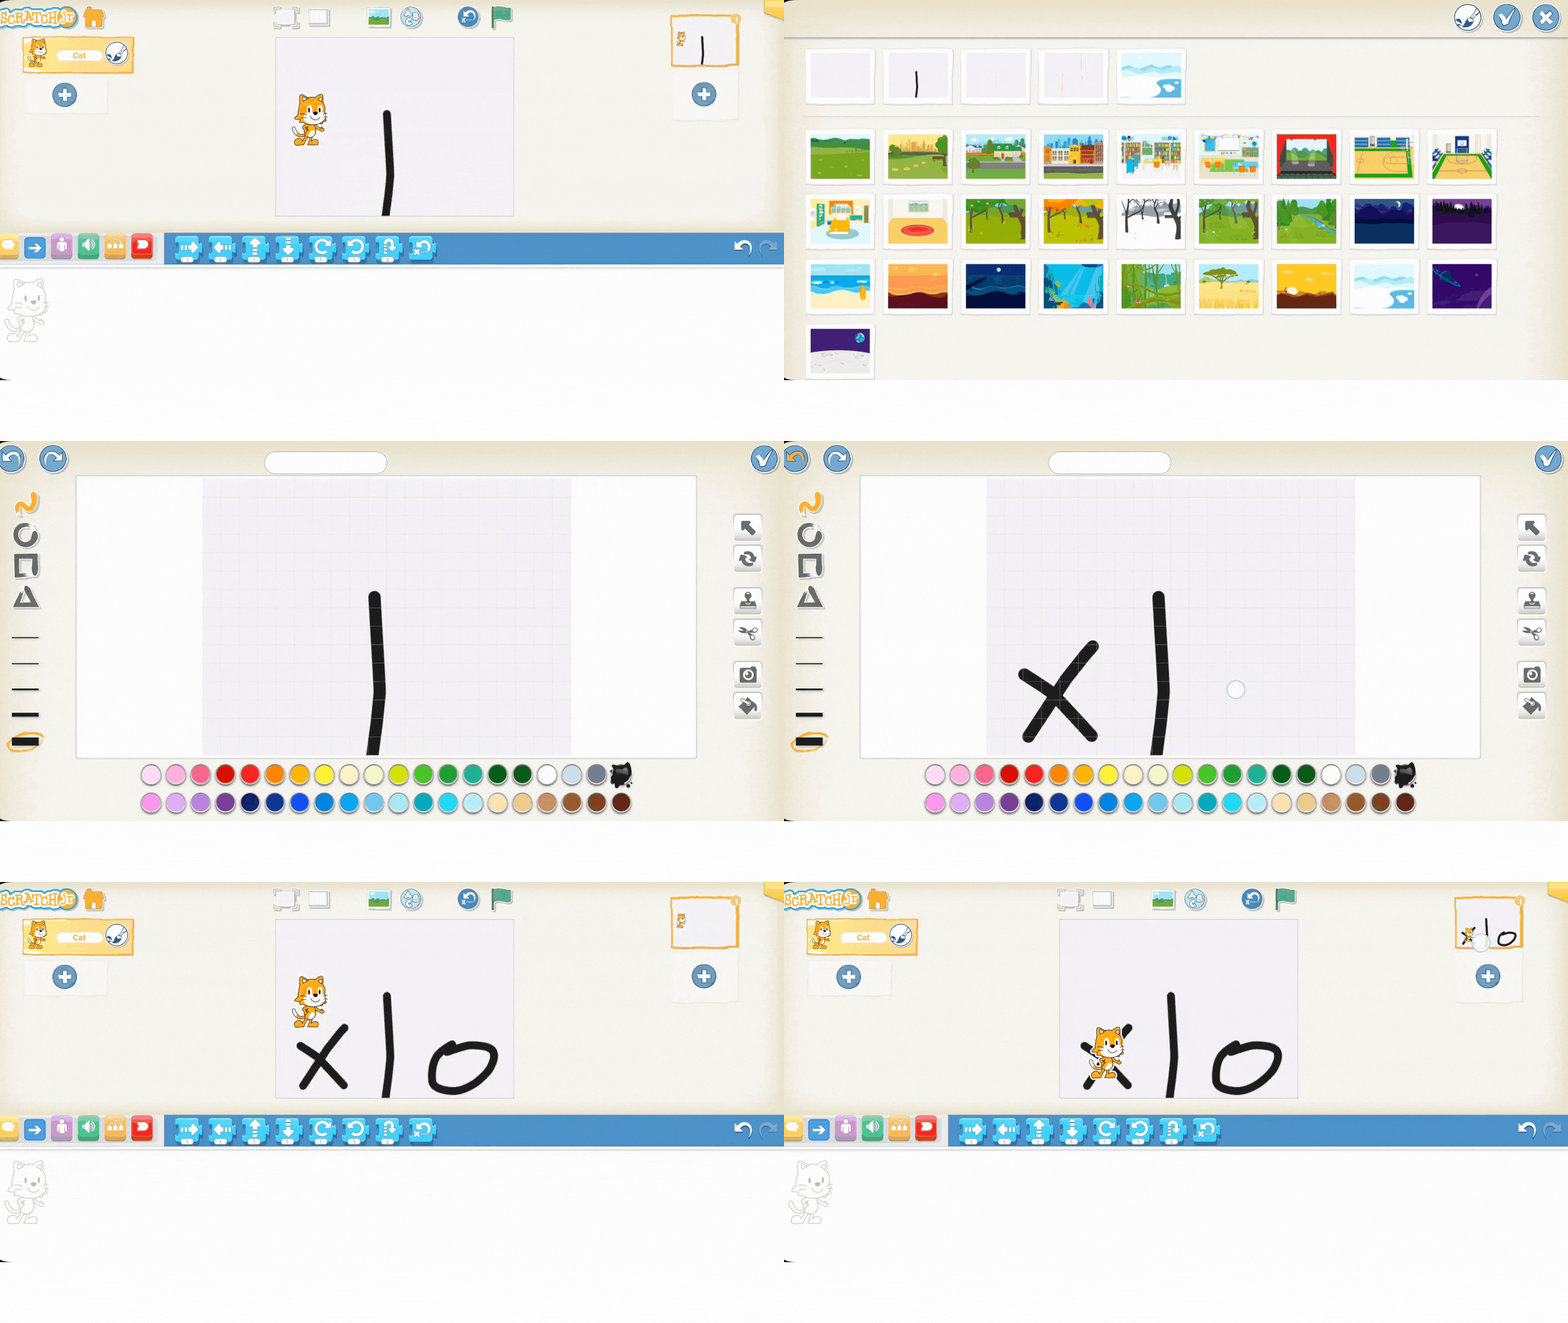
Draw the Barrier: Instruct the students to select a drawing tool (like the line tool) and draw a single, thick, horizontal line across the middle of the screen. This line will act as the wall or barrier that the character must navigate around.
Mark the Start: Encourage them to use the pencil or brush tool to mark a starting point for their character by drawing a small "X" on the path on one side of the line.
Mark the Target: On the opposite side of the barrier, have them draw a small "O" to represent the target or finish line.
Exit the Editor: Tap the checkmark icon to save the background and return to the coding screen.
The stage is set! Now you're ready to code the solution to your own maze.
Now that you've drawn the path, it's time to code the solution and guide your character around the barrier you created!
Since this is a simple maze (just a straight line barrier), you'll only need a few movement blocks to solve it.
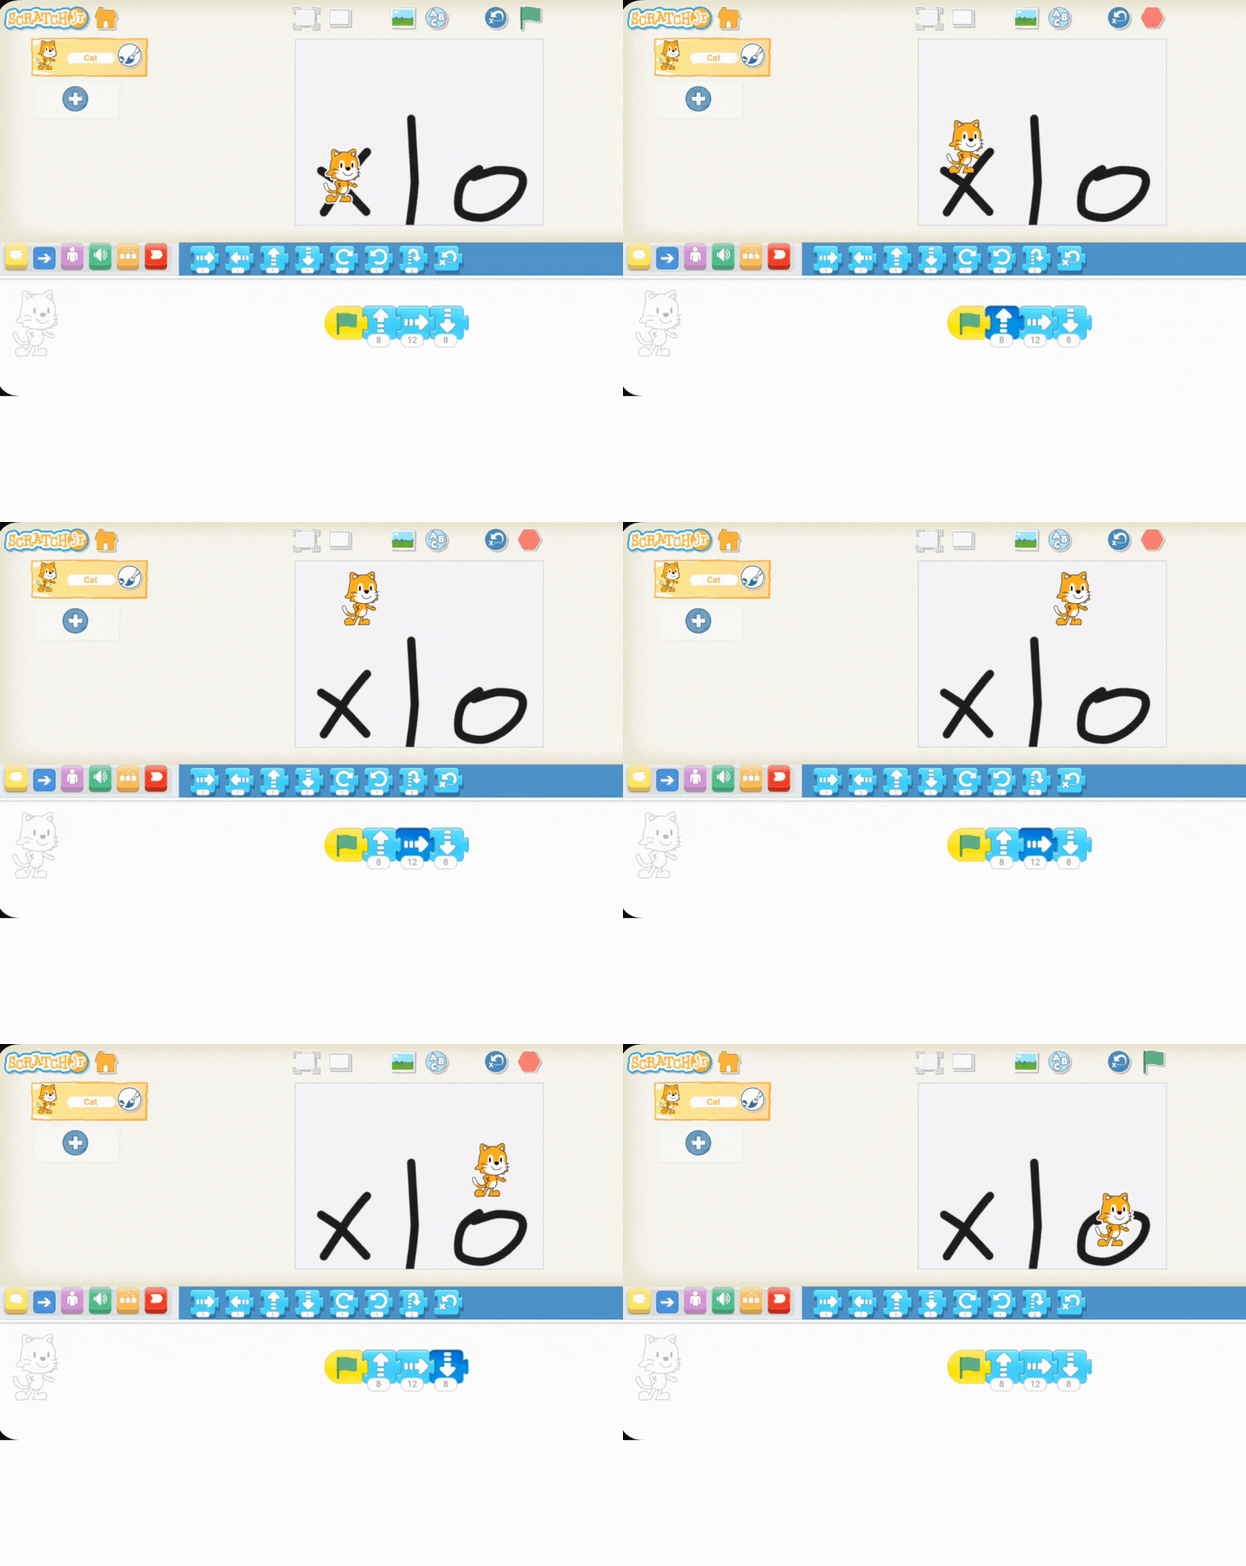
Start the Code: Instruct the students to drag the green flag block into the coding area to begin the program.
Move to the Barrier: Add a "move forward" block (blue right arrow) to move the character close to the line.
Go Around the Barrier: Now, the character needs to go over or under the line. Since we want them to move around it, they'll need:
A "move up" block (blue up arrow) to move above the line.
A "move forward" block to move across the line.
A "move down" block (blue down arrow) to get back onto the ground level.
Finish the Maze: Finally, add another "move forward" block to move the character to the "O" finish line.


