For this project you will need 2 Microbits. Both of them will need to be powered on and one of the power sources will need to let you walk around with the Microbit, so either a Microbit battery pack or a USB power bank.
The code that we create will be downloaded onto both Microbits and we will use the A and B buttons to set which Microbit is "lost" and which one is the "finder".
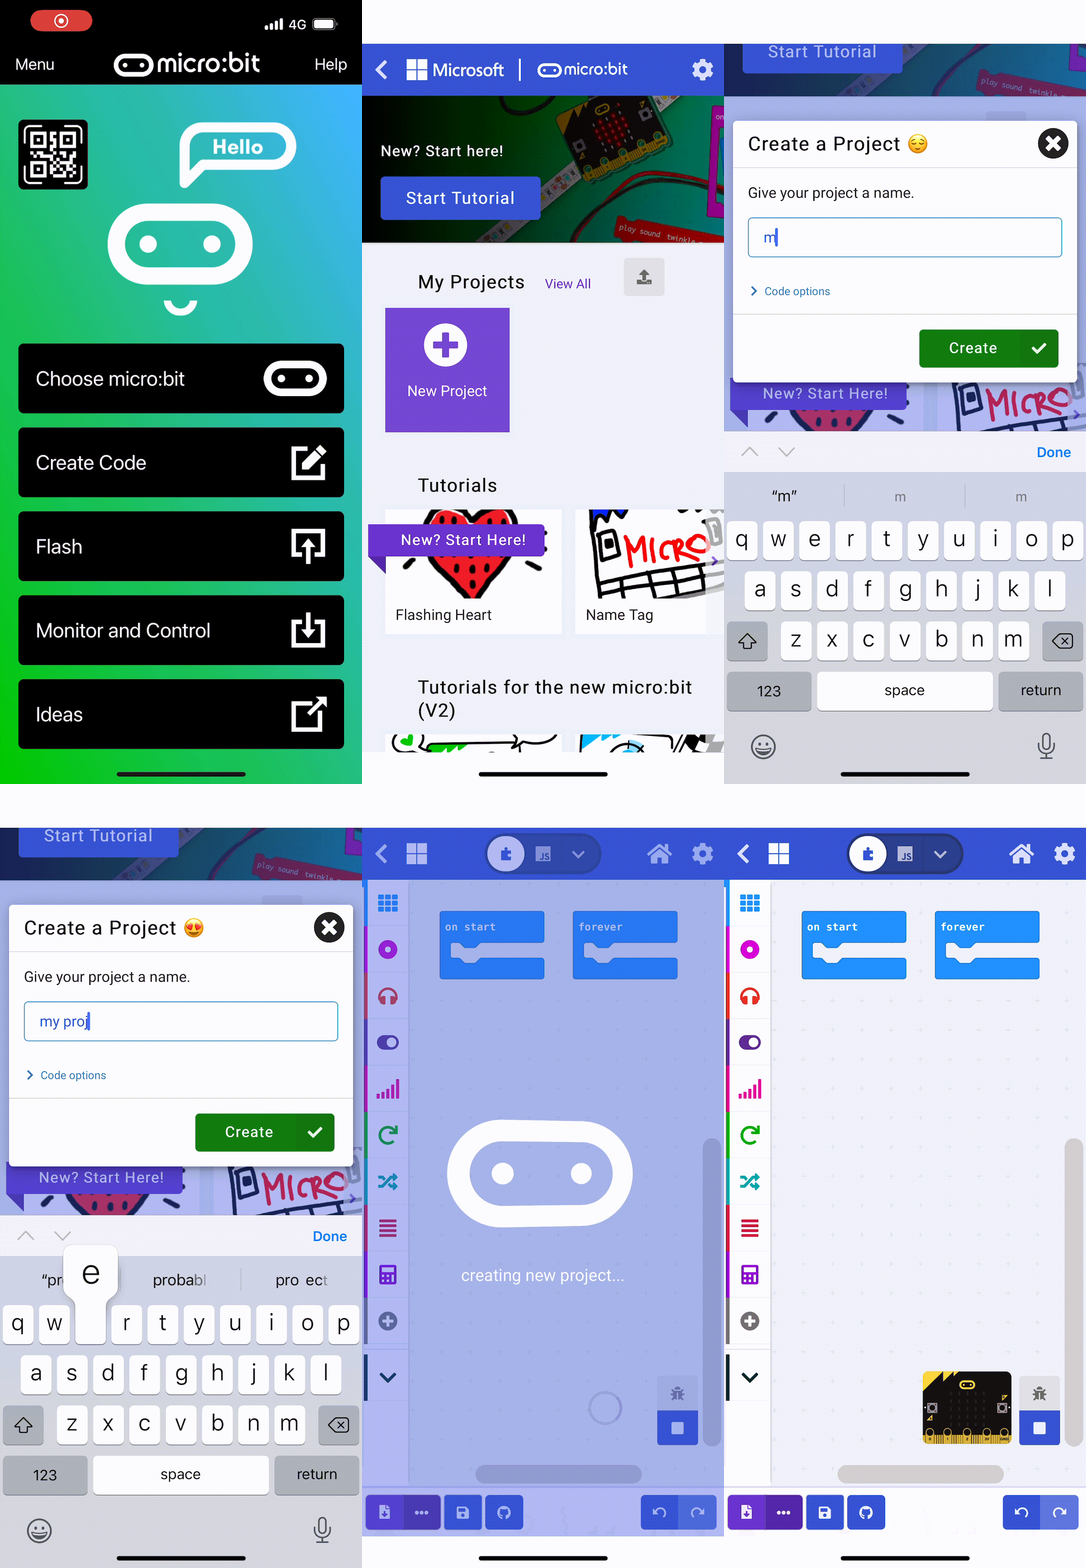
Go to the https://makecode.microbit.org website and create a new project.
Go to the Makecode.com Microbit website using the link below and click on the 'New Project' button underneath the 'My Projects' heading.
https://makecode.microbit.org/
Install the micro:bit app on your iPad or tablet.
Open the app, tap 'Create code' and then create a new project.

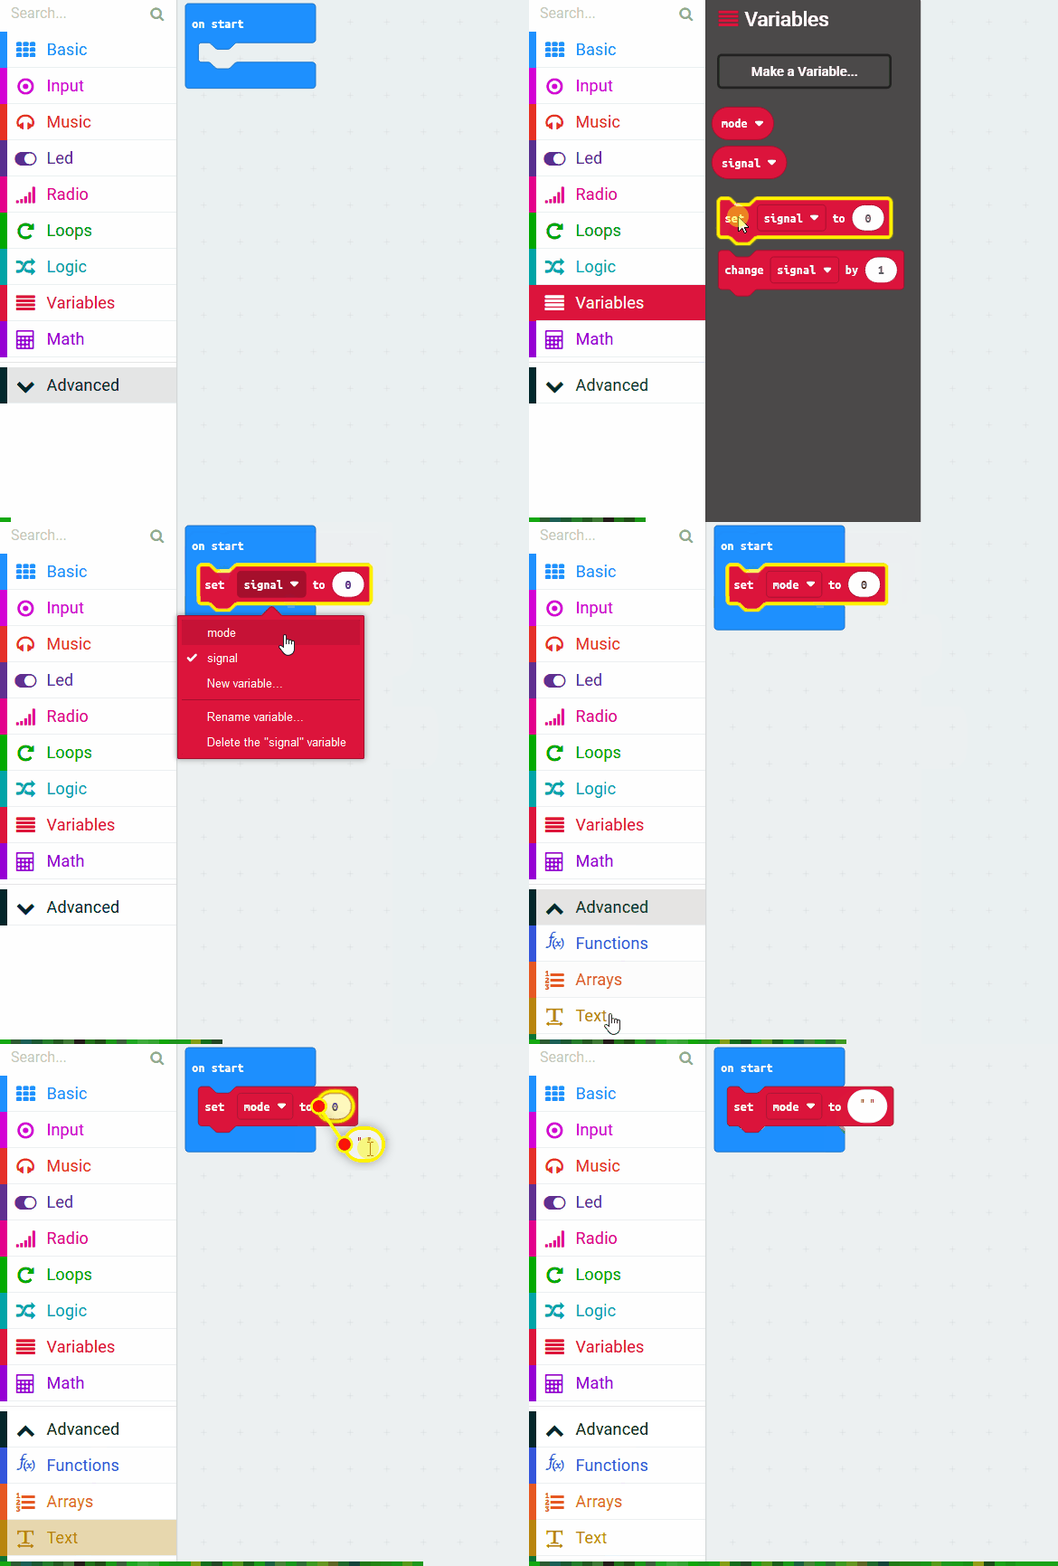
For this project we will need to create the following 2 variables:
Create a variable called mode and a variable called signal and then add the following code to setup the 'mode' variable to a blank string "".
let mode = ""
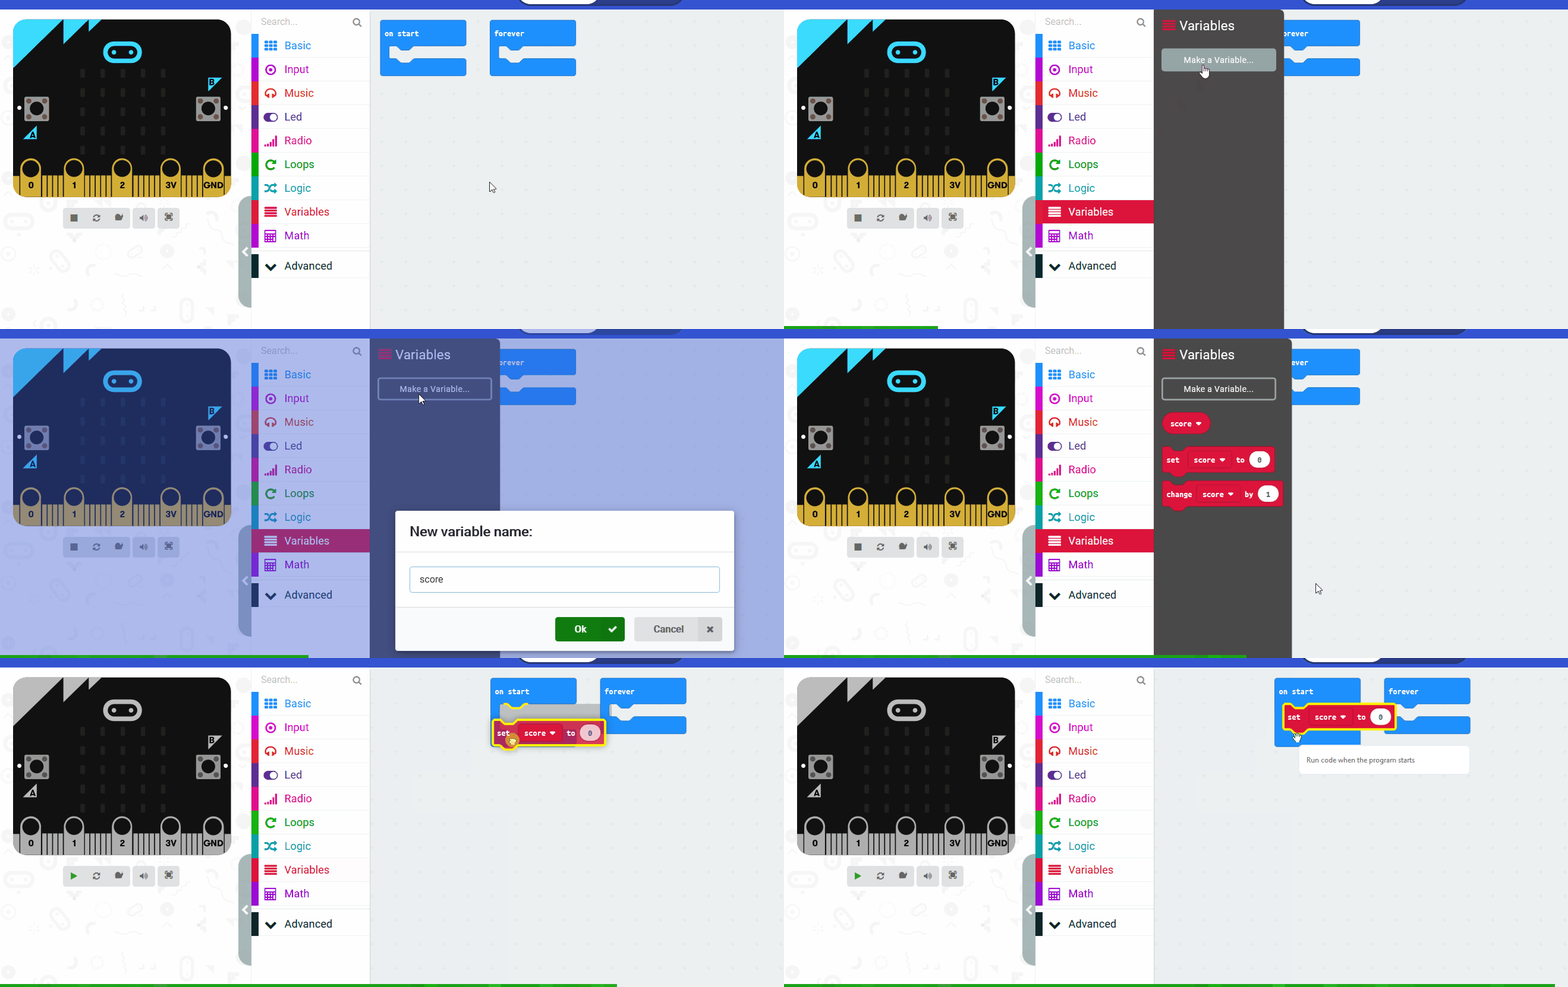
In the Variables toolbox, create a new variable by clicking the 'Make a Variable' button.
Once you click this button a box will appear asking what you want to call your variable. Give it a name that reminds you what you will be using it for. For example, if you wanted to keep track of your score in a game, you would create a variable called 'score'.
We need to set the radio group that our Micorbits will be broadcasting on so that they can communicate with each other. A radio group is the channel that the Microbit both sends it's messages and listens for other messages. A Microbit can only send or receive in one group at a time.
Add the following code to set the radio group to 1.
let mode = ""
mode = ""
radio.setGroup(1)
Next we are going to program the A and the B buttons to set the mode of each Microbit.
If you press the button A then you will set that Microbit to be the finder Microbit.
If you press the button B then you will set that Microbit to be the lost Microbit.
Add the following code:
input.onButtonPressed(Button.A, function () {
    mode = "finder"
})

input.onButtonPressed(Button.B, function () {
    mode = "lost"
    basic.showIcon(IconNames.Skull)
})


