Chromebooks, laptops, and PCs are crucial tools for coding and digital skills education. Chromebooks are ideal for web-based applications and collaborative projects, while laptops and PCs support a wider range of programming environments and software for more intensive tasks like software development and data analysis.
Microbit Tutorial
Learn about the Microbit computer and how you can program it!
Learn about the Microbit computer and how you can program it!
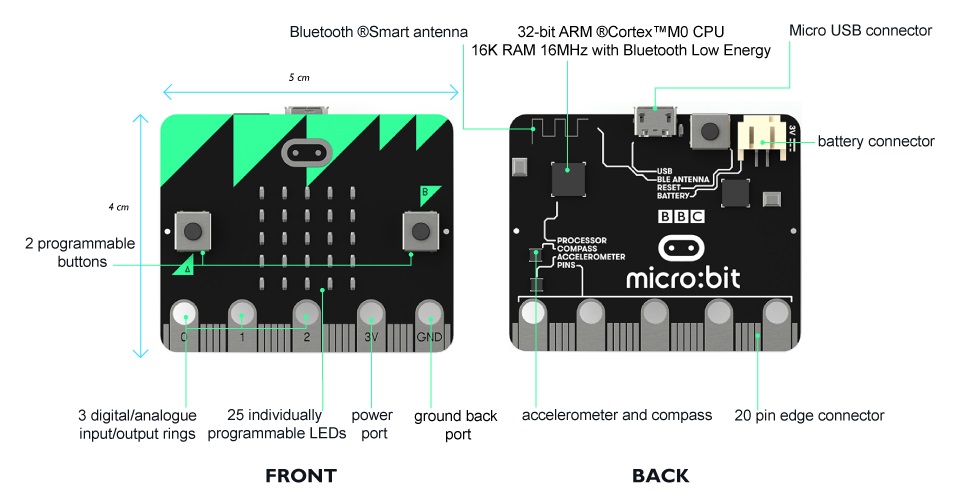
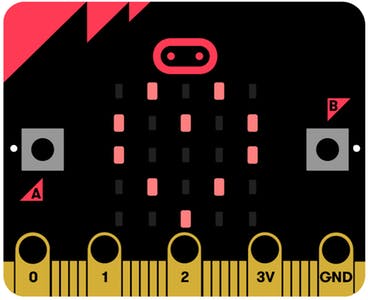
The Microbit is a tiny programmable computer, designed especially for learning and teaching coding.
It has a processor inside it (like the brain of the computer) and has the following:
Watch this short video to see how we can create code and program it.
Your Microbit is a versatile mini-computer that you can program to perform a wide array of tasks. It's equipped with buttons, LEDs, and various sensors that you can manipulate to create engaging projects. For instance, you can program your Microbit to function as a pedometer, a compass, or even a musical instrument. The possibilities are nearly limitless, and it's all up to your creativity and programming skills.
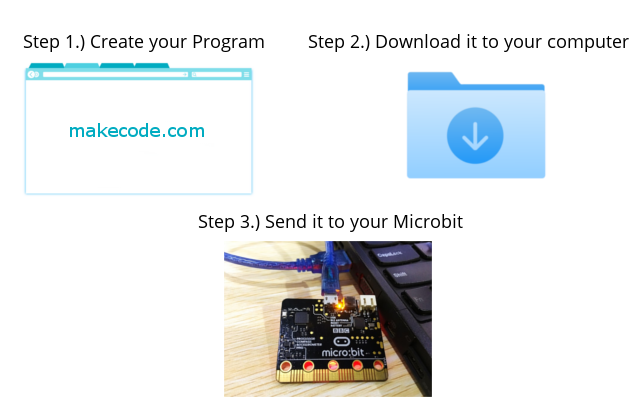
In a similar way to Scratch, you can create programs using a special website but you then need to download the program to your computer and then send the program to the Microbit.
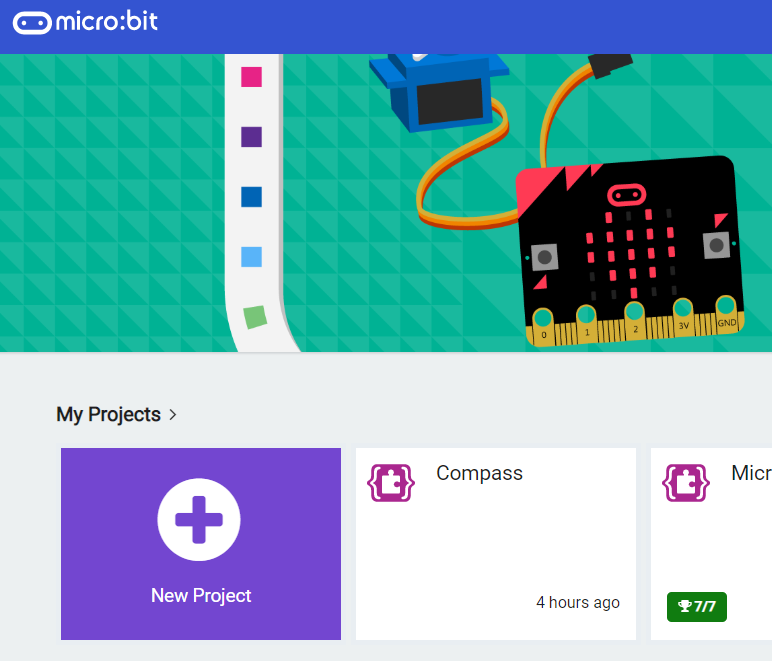
The makecode.com website is a website provided by Microsoft that lets you create code for different devices such as the Microbit.
Go to the Makecode.com Microbit website using the link below and click on the 'New Project' button underneath the 'My Projects' heading.
https://makecode.microbit.org/
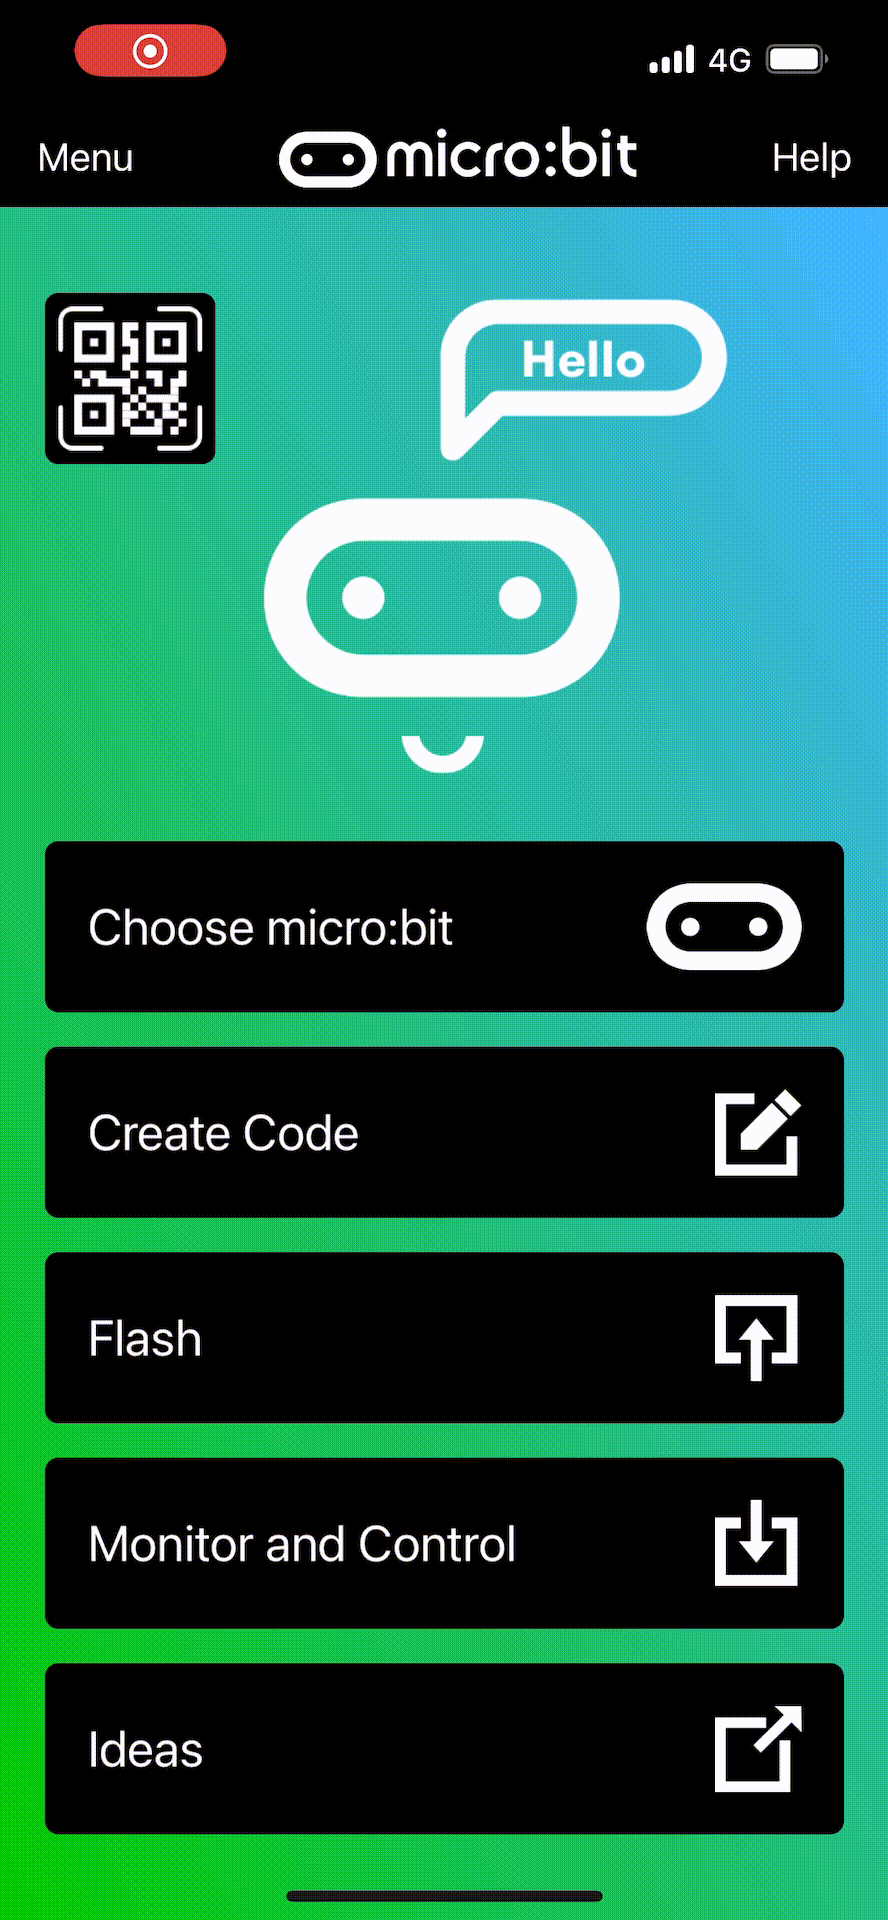
Install the micro:bit app on your iPad or tablet.
Open the app, tap 'Create code' and then create a new project.
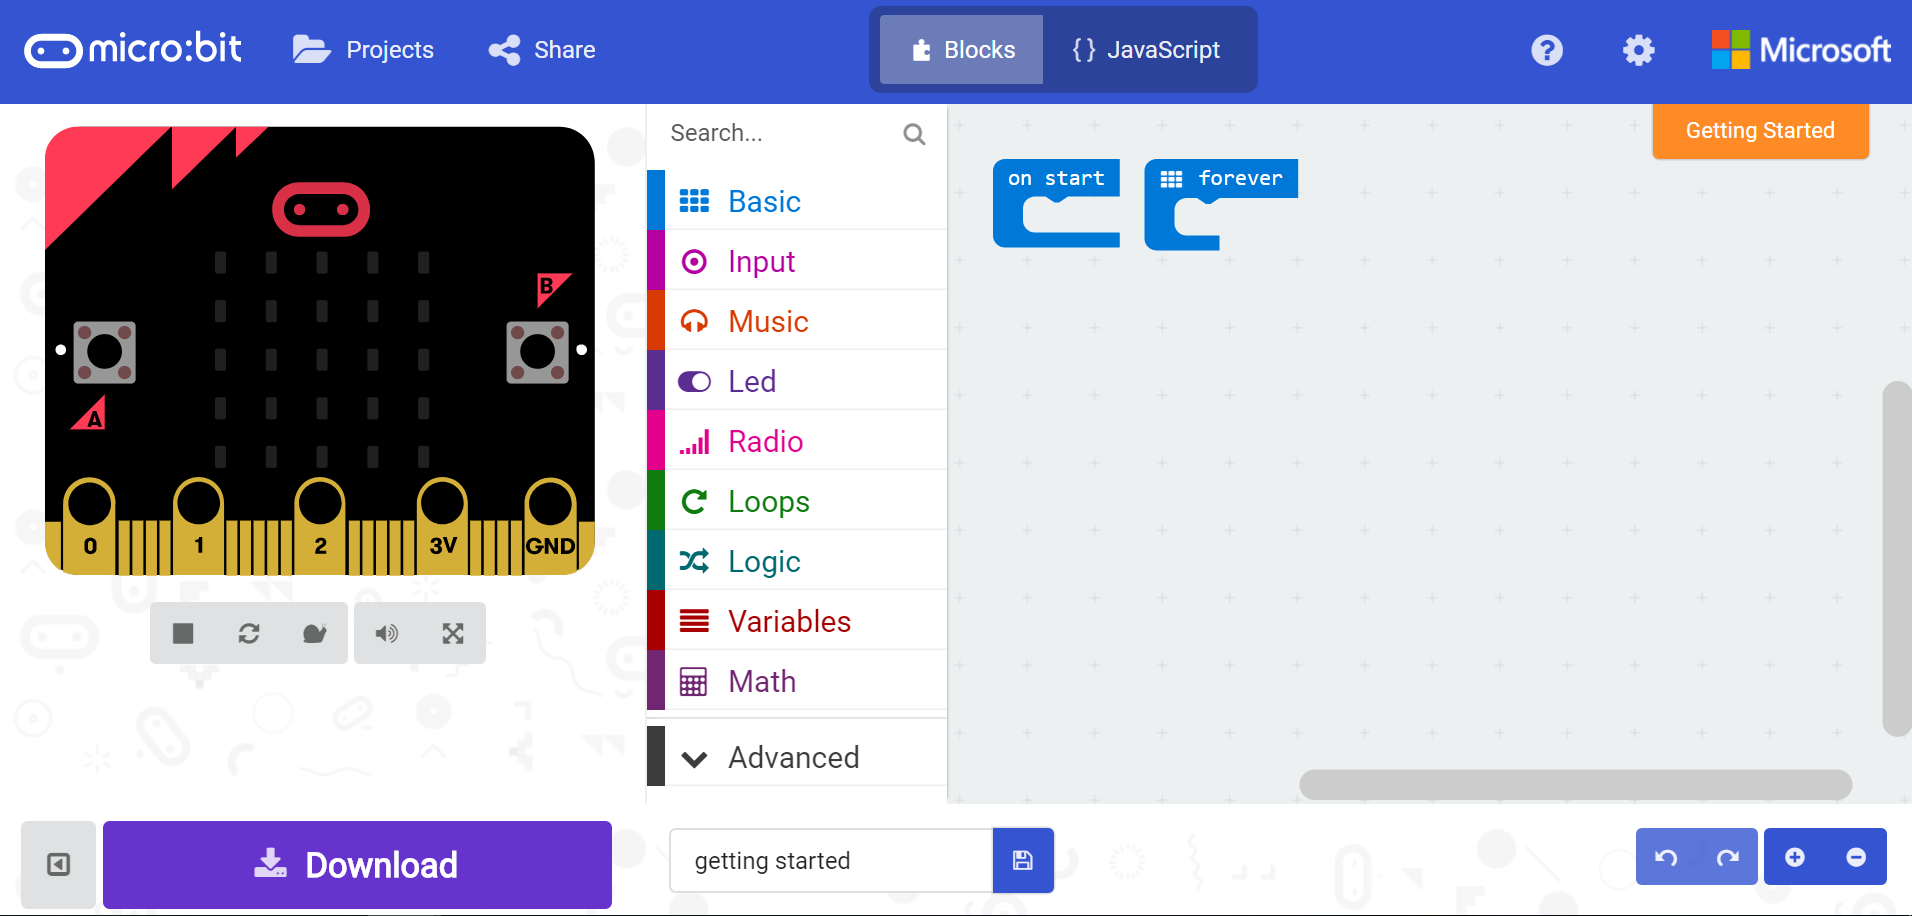
When you create a new project you will be brought to the project editor, which is what we use to create our Microbit programs. The editor has 3 main areas:
The blocks 'on start' and 'forever' will appear in the Scripts Area by default for new projects.

Get ready to embark on an incredible learning journey! Get access to this lesson and hundreds more in our Digital Skills Curriculum.