Game Microbit
Beginner
60 mins
Teacher/Student led
+85 XP
What you need:
Chromebook/Laptop/PC

Reaction Timer

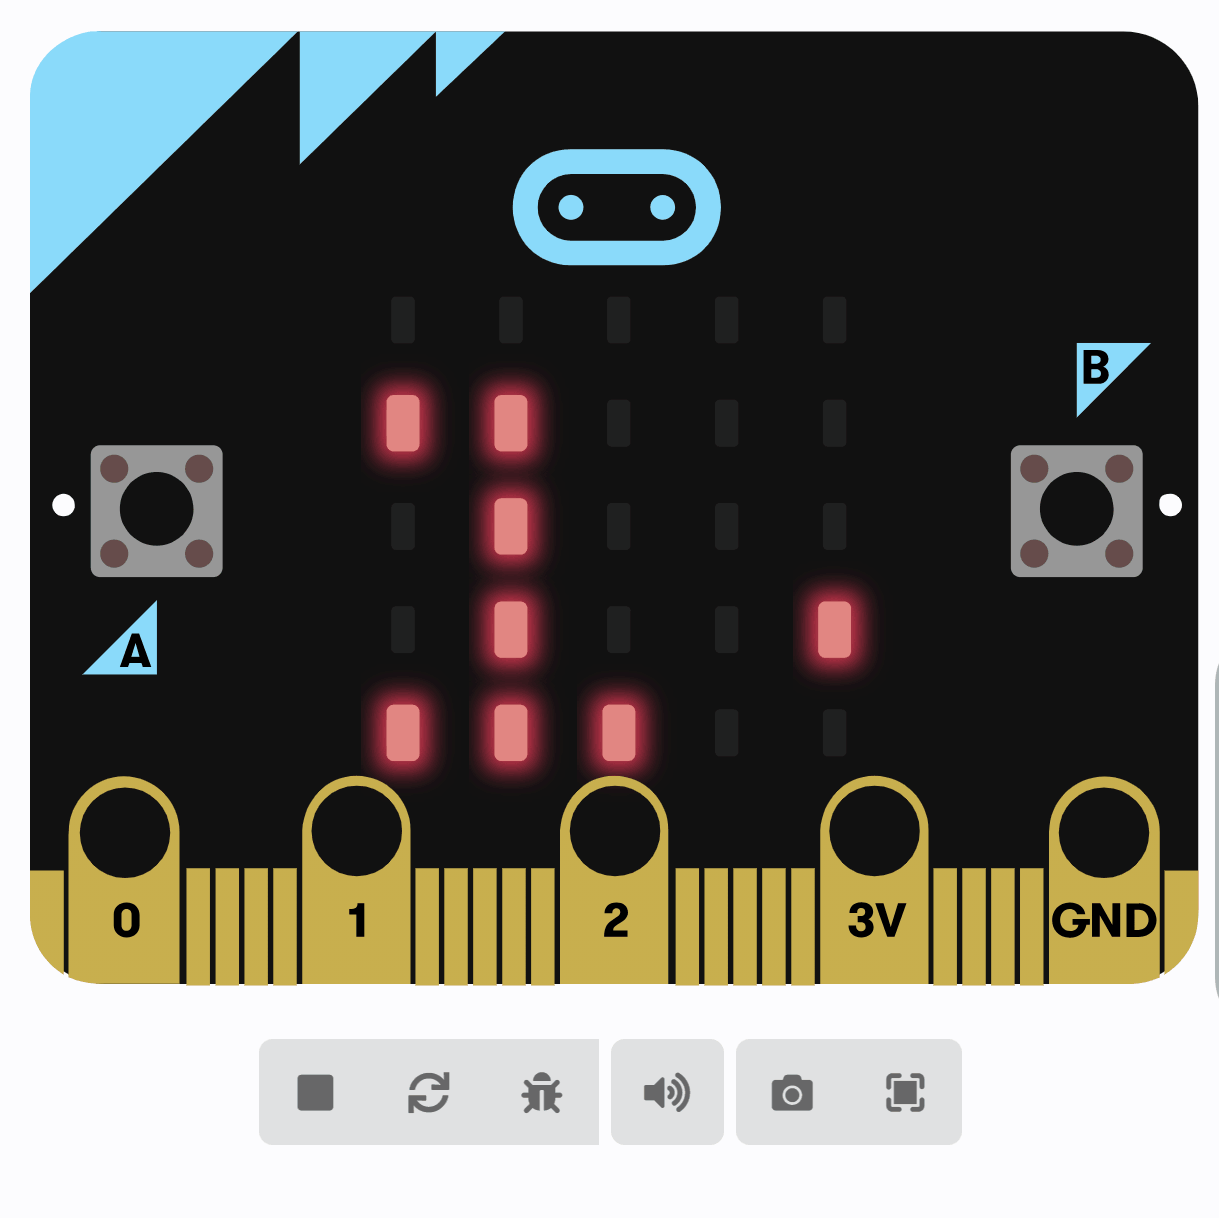
Follow this guide to build a fun project on your Micro:bit. Start by creating a new project, add a welcome message, set up a countdown, introduce a random delay, create variables, and record your reaction time.
Learning Goals Learning Outcomes Curriculum Mapping Teacher Notes Lesson Files

Teacher Class Feed

Load previous activity

    1 - Create a New Project

    First, go to the Micro:bit website. Click on 'New Project' and name your project as 'Reaction Timer'.

    2 - Creating a Welcome Message

    Let's start by creating a welcome message that will be displayed when you power on your Microbit.

    Add the following code to your project:

    basic.showString("Get Ready")

    3 - Creating a Countdown

    After the welcome message, we are going to create a countdown from 3 to 1 and then show a line on the screen.

    Add the following new code to your project:

    basic.showString("Get Ready")
    basic.showNumber(3)
    basic.pause(1000)
    basic.showNumber(2)
    basic.pause(1000)
    basic.showNumber(1)
    basic.pause(1000)
    basic.showLeds(`
        . . . . .
        . . . . .
        # # # # #
        . . . . .
        . . . . .
        `)
    You could also create a function called 'countdown' and pass in the amount of seconds you want to count down. Have a think about how you could do this.

    4 - Adding a Random Delay

    To make the game unpredictable, let's add a random delay after the countdown. 

    Add the following new code to create a random delay between 1 to 5 seconds (1,000 to 5,000 milliseconds) and then show the signal (a fully lit up LED screen) to the player.

    basic.showString("Get Ready")
    basic.showNumber(3)
    basic.pause(1000)
    basic.showNumber(2)
    basic.pause(1000)
    basic.showNumber(1)
    basic.pause(1000)
    basic.showLeds(`
        . . . . .
        . . . . .
        # # # # #
        . . . . .
        . . . . .
        `)
    basic.pause(Math.randomRange(1000, 5000))
    basic.showLeds(`
        # # # # #
        # # # # #
        # # # # #
        # # # # #
        # # # # #
        `)
    

    5 - Create Variables

    We will need 2 variables to store some time stamps:

    1. startTime - to store when the signal is shown to the player.
    2. reactionTime - to store when the player presses the A button.

    Create these variables now and then add the following new code to set the startTime variable.

    let startTime = 0
    basic.showString("Get Ready")
    basic.showNumber(3)
    basic.pause(1000)
    basic.showNumber(2)
    basic.pause(1000)
    basic.showNumber(1)
    basic.pause(1000)
    basic.showLeds(`
        . . . . .
        . . . . .
        # # # # #
        . . . . .
        . . . . .
        `)
    basic.pause(randint(1000, 5000))
    basic.showLeds(`
        # # # # #
        # # # # #
        # # # # #
        # # # # #
        # # # # #
        `)
    startTime = input.runningTime()
    
    The running time (ms) block stores the number of milliseconds since the program started.

    Unlock the Full Learning Experience

    Get ready to embark on an incredible learning journey! Get access to this lesson and hundreds more in our Digital Skills Curriculum.

    Copyright Notice
    This lesson is copyright of Coding Ireland. Unauthorised use, copying or distribution is not allowed.
    🍪 Our website uses cookies to make your browsing experience better. By using our website you agree to our use of cookies. Learn more