The aim of this project is to code a set of traffic lights to run through a sequence and broadcast what light is been displayed. Then a robot car will receive the broadcast and decide whether to stop or go.
You will need the following for this project:
Put one of the Microbits into the car and attach the other Microbit to the traffic lights using the screws.
We will need to create 2 code projects:
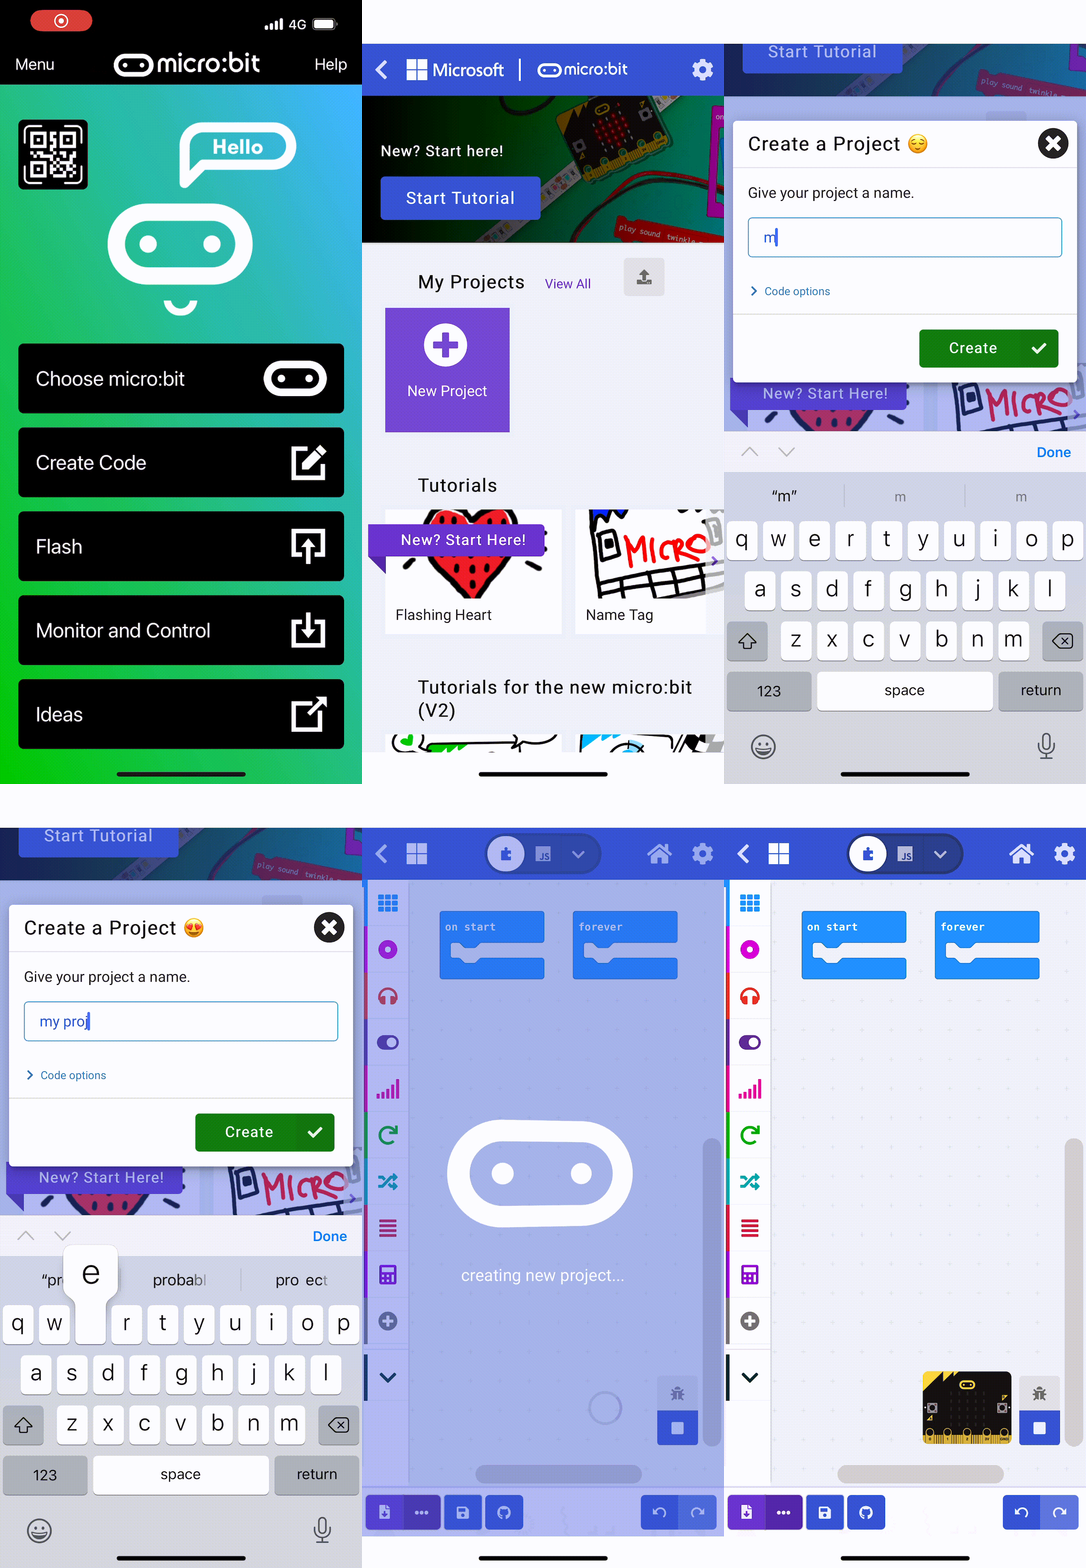
Let's create the code for the traffic lights first. Go to the https://makecode.microbit.org website and create a new project. Call it "Traffic Lights" or something that let's you know that it's the project for the traffic lights.
Once you've created the new project, add the following code to set the radio group to 1. We will do the same later on the for the car project.
radio.setGroup(1)
Go to the Makecode.com Microbit website using the link below and click on the 'New Project' button underneath the 'My Projects' heading.
https://makecode.microbit.org/
Install the micro:bit app on your iPad or tablet.
Open the app, tap 'Create code' and then create a new project.

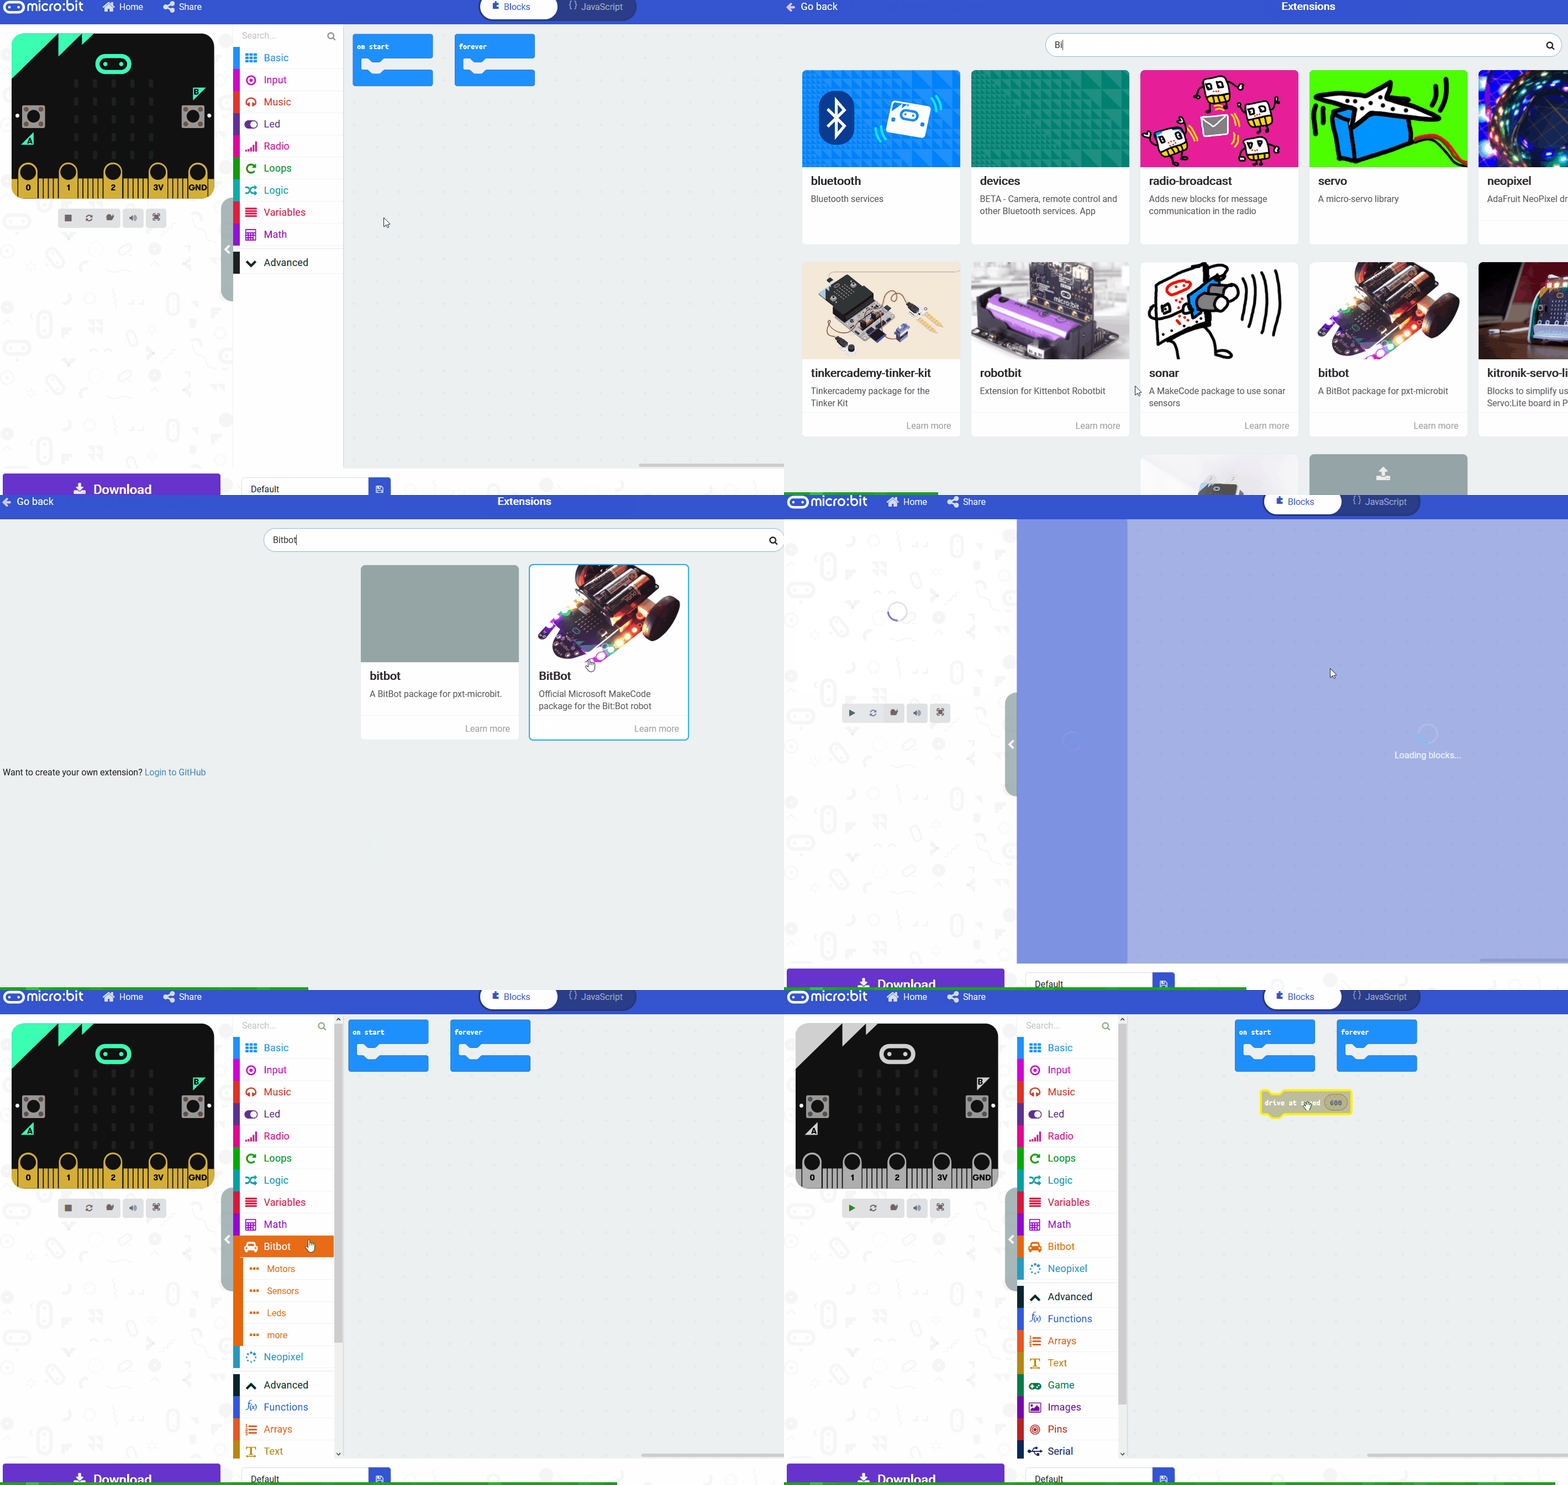
There are custom code blocks that we use to program our traffic lights kit. To add them to our toolbox we need to add the "stopbit" extension.
Search for the "stopbit" extension and then click on the traffic lights kit picture.
This will add the "Kitronik STOP:bit" category of code blocks to your toolbox.
To add an extension follow these steps:
We're going to program the traffic lights to go through the following sequence:
Add the following code to make the traffic lights forever go through the sequence.
Now let's also broadcast what current state the traffic lights is in. Add the following new code to:
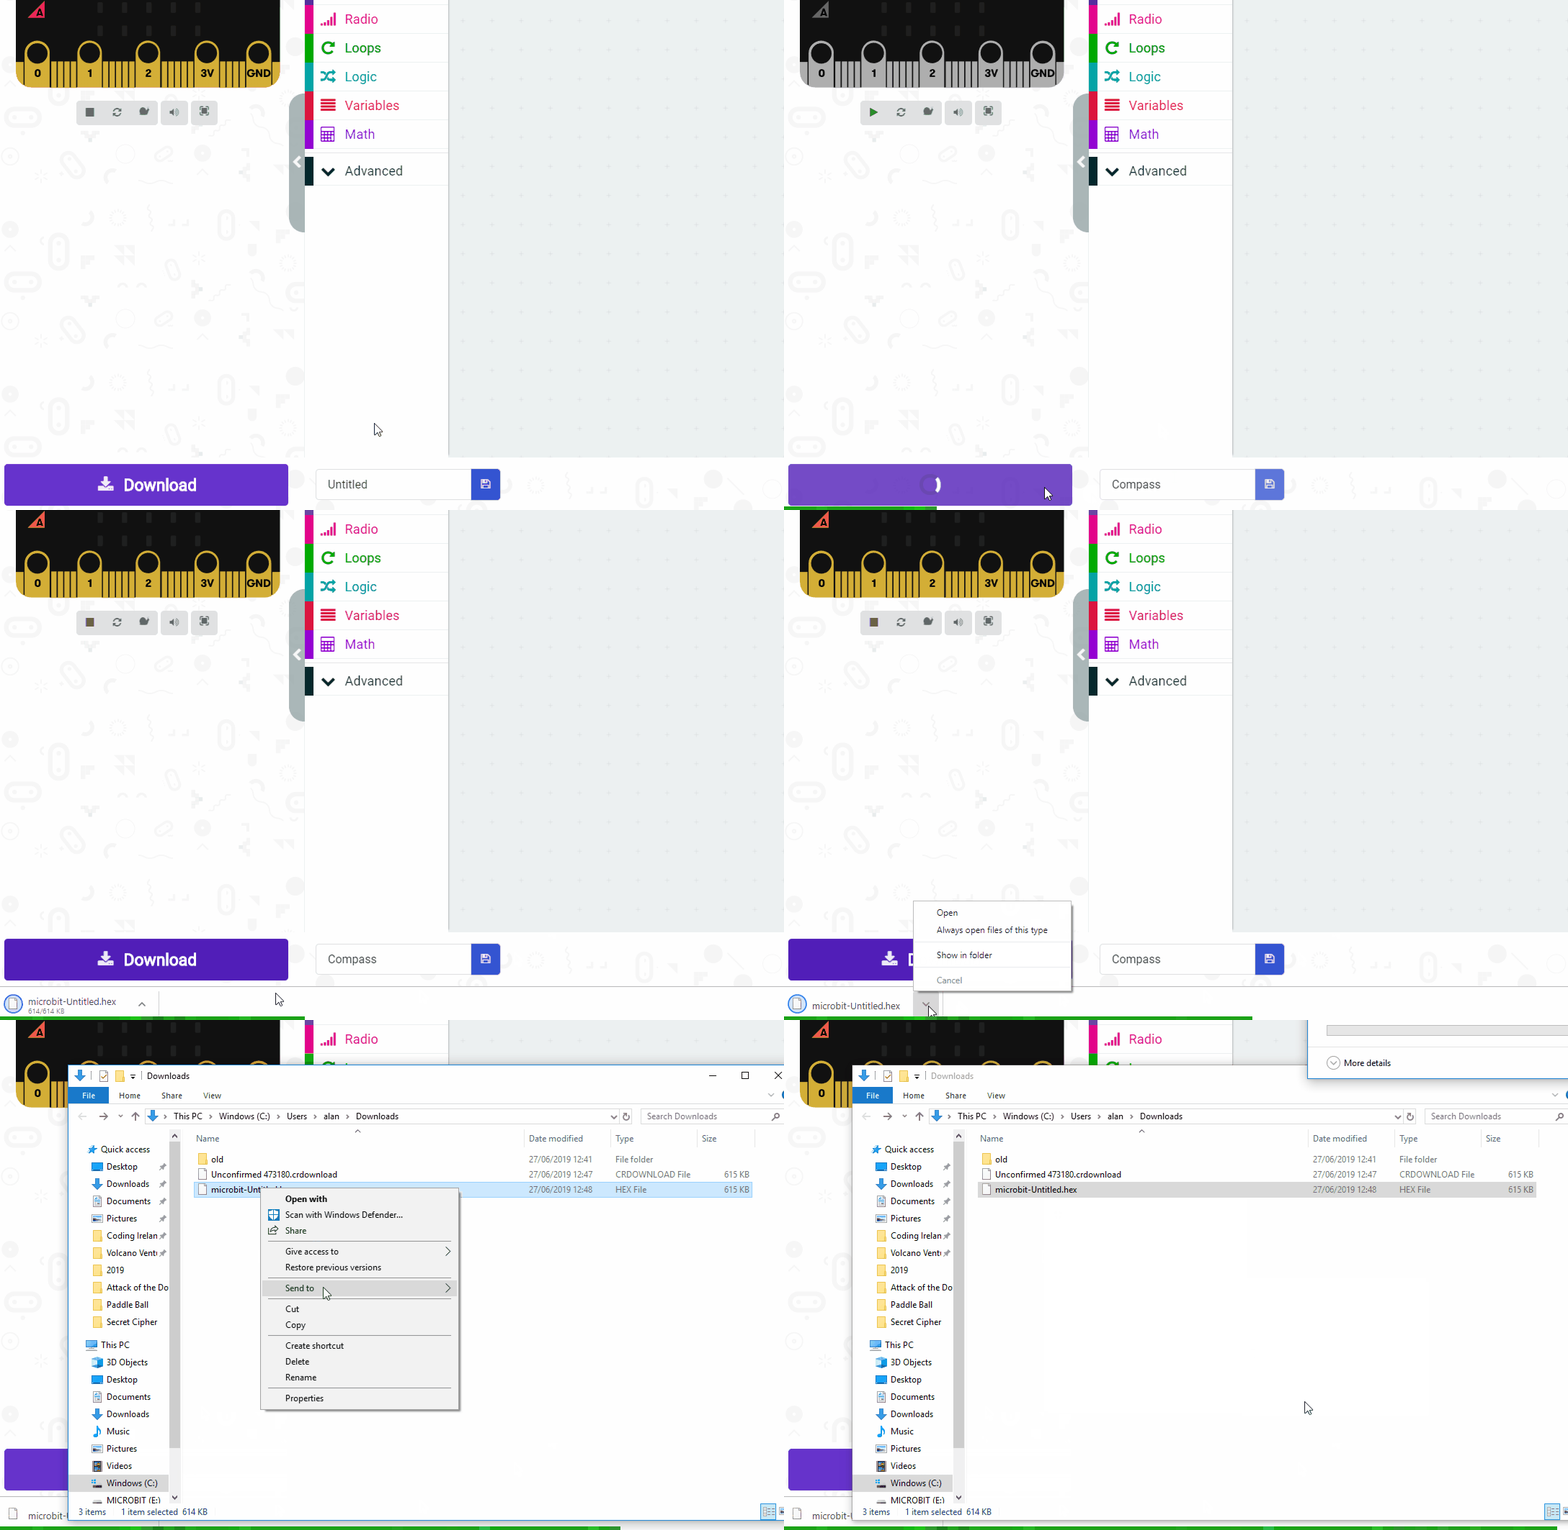
Once you have added the code, download it onto the Microbit that is attached to your traffic lights.
Give your project a name and send it to your Microbit by following these steps:


