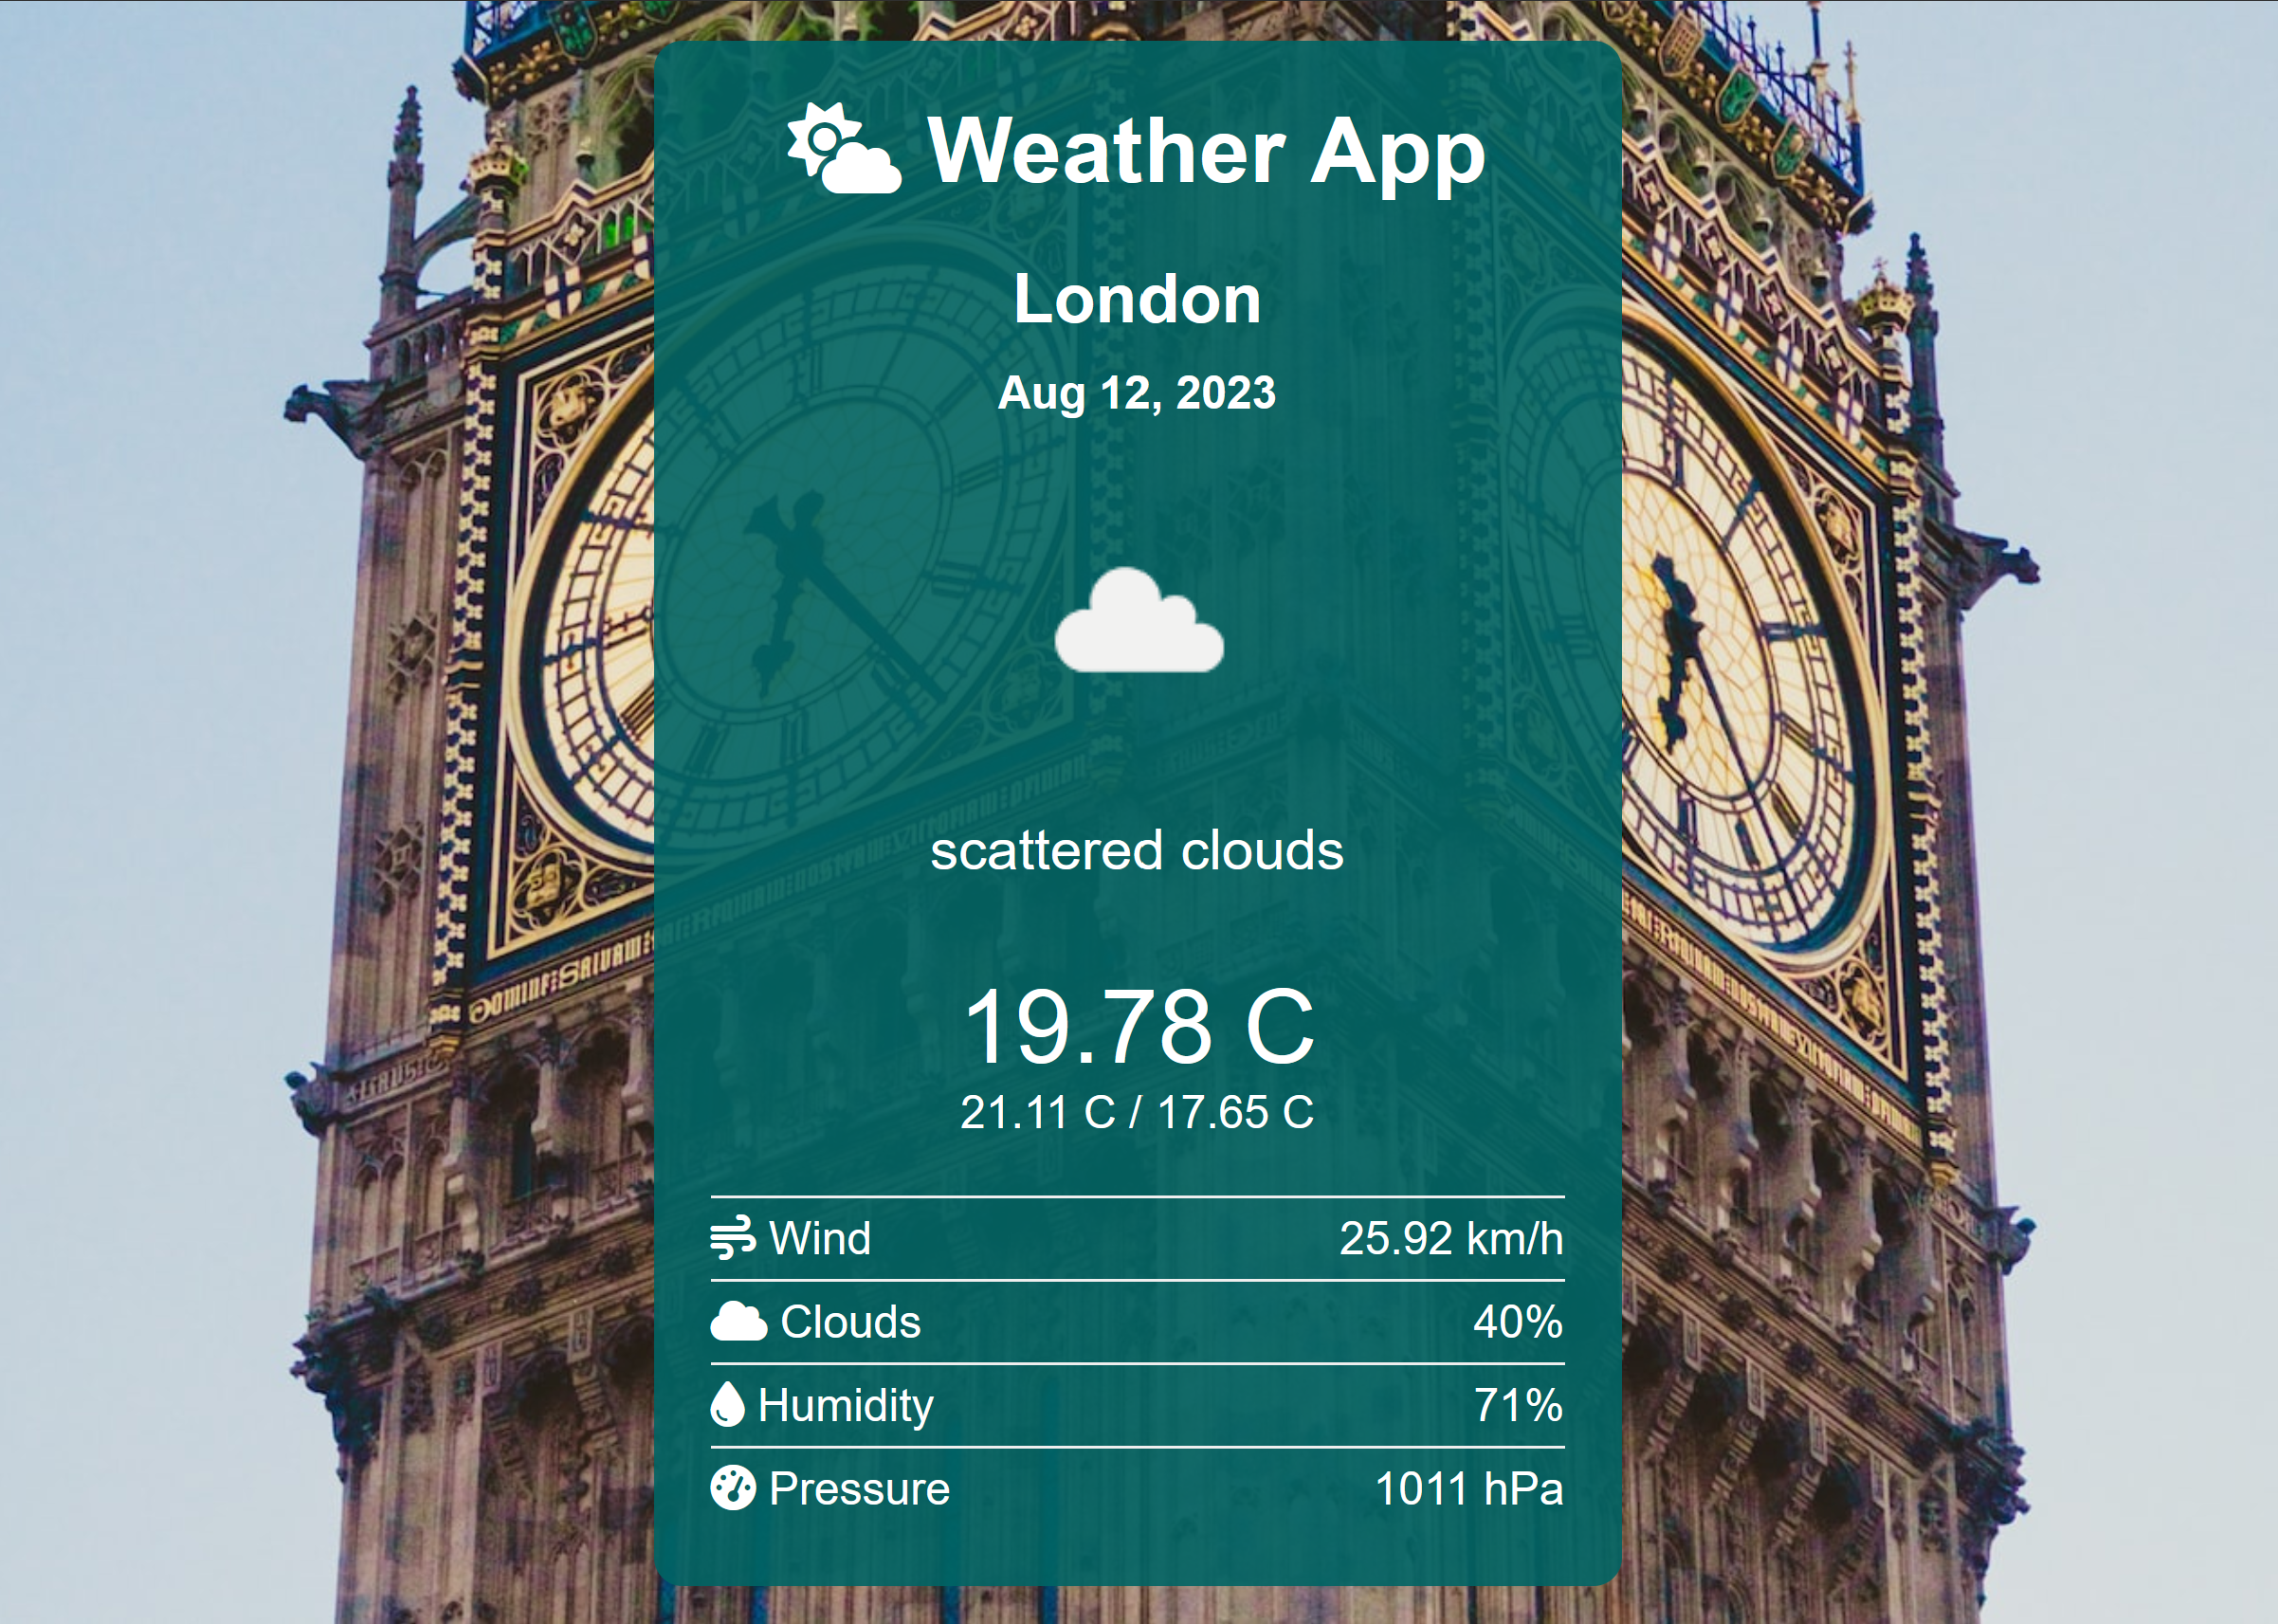
In this lesson, you will create a Weather Web App that pulls real-time weather data based on a location and displays it in an engaging and interactive manner. You will learn how to fetch and display weather data using APIs and jQuery. By the end of this lesson, you will have a fully functional Weather Web App.
To start, open CodePen and create a new pen. We will be using HTML, CSS, and JavaScript for this project.
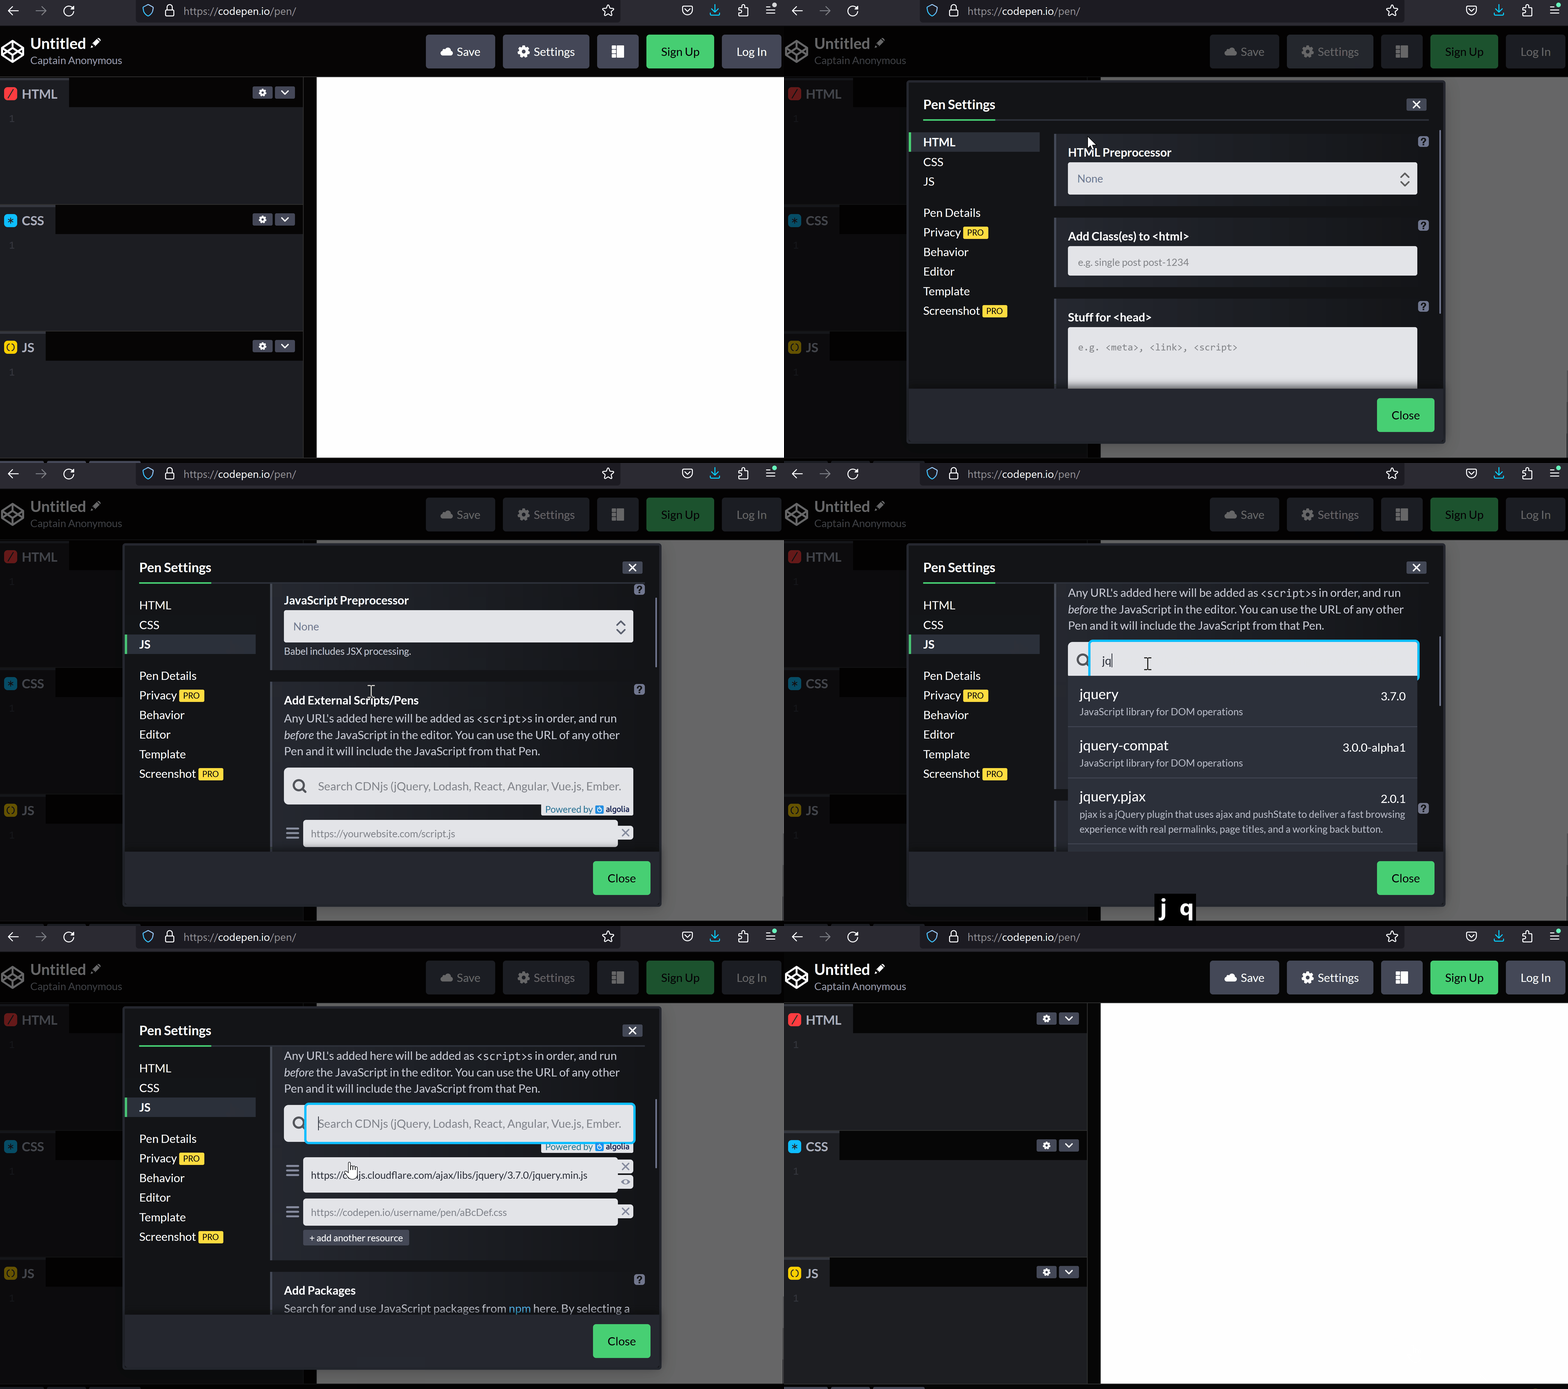
In this step, we will add the jQuery library to our project. jQuery is a popular JavaScript library that makes it easier to work with HTML documents, create animations, handle events, and perform various other tasks on a web page.
To add a JavaScript library to your CodePen project, follow these steps:
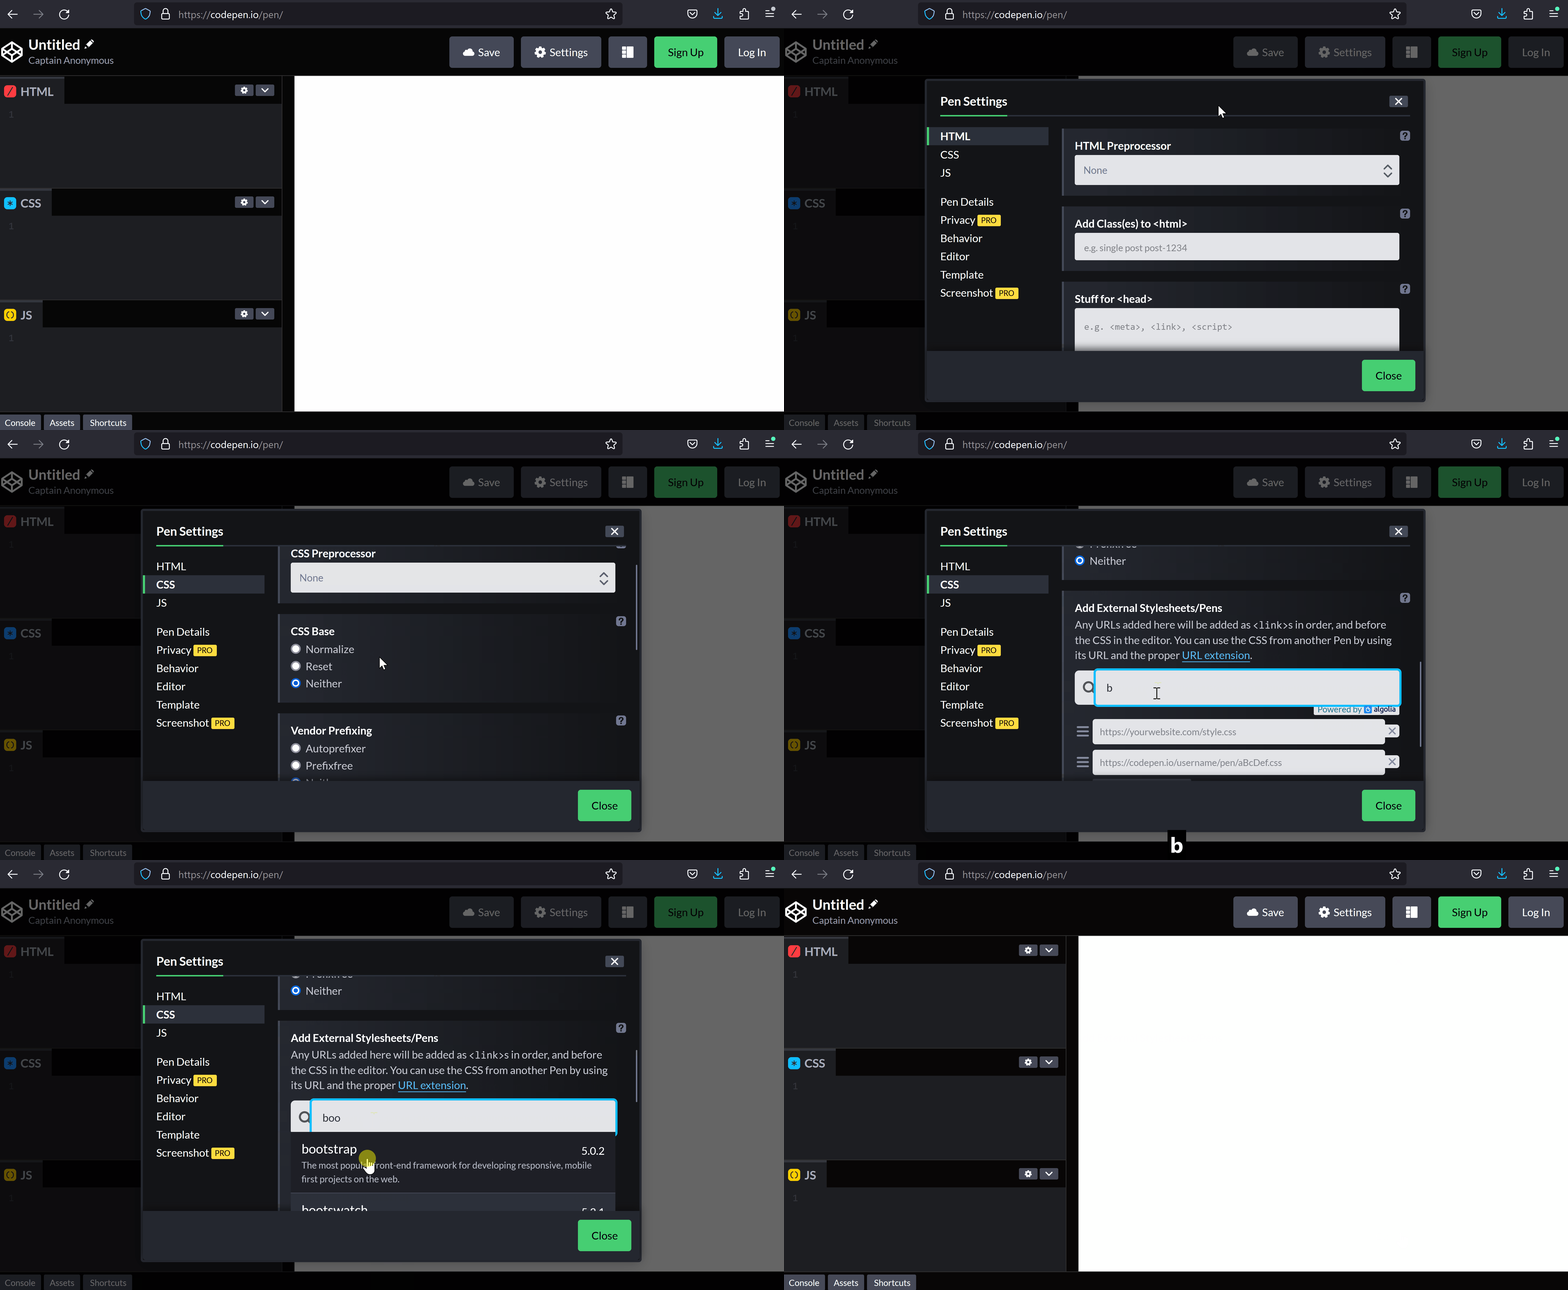
In this step, we will add Font-awesome to our project. Fontawesome is a library of icons that we can use to make our Weather Web App more visually appealing. To add Fontawesome, we need to include its stylesheet in our CodePen.
Once you add the Fontawesome stylesheet to your project, you can use Fontawesome icons in your HTML code by adding an <i> element with the appropriate class names. For example, to add a sun icon, you can use the following code:
<i class="fas fa-sun"></i>This will display
You can find more icons and their class names on the Fontawesome website.
To add a Stylesheet to your CodePen project, follow these steps:
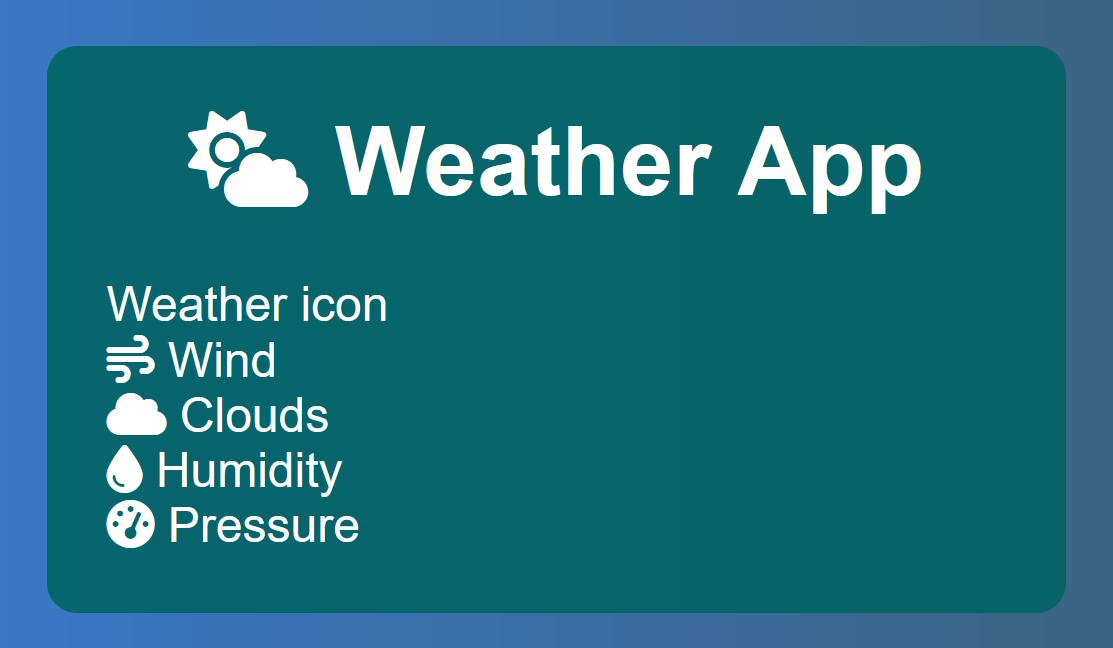
In this step, we will create the HTML structure for our Weather Web App. This structure will include various elements to display the weather data, such as the location, date, forecast, temperature, and other weather parameters like wind, clouds, humidity, and pressure. We will also add a background image of the location we are showing the weather for.
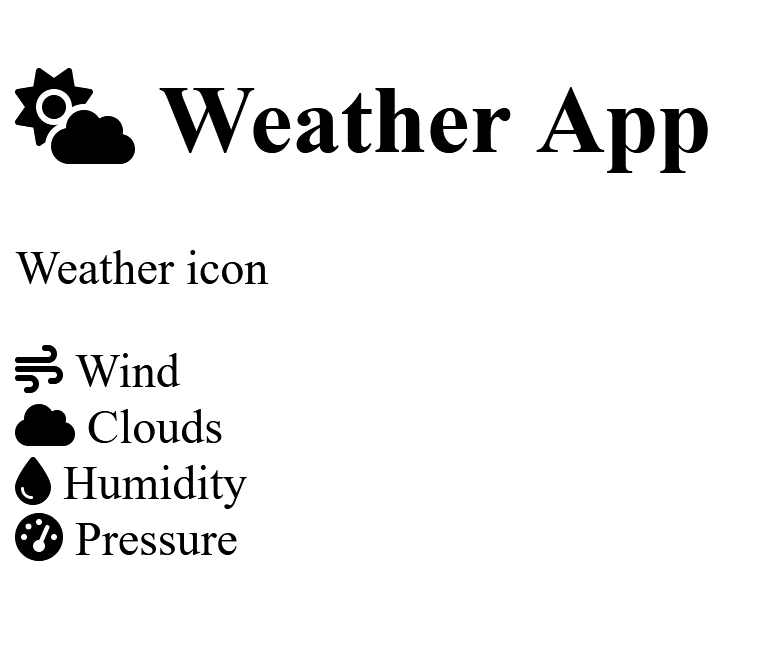
Add the following HTML code to the HTML section of your project:
<div id='bg-img'>
  <div id='wrapper'>
    <h1><i class="fas fa-cloud-sun"></i> Weather App</h1>
    <div id='location'>
      <h2 id='currentLocation'></h2>
      <h4 id='currentDate'></h4>
    </div>
    <div id='main-data'>
      <img src='' alt="Weather icon"/>
      <p id='forecast'></p>
      <p id='currentWeather'></p>
    </div>
    <div id='temp'>
      <p id='currentTemp'></p>
      <p id='high-low'></p>
    </div>
    <div id='parameters'>
      <div>
        <span><i class='fas fa-wind'></i> Wind</span>
        <span id='wind'></span>
      </div>
      <div>
        <span><i class='fas fa-cloud'></i> Clouds</span>
        <span id='cloud'></span>
      </div>
      <div>
        <span><i class='fas fa-tint'></i> Humidity</span>
        <span id='humidity'></span>
      </div>
      <div>
        <span><i class='fas fa-gauge-high'></i> Pressure</span>
        <span id='pressure'></span>
      </div>
    </div>
  </div>
</div>
Here's a brief explanation of the main HTML elements:
bg-img: This div will contain the background image of the location we are showing the weather for.wrapper: This div wraps all the content of our Weather Web App.location: This div displays the current location and date.main-data: This div contains the weather icon, forecast, and current weather description.temp: This div displays the current temperature and high-low temperatures.parameters: This div contains the weather parameters like wind, clouds, humidity, and pressure.In this step, we will add some CSS to style our Weather Web App. The provided CSS code will style the background, text, and layout of the web app. It will also create a responsive design that looks good on different devices.
Add the following code into the CSS section of your project:
body {
  font-family: Arial, sans-serif;
  color: #fff;
  margin: 0;
  padding: 0;
  background: #e0e0e0;
}

#bg-img {
  display: flex;
  align-items: center;
  justify-content: center;
  height: 100vh;
  background: linear-gradient(to right, #3a7bd5, #3a6073);
  background-size: cover;
  background-position: center;
}

#wrapper {
  background: rgba(0, 100, 100, 0.9);
  padding: 20px;
  border-radius: 10px;
  width: 300px;
}

h1, h2, h4, p {
  margin: 0;
  padding: 0;
  text-align: center;
}

h1 {
  margin-bottom: 20px;
}

h2 {
  font-size: 24px;
  margin-bottom: 10px;
}

h4 {
  font-size: 16px;
  margin-bottom: 20px;
}
Here's a brief explanation of what the CSS code does:
body: Sets the font, color, margin, padding, and background color for the entire page.#bg-img: Styles the background image container with a linear gradient, centers the content, and sets the height to 100% of the viewport height.#wrapper: Styles the main content wrapper with a semi-transparent teal background, padding, border-radius, and a fixed width.h1, h2, h4, p: Sets the margin, padding, and text alignment for the headings and paragraphs.h1: Adds a bottom margin to the main heading.h2: Sets the font size and bottom margin for the secondary heading.h4: Sets the font size, bottom margin, and color for the tertiary heading.