Look around our school for a moment. What small problem keeps annoying people, and could a simple built thing fix it?
Today we pick one real school problem from a short list, name who it is for, decide how we will know it works, and sketch a solution our group can build next.
Keep this light. Do not hand out materials yet. Put up one everyday school annoyance as a hook, for example books sliding off a display shelf, or rain wetting the seed trays. Ask: Who does that bother? What would “fixed” look like?
Before the lesson: print one set of the four problem cards per group (full card texts are in step 3). Print one Investigation Journal Design Brief page per group. Have clipboards, plain paper and rulers ready. Clear a wall or noticeboard space for finished Design Briefs at the end if you wish to display them later in the project.
Project arc: this lesson is Part 1 of define → build → test. Groups keep their Design Briefs for the next two sessions.
If we rush straight to cardboard, we might build something clever that still lets the markers hit the floor.
Before engineers build, they get three things clear. Who is it for and what do they need? How will we know it worked? And what is the plan on paper? We call those the user need, the success criteria, and the Design Brief.
Building without a clear need wastes time. Watch the board example, then tell me: who is the user, and name one check that would prove the design works.
Board stays short. The full table is for you only.
| Concept | Why it matters | Example |
|---|---|---|
| User need — what the person who will use the design really needs it to do, said in plain words | If you skip the user, you build something clever that nobody wanted | The seed trays get wet in the rain, so the caretaker needs a cover that keeps the trays dry but still lets light in |
| Success criteria — clear checks that tell you whether the finished design works | Criteria turn “it looks nice” into something you can test fairly next time | The cover must stay on in a light breeze, fit the tray, and keep the soil dry after a water-spray test |
| Design Brief — a plan that names the problem, the user, the success criteria, and a labelled sketch of the idea to build | A clear plan is how engineers communicate so someone else (or your future self) can build from it | A group's Design Brief shows a cardboard book stand with labelled folds, sizes in centimetres, and the materials they will use |
Worked model pacing (about 6 minutes total): spend roughly 3–4 minutes on the live think-aloud and a rough board sketch. Protect the last minute for the whole-class call-out (user + one criterion), even if the sketch stays rough. The three terms must be anchored before groups handle the cards.
Worked model (you do this live): use a problem that is not on the four pupil cards, so every group still has to define need, criteria and sketch themselves. Good board example: whiteboard markers keep rolling off the ledge onto the floor. Think aloud: If we jump straight to cardboard without naming the need, we might make a fancy box that still lets markers roll away. Then: I wonder who is bothered? (the teacher and anyone writing on the board). I think the need is to stop markers rolling off the ledge without blocking the writing surface. Write three success criteria on the board: holds at least three markers, stays put when the board is wiped, lets you lift a marker out with one hand. Sketch a simple shallow tray or rail with a lip and a label “cardboard or lolly-stick rail”, sizes roughly in cm. Immediately ask the class aloud: Who is the user? Name one success criterion you can see on the board. Say: Next we will build from a plan like this, not from a vague idea in our heads.
Misconception to head off: pupils jump straight to materials (“we’ll use cardboard”) before naming the need. Gently push them back: Who is it for, and what must it do?
Nature of STEM: defining and refining the problem is the start of every engineering project, not a bolt-on before the “real” making.
In your group, read the four problem cards. Pick the problem your group actually cares about fixing around our school.
On scrap paper first, write: who is bothered, what they need, and three success criteria you could actually test. Be ready to say your choice in one sentence.
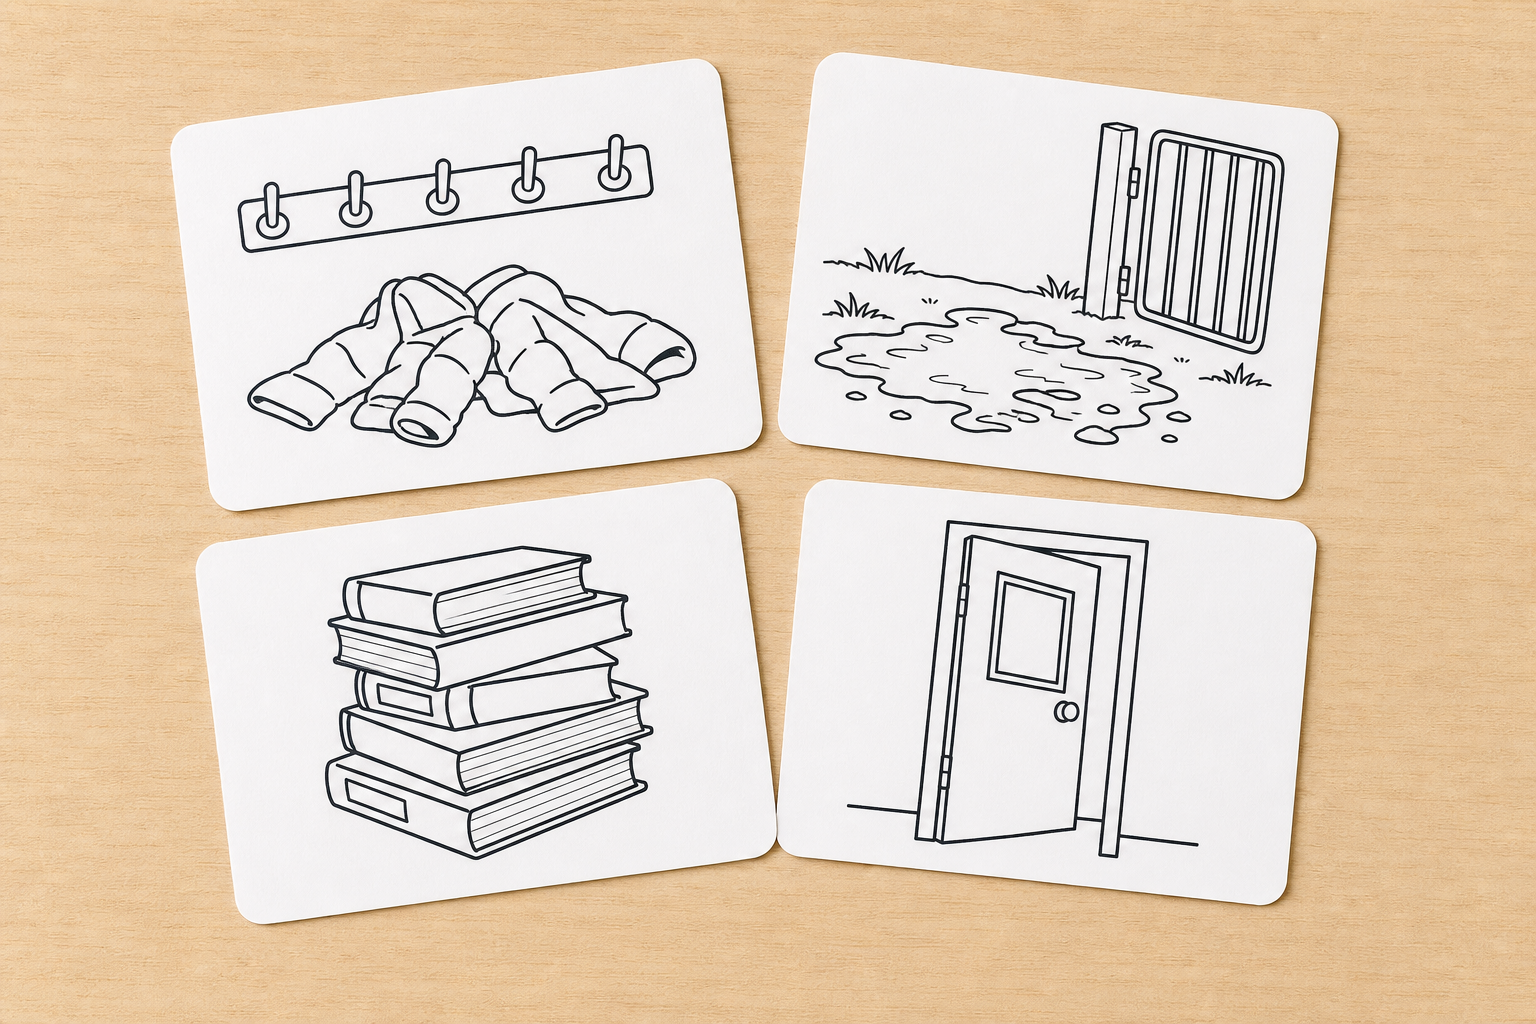
Print one set of the four problem cards per group. The full card texts below are what groups read; copy them onto the printable sheet exactly.
Card A — Seed-tray cover: Rain and wind wet the seed trays outside. The caretaker (or school gardener) needs a small cover that keeps the rain off the trays but still lets light and some air through. Your build must use only the junk-modelling kit next time.
Card B — Ball barrier for the flowerbed: Balls keep rolling from the yard into the flowerbed and crushing plants. Yard supervisors and the gardening group need a low barrier that stops a rolling ball but is safe for children to walk past. Your build must use only the junk-modelling kit next time.
Card C — Book display stand: Library or classroom books slide flat and the covers cannot be seen. Readers and the teacher need a stand or holder that shows at least two books upright and does not tip when a book is lifted out. Your build must use only the junk-modelling kit next time.
Card D — Classroom draught-stopper: Cold air comes under the classroom door on windy days. The class needs a draught-stopper that fits the door, moves with the door or stays put safely, and cuts the draught you can feel with your hand. Your build must use only the junk-modelling kit next time.
Teacher extension swap: if your school has no outdoor seed trays, swap Card A for a bug-hotel cover with the same constraints (rain off, light and air through, junk kit only).
Give each group one card set and 1–2 minutes to choose. Then 8–9 minutes to pin down user and three criteria. Circulate with these prompts: Who uses it every day? What would count as “it worked”? Could we test that with water, a ball, a book, or a fan?
If a group invents a fifth problem, steer them back to the list so every group can share the same kit and the same style of test later.
Optional quick check: one pair from a group may walk (with you or an SNA) to measure a door width or look at the flowerbed edge for 2 minutes, then return. Keep the rest of the class working from the cards so the room stays manageable.
Differentiation: offer a sentence frame on the board: Our user is… They need… We will know it works if… Confident groups add a constraint (max height, must pack away, must use no tape on paintwork).
You now get one Design Brief page. First, copy your rough notes onto it: the problem, the user, and your three success criteria.
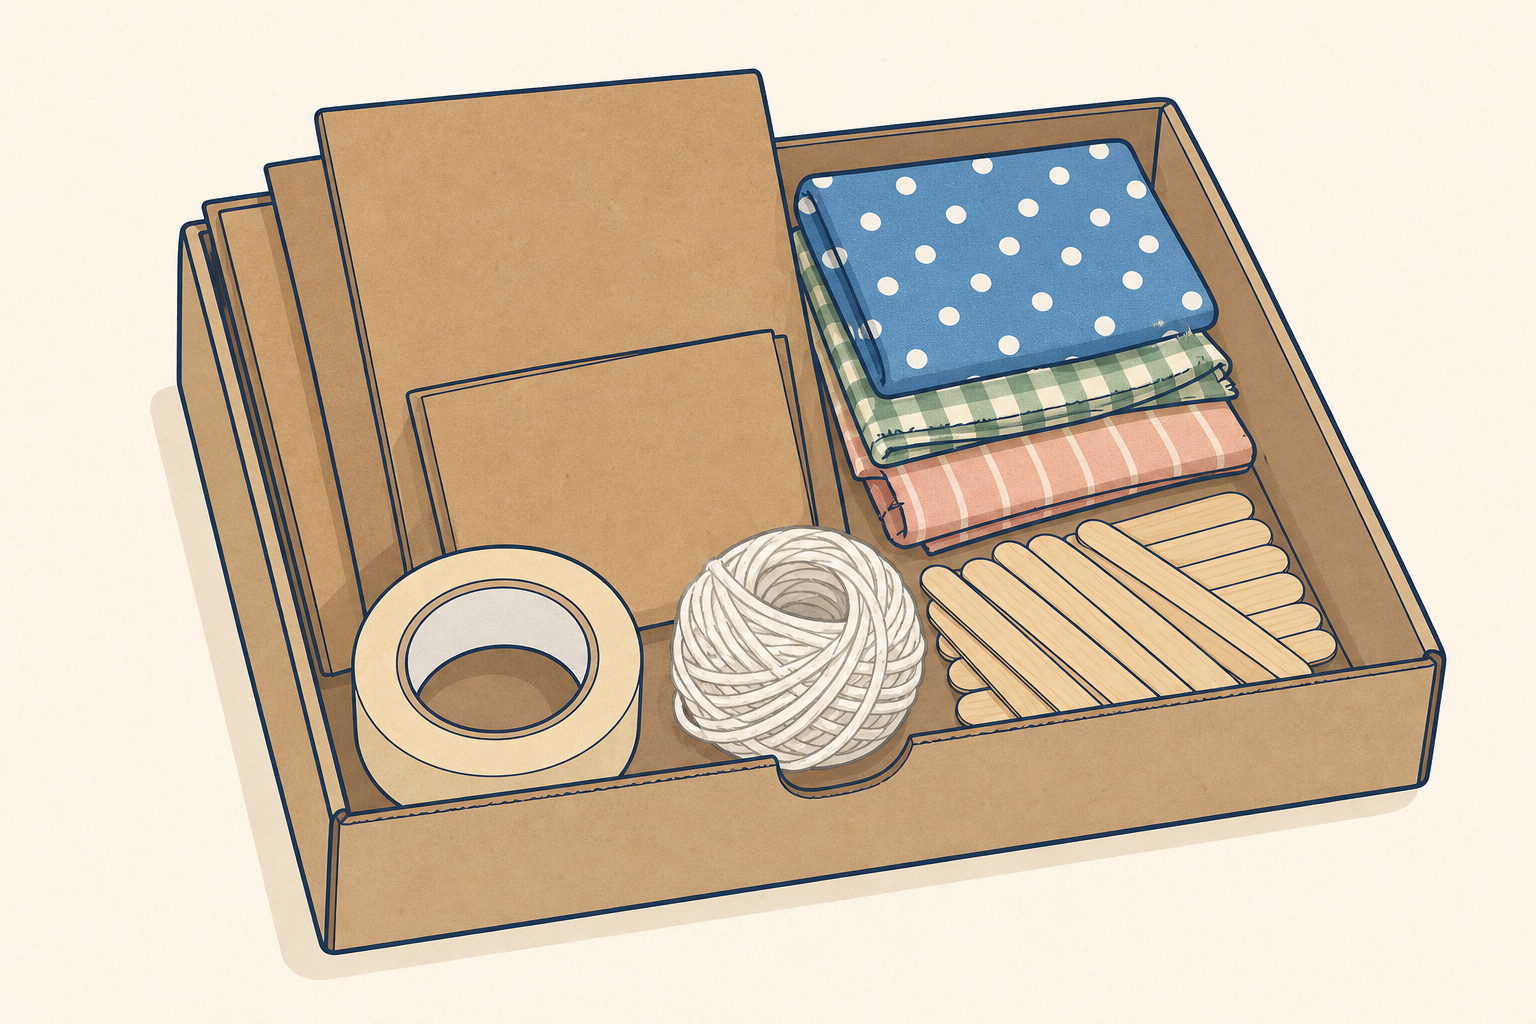
Next, plan only with the shared junk-modelling kit you will get next time: cardboard, tape, string, lolly sticks and fabric scraps.
Then sketch one clear solution. Label the parts, the kit materials you expect to use, and at least one size in centimetres. Estimated sizes are fine if you label them clearly (for example “about 80 cm, door-width guess”).
This sketch is your group’s promise for next time, so make it kind to the builder. Check that another group, or your future selves next week, could start building from it.
Hand out one Investigation Journal Design Brief page per group as this step opens. This is the heart of the lesson. Pupils work from the junk-modelling kit they will actually get next time: cardboard, tape, string, lolly sticks or similar classroom scraps. Do not promise tools or materials you cannot provide.
Coach the board beats in order so groups are not buried under every requirement at once: (1) transfer problem, user and three criteria from scrap notes; (2) stay inside the junk kit; (3) sketch with labels, materials and one size; (4) clarity check for a builder next week.
If groups cannot leave the room to measure, give one shared class measurement for common features (for example a typical classroom door width, or the depth of the book shelf) and allow estimated sizes with a unit label such as “about 80 cm, door-width guess”.
Look-fors on a strong brief:
Coaching phrases: What joins the parts? Where is the base? What fails first if we tip it? If a design is a fantasy castle, pull it back to the criteria: Does this still solve the problem on your card?
Differentiation: some pupils draw first and label second; others list parts then draw. Pair a confident sketcher with a strong ideas person. You may scribe labels for a pupil who struggles with writing, while they direct the drawing.
Remind groups their Design Brief travels with them into the build and the test sessions. No digital save is needed. Building and testing happen in later lessons of this project, not today.
Swap Design Briefs with another group for two minutes. Readers only: can you tell the problem, the user, and how success will be judged? Tell the designers one strength and one question.
Designers: use the feedback to tighten one criterion or one label on your sketch. A clear plan is a kindness to the builders next time, so make that change stick.
Run as structured pairs of groups, not a free mill. Use hard timing so every group edits something:
Signal each change of beat with a clear call so the edit pass is not lost.
Focus question: is the plan clear enough to build, and are the criteria fair to test?
Listen for vague criteria such as “it should be good” or “it should look nice”. Push for observable checks: stays upright with two books, keeps paper dry under a light water spray, stops a tennis ball on a gentle roll.
Fold the whole class in when one pair shares: Would you know how to start building from that sketch? What measurement is still missing?
You're previewing this lesson. Get full access to this lesson and hundreds more — each one ready to teach, with interactive activities, printable resources and pupil progress tracking built in.