A design can look clever on paper and still fail in real Irish weather. What if your school-garden shelter soaks through the first time it rains?
Today you will test materials first, then choose which ones earn a place in a build. Hands up: which matters more for a shelter roof, looking smart, or staying dry?
Keep this light. Hold up one soft fabric scrap and one plastic sheet if you have them ready, but do not run a full test yet. The point is curiosity: a pretty material can still be the wrong material.
Key question: What would make a material right for a job?
Link gently to what pupils already know about materials and properties without claiming a dated earlier lesson. Anchor the brief once to school-garden or yard seed trays so the job feels local and real.
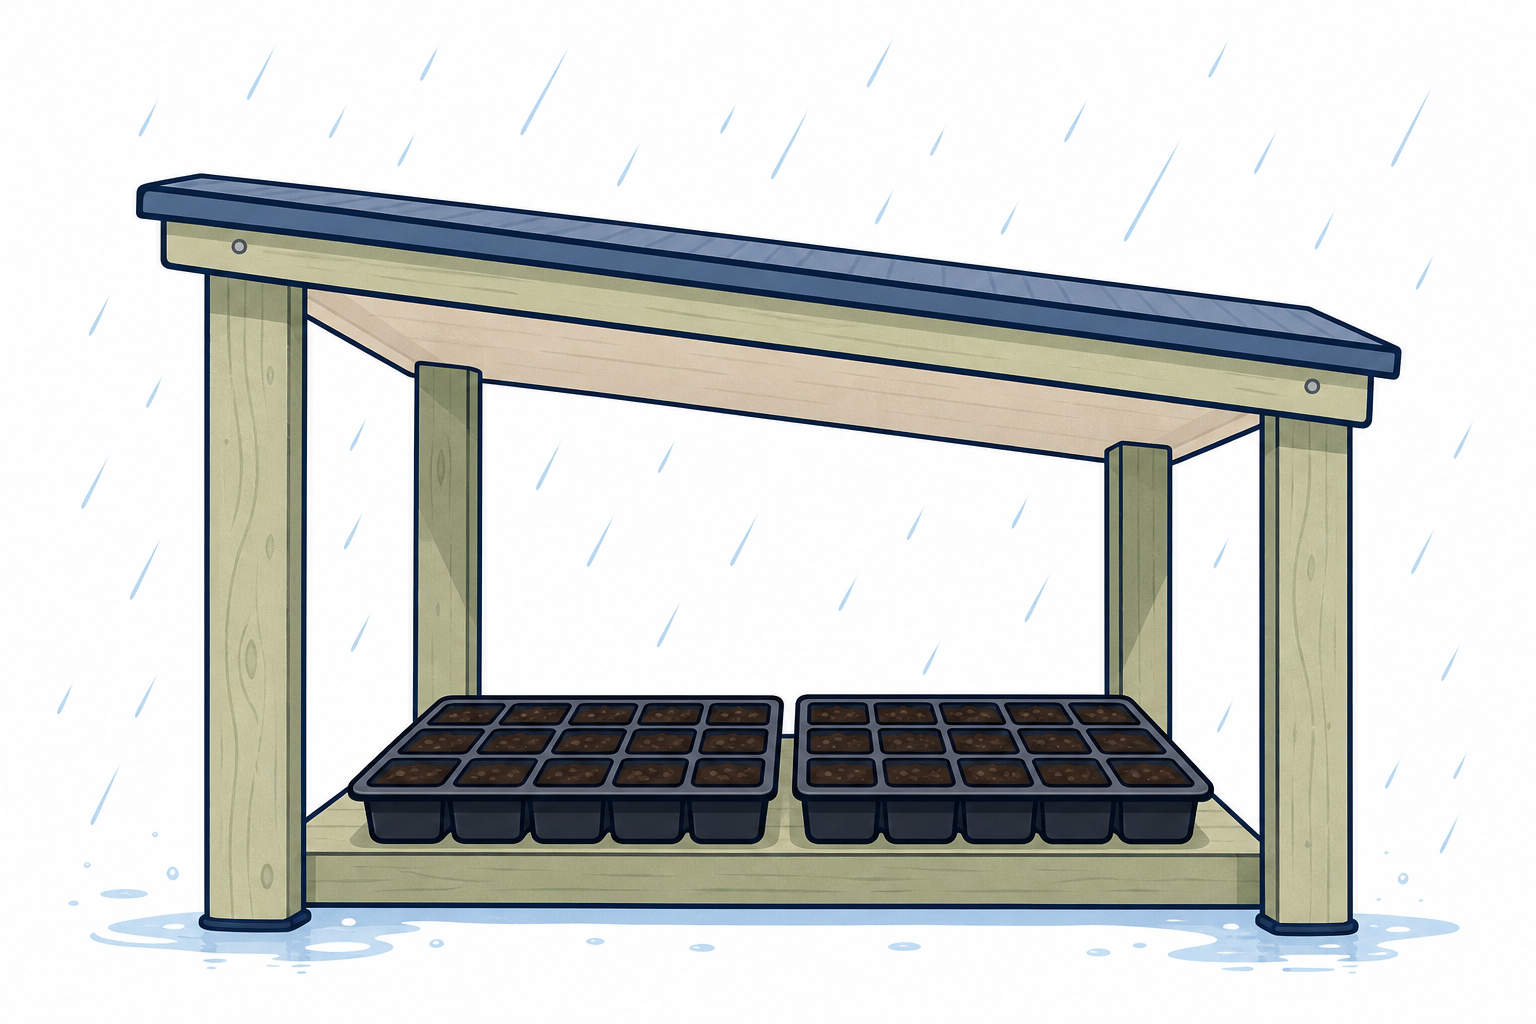
Our brief: build a small outdoor shelter for school-garden seed trays. It must stay dry in Irish rain, stand steady, and use materials we can cut and join.
That job description is our design brief. The features of a material we can test are its properties. When we pick a material, we must justify the choice with what our tests showed.
From the brief, which properties does this shelter need?
Project only the short board version above. Use the full table yourself.
| Concept | Why it matters | Example |
|---|---|---|
| Property — a feature of a material you can test, such as waterproof, strong, flexible or stiff | The right property keeps a build working in real conditions, not just on paper | A plastic sheet keeps rain off seed trays; a soft cloth soaks and lets water through |
| Design brief — a short job description that says what must be built and what success looks like | The brief tells you which properties matter so you do not choose materials at random | Shelter for school-garden seed trays: waterproof roof, stable sides, materials you can cut and join |
| Justify — give a clear reason for a choice using what your tests showed | Engineers explain choices with evidence so others can trust the design | "We chose card for the base because it held more weight before bending than foil did" |
Invite the class to name properties from the brief (waterproof / stays dry, strong or stiff enough to stand, easy to cut and join). Do not lock the three test methods yet — that happens in the next step, where you map their property ideas onto water, bend and load tests.
Nature of STEM: engineers match materials to the job. Irish rain, wind and schoolyard wear make property tests practical, not optional.
Misconception to head off: pupils may pick the material they like the look of. Push them back to the brief: which property does the job need?
Worked example to model aloud later if needed: "I wonder which roof material keeps water out. I predict plastic will win because water beads on it. I drip the same three drops on plastic and on fabric. I observe that plastic holds no wet patch and fabric darkens. I think plastic is the better roof choice for this brief."
The brief needs materials that stay dry, hold their shape and carry a load. So we will run three quick tests on each sample: a water test, a bend test, and a load test.
We will change only the material. What must stay the same so the comparison is fair?
Before you touch the tray, say which material you think will stay driest, and which will hold a load best. Note that prediction on your Investigation Journal page so you can check it against your results later.
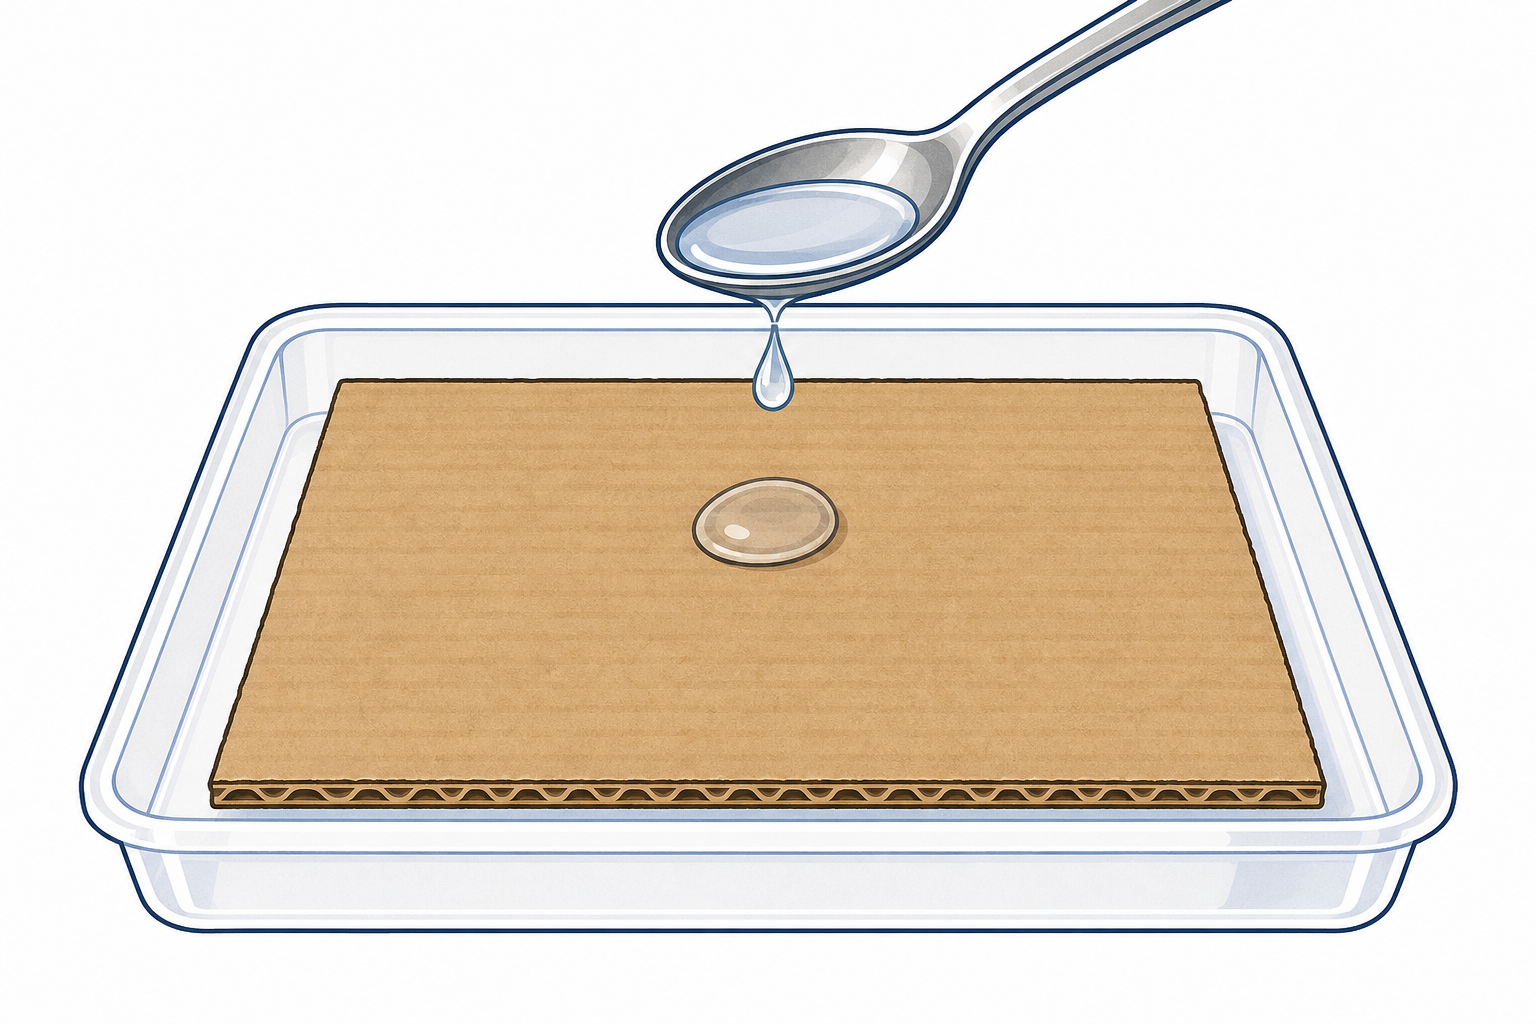
Draw out the class property ideas from Step 2, then confirm the matching tests: stay dry → water test; hold shape / stand steady → bend test and load test. The class decision in this step is the fair-test controls, not inventing new tests from scratch.
Change: the material sample. Measure: water result (sits / soaks / runs through), bend result (bends easily / holds shape / cracks), strength under load (how many washers before it sags or fails). Keep the same: sample size as near as possible, same three drops or one level teaspoon every time (drip method only — do not mix dripping and dipping), same washers, same support gap for the load test (books about 6 cm apart), same water-test setup (sample held or rested over the tray so water that runs through falls into the tray).
Predictions: keep these oral-plus-a-quick-note. Pupils say which material they think will win on water and on load, and jot that on the Investigation Journal page. Do not invent a separate plan sheet or extra boxes. Fair-test controls are agreed as a class discussion, not filled as a planner form.
Key questions: If one group uses a huge sheet and another uses a scrap, is that fair? Why do we write the result before we choose?
This is guided Stage-4 work: the class agrees the controls; groups still run the tests and make the material choices.
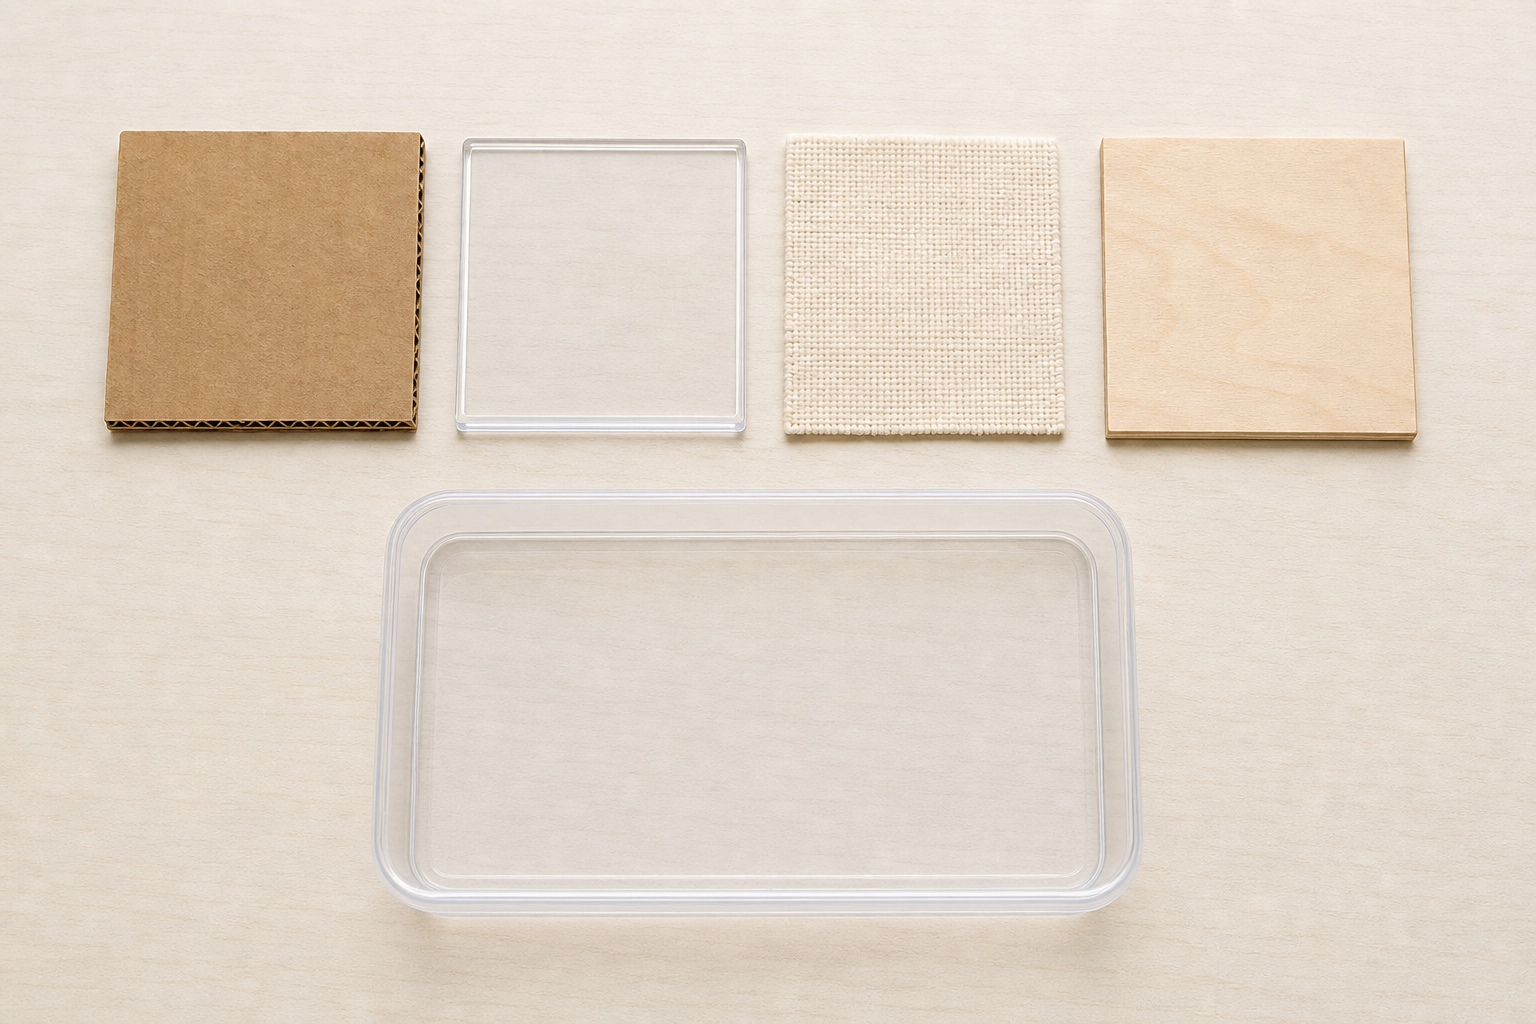
In your group, test the four samples on your tray. Work through one test at a time. Finish that test on every sample before you start the next test.
Write every result on your Investigation Journal page as you go. Engineers do this careful table work so the real build does not collapse in the rain. Your notes are the decision, not decoration.
First, the water test on every sample: Hold or rest the sample over the shallow tray. Drip the same three drops (or one level teaspoon) onto the top. Watch the tray underneath. Does water sit on top, soak in, or run through into the tray? Record the water result for each sample.
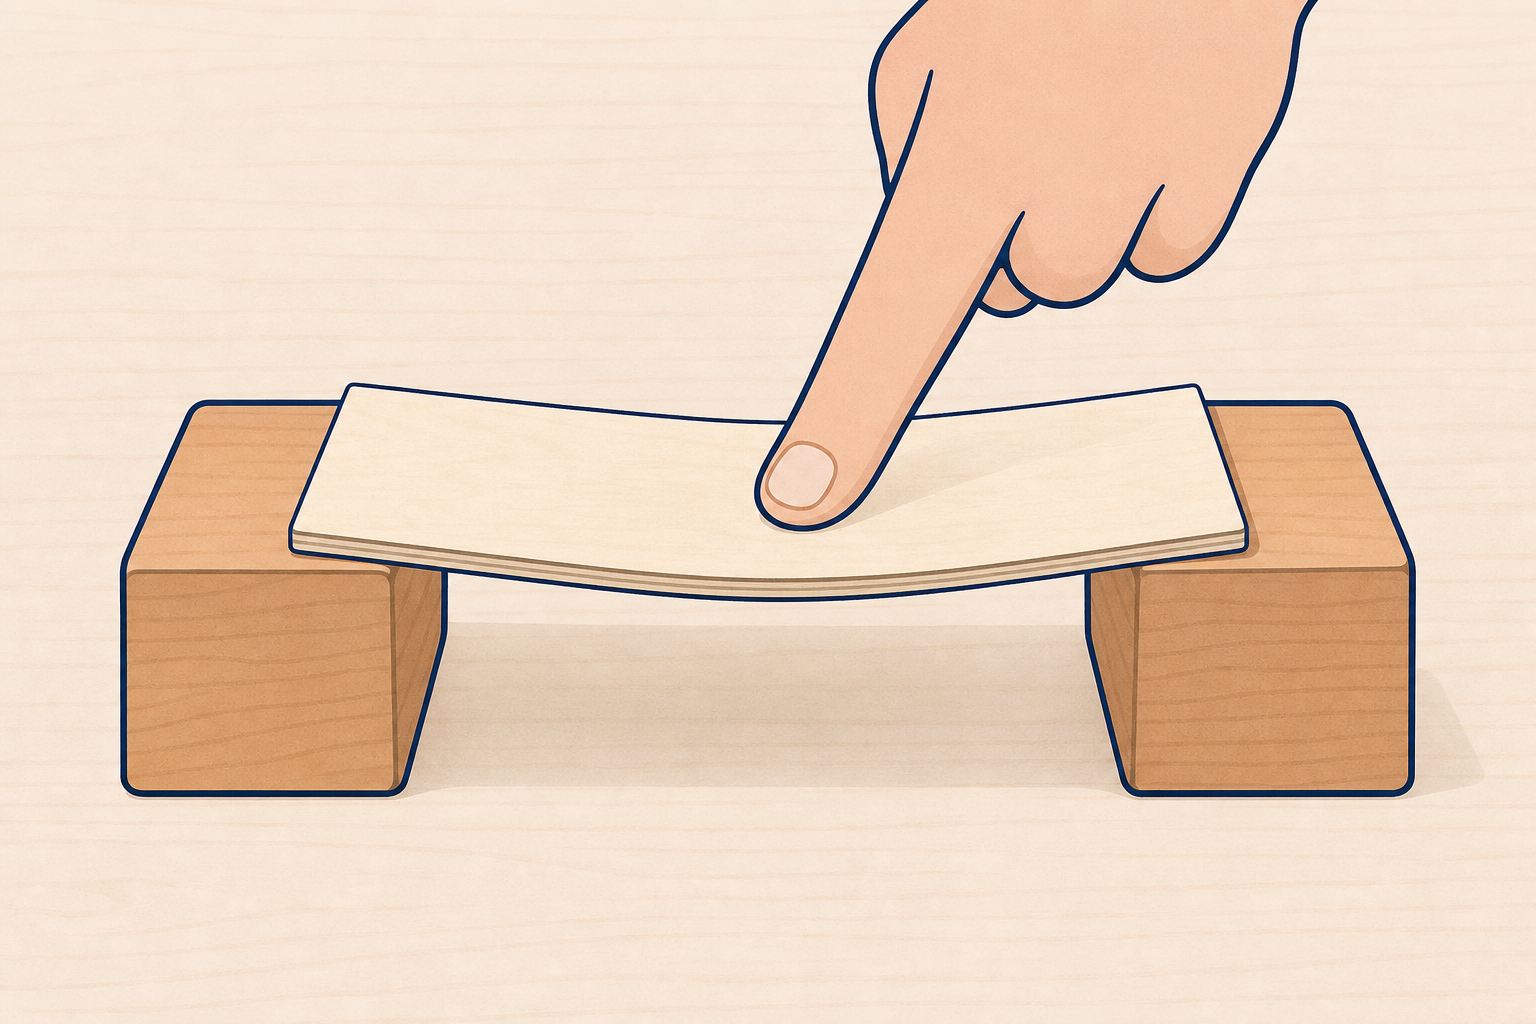
Next, the bend test on every sample: Gently flex the sample. Does it bend easily, hold its shape, or crack? Record the bend result for each sample.
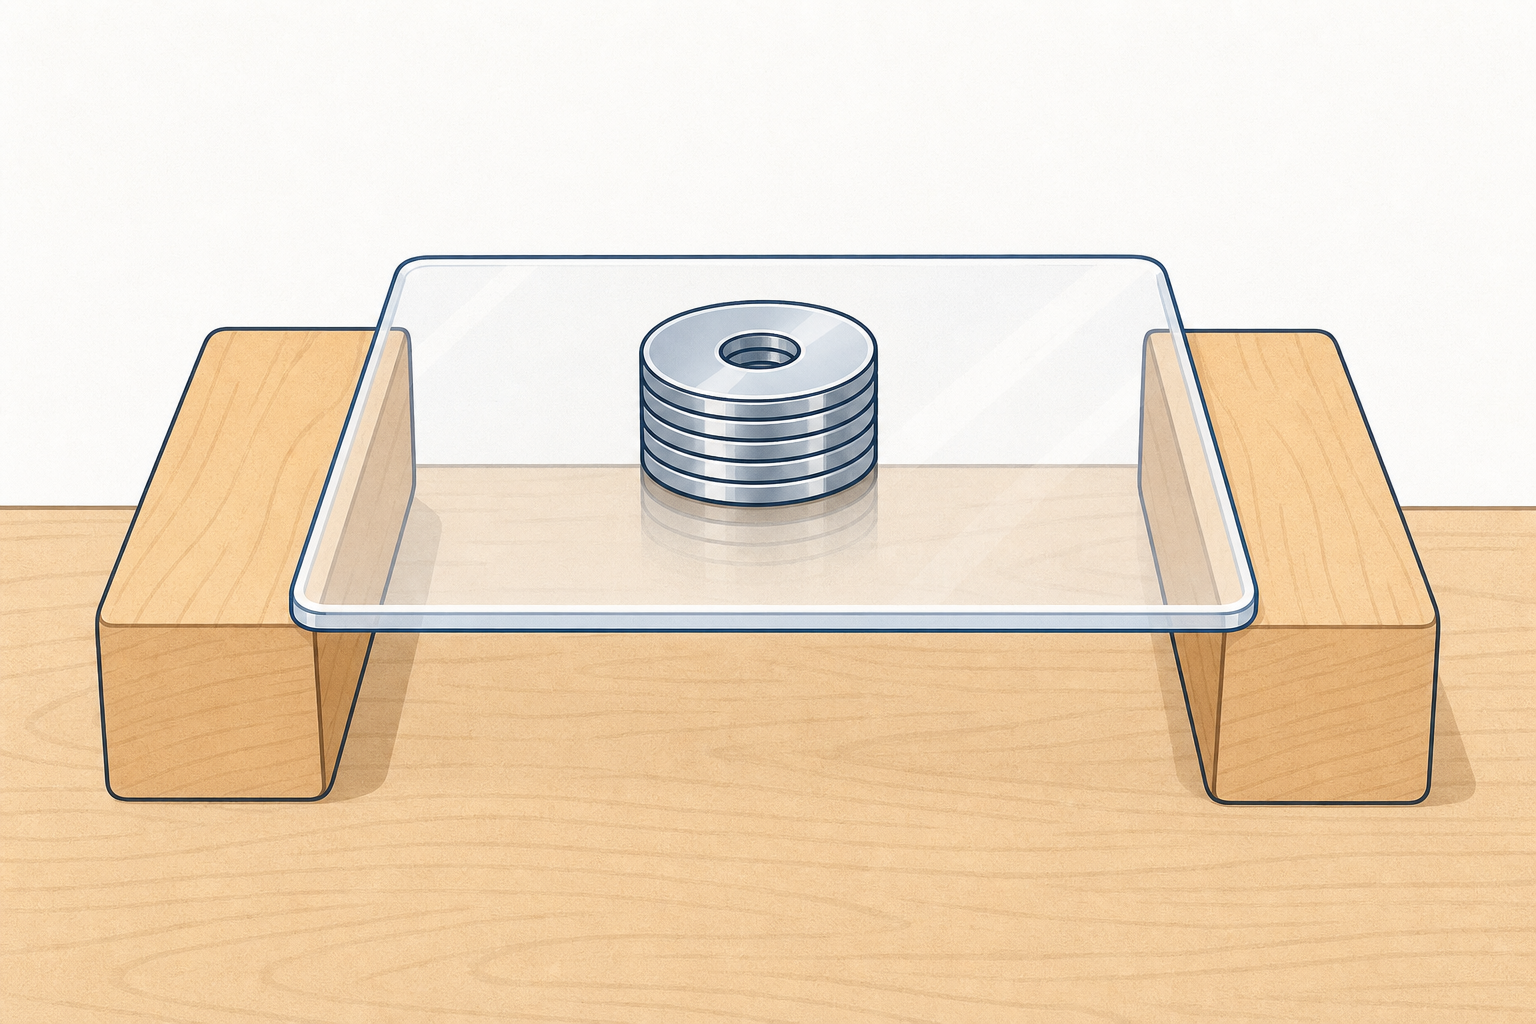
Last, the load test on every sample: Rest the sample across two books set the same small gap apart (about 6 cm, so each end of the sample sits on a book). Add washers one at a time in the middle. How many before it sags a lot or fails? Record how many washers each sample held.
Careful results on fewer samples beat half-finished rows. If time is tight, finish water and load on at least three materials well.
Group setup: 3–4 pupils per tray. One pupil drips or loads, one watches the result, one records on the Investigation Journal page. Swap roles so everyone handles materials.
Recording destination (same for every group): all water, bend and load results go on the Investigation Journal page during this step. That is the evidence sheet for Step 5 choices and the share. Do not treat the on-screen results table as a separate place to store answers; use it only to model the columns if helpful, then send pupils straight back to the journal page.
Default sample set (four): plastic sheet, aluminium foil, card, cotton fabric. Paper is optional extension only — do not put it on every tray as the main path. Five samples through three full tests will overrun a typical mixed 5th Class in 20 minutes.
Water-test setup (same for every group): sample is held or rested over the shallow tray (not flat on the table alone). Drip three drops or one level teaspoon onto the upper face only. Observe sits on top / soaks in (darkens or softens) / runs through into the tray. Drip method only — do not offer dipping as an equal option.
Load-test setup (same for every group): set the two hardback books about 6 cm apart edge to edge so a 10 cm sample bridges the gap with a little resting on each book. Rest the sample across both books. Add washers one at a time in the middle only. Keep that same gap for every sample and every group. If a sample is slightly short, reduce the gap together as a class and restate the new shared gap; do not let groups invent their own spans.
Board pacing: reveal one test method at a time (water, then bend, then load) rather than leaving all three procedures up while trays are busy. Call the order aloud: water all → bend all → load all.
Expected pattern (typical classroom samples): plastic sheet or foil often wins waterproof; card may hold shape better than soft fabric; fabric often soaks; thin foil may tear under load sooner than card. Real results vary — treat unexpected results as useful data.
Teaching tips:
Differentiation: less confident groups test three materials only (still water then bend then load). Confident groups who finish early may add the paper sample or a quick join note ("easy to join with tape").
Safety: no tasting; mind wet floors; keep washers off the floor trip zone.
Stay on the same Investigation Journal page where you wrote your test results in the last step.
Finish any result rows you still need. Then choose materials for the shelter: one for the roof, one for the sides or base, and one you would not use. For each choice, write a short why that uses the test evidence already on your page.
Pupils stay on the same Investigation Journal page they filled during Step 4. Results already written there are the evidence base. Remind them to complete any missing result cells first, then add roof / side-or-base / reject choices with a short evidence why. Do not invent extra boxes, rename the journal page, or ask them to copy results from somewhere else. This beat stays in the lesson — do not set it as homework, or the share will have nothing solid to stand on.
Same-lesson fallback if testing ran long (reduce scope on this same page only): every group must still leave this step with (1) water results written for the materials they tested, (2) at least one other result column started, (3) one roof choice with a short evidence why, and (4) one rejected material with a reason. That is enough for the share. Full side/base justifications can finish after the share if needed. The fallback never means rewriting missing results onto a different sheet.
Look-fors:
If a group chooses a soft fabric roof, ask them to re-read their water results rather than telling them they are wrong.
You're previewing this lesson. Get full access to this lesson and hundreds more — each one ready to teach, with interactive activities, printable resources and pupil progress tracking built in.