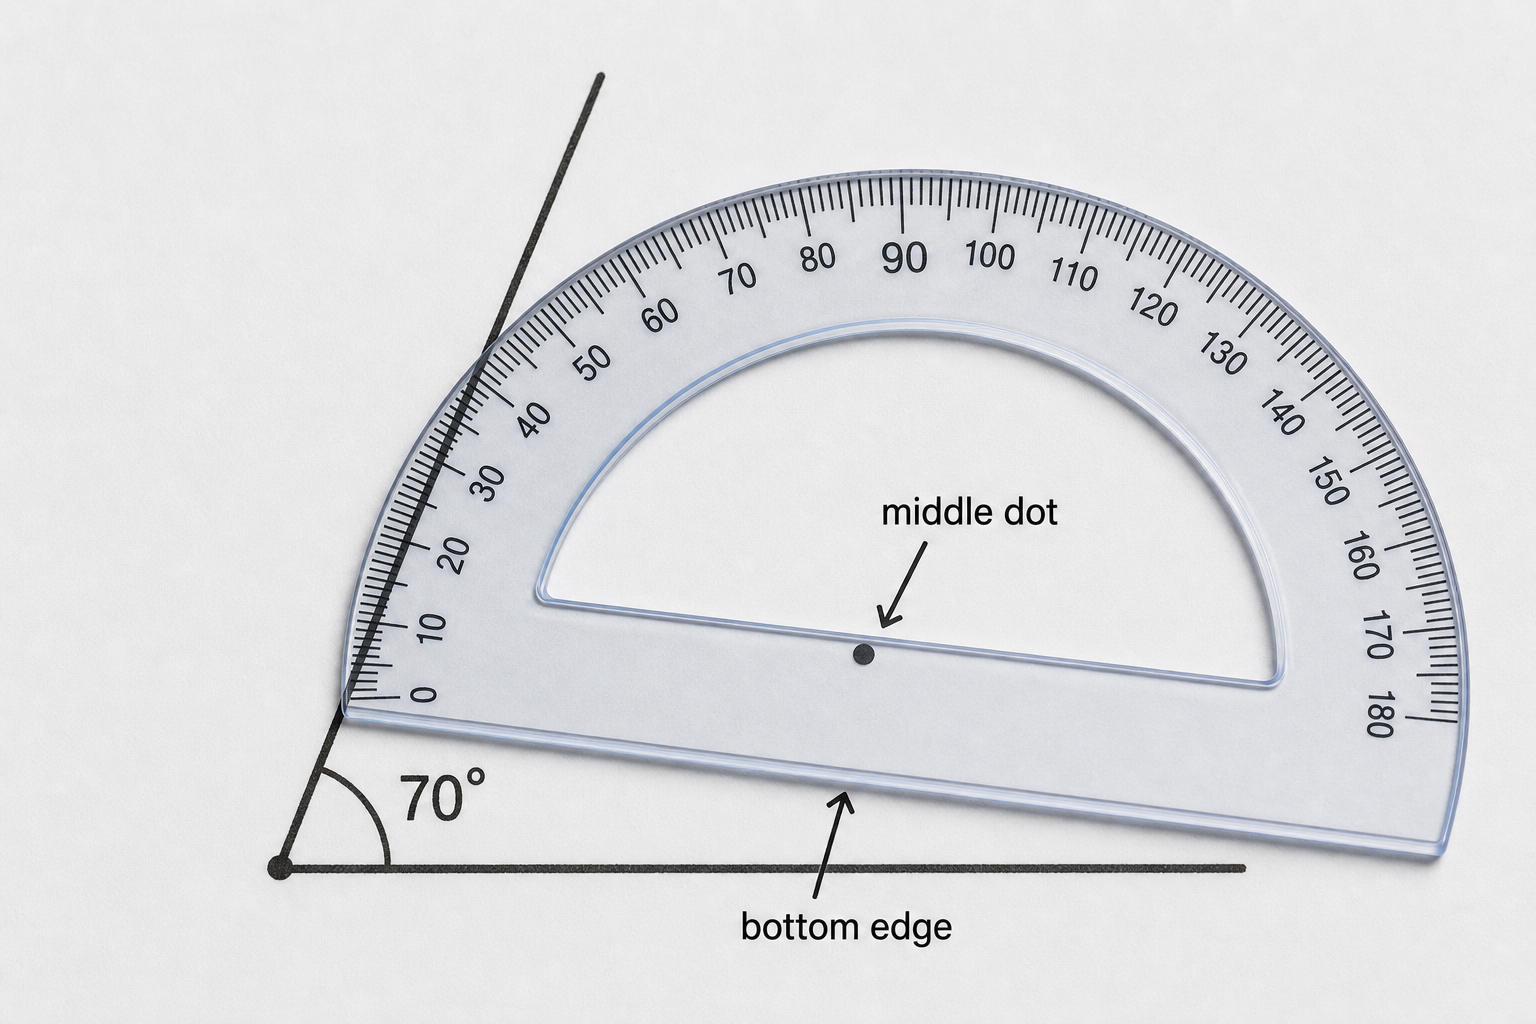
Here is an angle with a protractor laid on top of it. Just by looking, does this look right to you, or does something seem off?
Two things to check with your eyes. The middle dot of the protractor should sit right where the two arms meet, at the corner. The straight bottom edge of the protractor should lie flat along one of the arms. Is each of those in the right place here?
Look at the protractor already placed on each angle and the measure shown. Notice which number ring starts at zero on the baseline arm, that is the ring we follow. Notice the two angles on the last one and how they make a full turn together.
We measure on the board together now. One pupil comes up and reads the angle on the board's protractor aloud. Everyone else: keep your own protractor out at your desk, estimate the size silently in your head first, then get ready to agree or to say what you would change.
For this round the angle stays between 0° and 180°, so each one is acute, right or obtuse. Estimate the size first — your estimate tells you which ring to trust.
Take out your 'Measure the Angles' practice sheet. With your own protractor, measure each of the three angles on the sheet and write its size in degrees beside it. Then mark each one as acute, right or obtuse.
Today we work through four angles together, each one a step harder. We read the size on the board's protractor and check before moving on. At your desk, place your own protractor on the same angle and measure it too.
How does estimating the size of an angle first stop us from reading the wrong scale on the protractor?
Next we turn the skill around: instead of reading an angle, you will construct your own exact angles with the protractor.
You're previewing this lesson. Get full access to this lesson and hundreds more — each one ready to teach, with interactive activities, printable resources and pupil progress tracking built in.