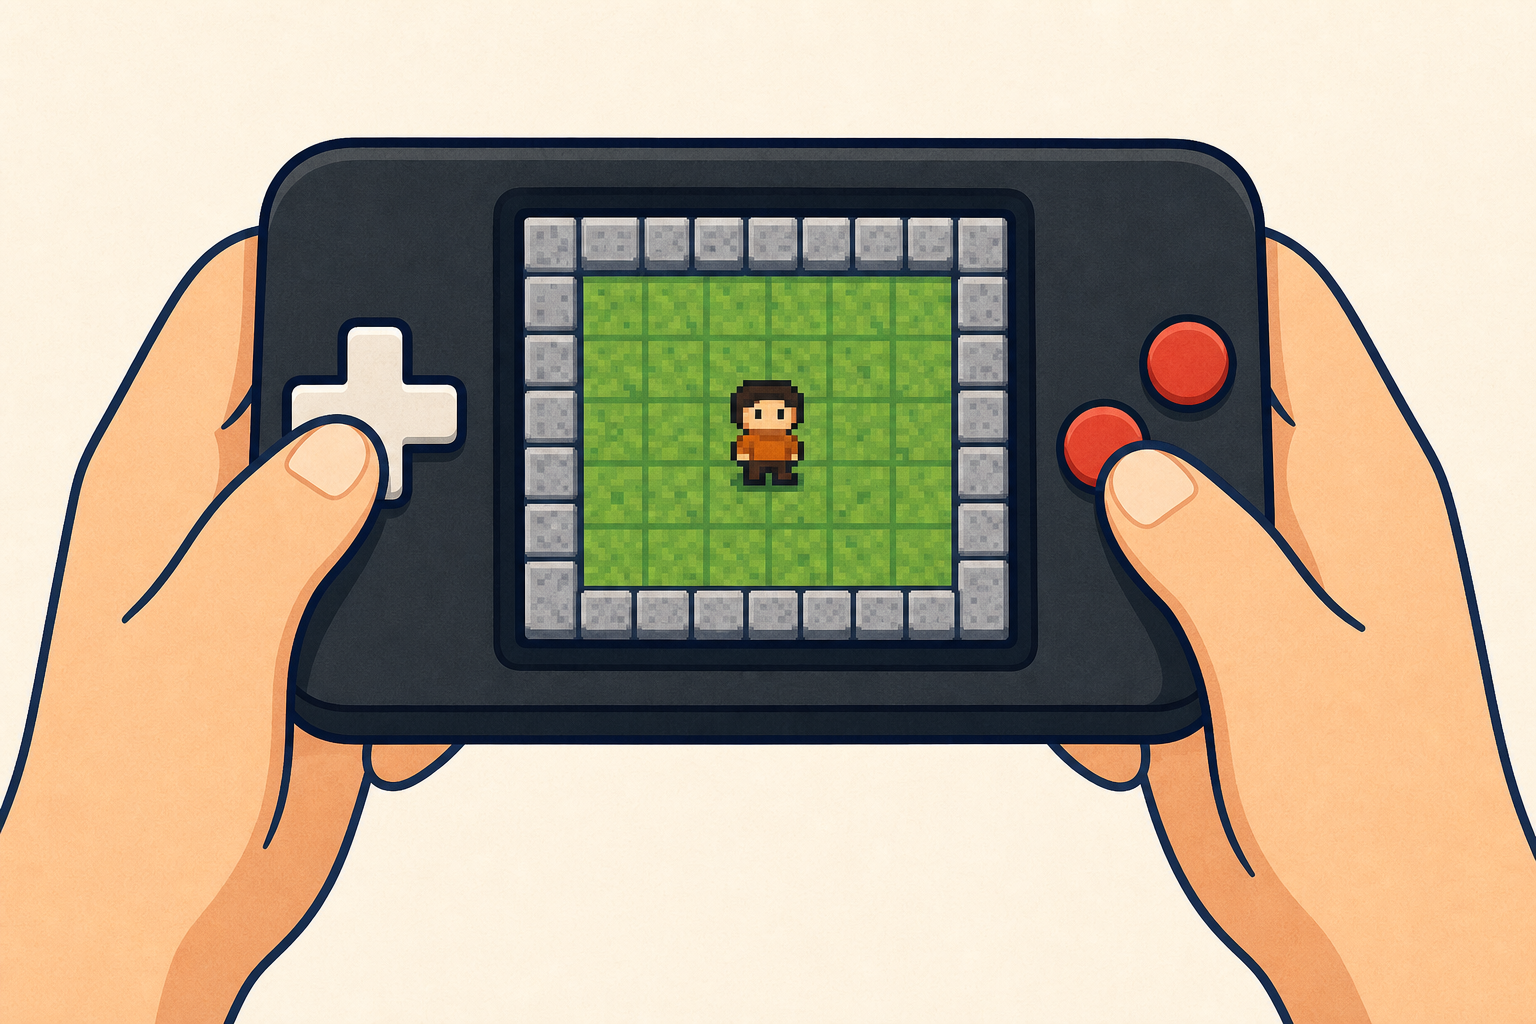
 Game designers don't just start typing — they plan first. They decide the goal of the game, who the player controls, how it moves and what the player has to avoid. Today you'll do the same job a real game programmer does: plan a simple arcade game, then build the first part of it on your device.
Fill in the three lines of your game plan on the Investigation Journal page first — the goal, the player, and how it moves. Then watch the board as each piece is modelled, then try it yourself and press Run to see what happens. By the end you'll have a sprite you can steer around the screen.
MakeCode Arcade is a fun and easy-to-use tool that lets us create our own arcade games. It's like a digital playground where we can build and play games right in our web browser.
With MakeCode, we can use colourful blocks to build our games, just like Scratch.
If you have a small handheld gaming computer like the BrainPad or GameGo, you can even put the games you make onto it and play them anywhere!
.png)
 Imagine the MakeCode Arcade code editor as a magical toolbox. It's a lot like the Microbit and Scratch editors you might have used before. Here's what it has:
- A simulator, which is like a mini TV screen where you can watch your code come to life and play the games you create.
- A toolbox, which is like a chest full of different code blocks. These blocks are sorted into groups so you can easily find what you need.
- A code area, which is like your construction site. This is where you build your code.
.jpg)
Let's create our first project!
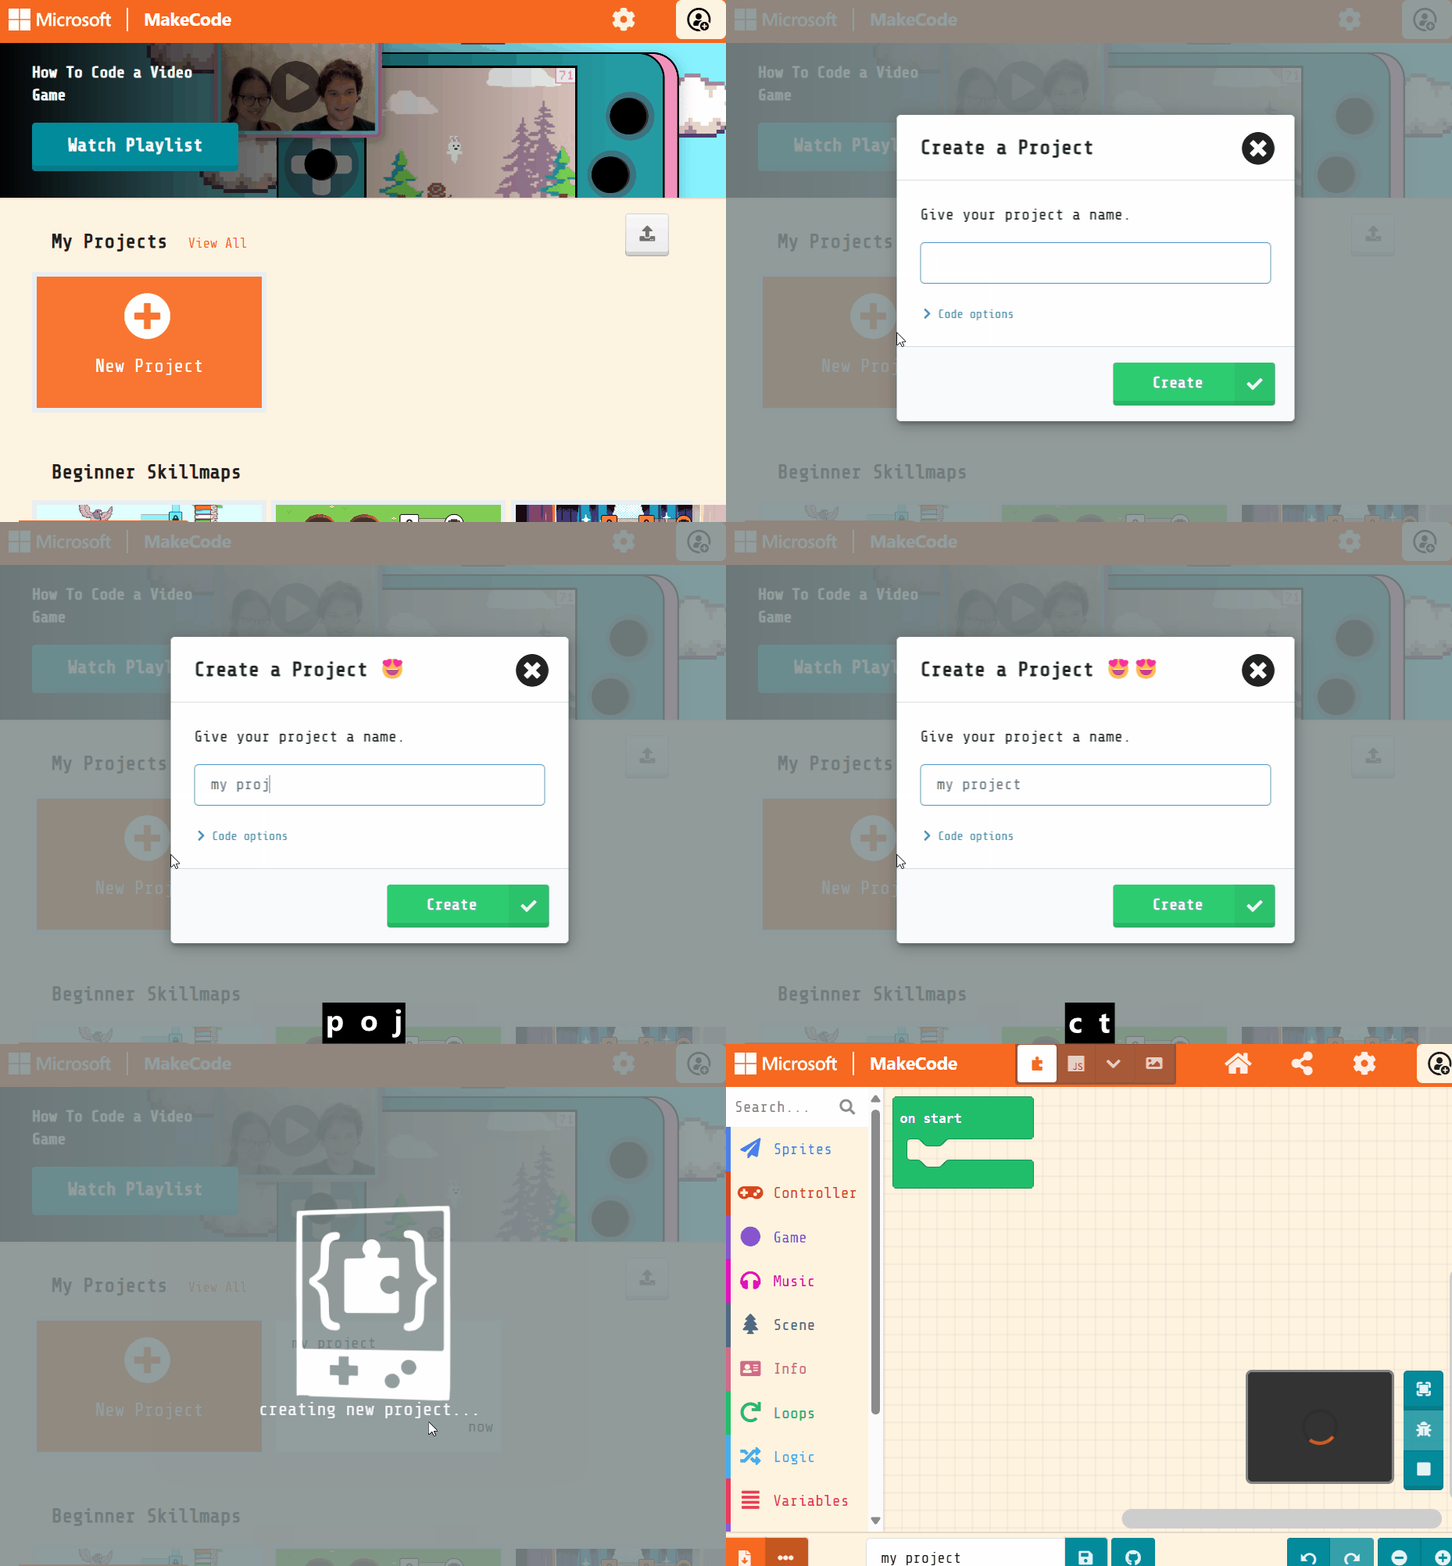
Go to the Arcade MakeCode website and create a new project. You can call your project anything you want!
Create a new Arcade project using the makecode.com website.

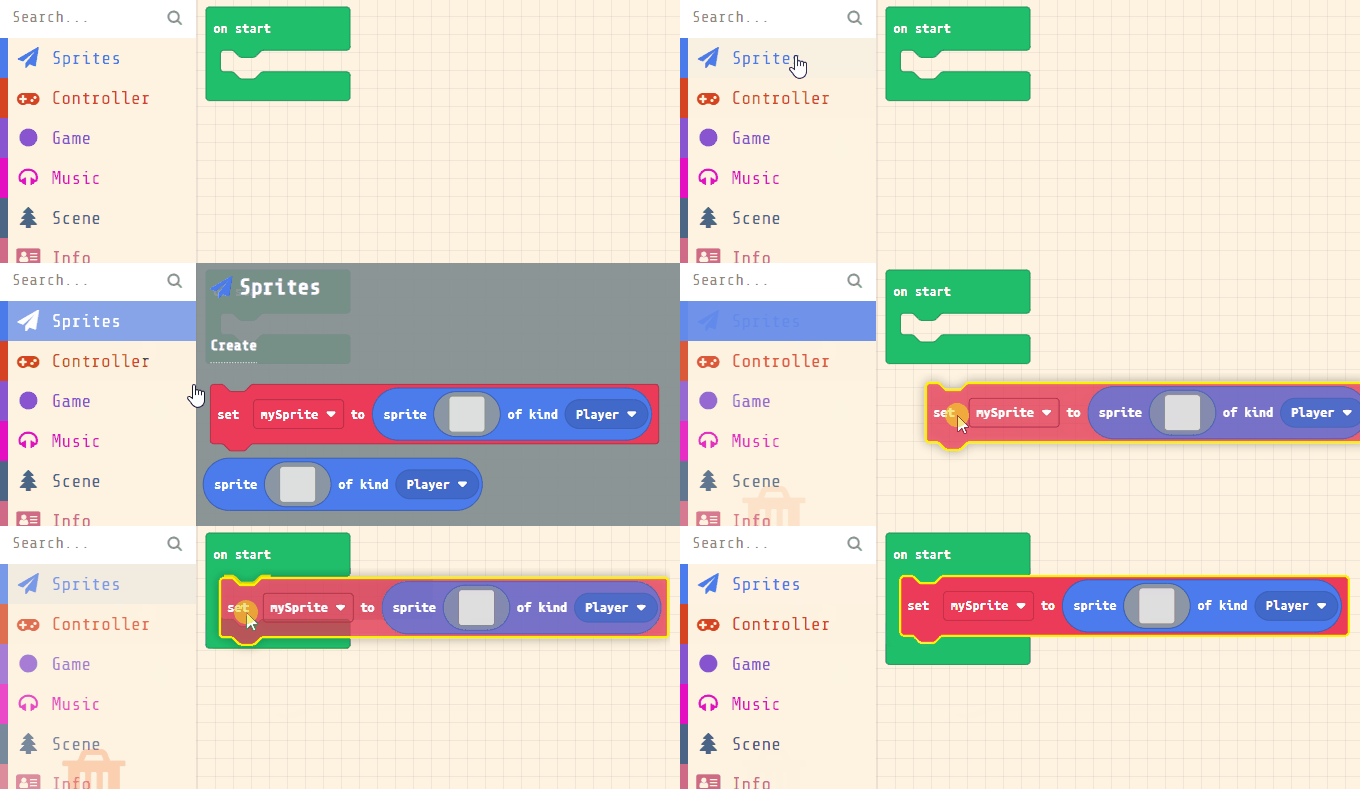
When we add a sprite to an Arcade project, we add it by putting it into a variable. We normally use variables to store numbers and text but we can also put more complicated things in them like sprites!
Add the following code to your project.
let mySprite = sprites.create(img`
    . . . . . . . . . . . . . . . .
    . . . . . . . . . . . . . . . .
    . . . . . . . . . . . . . . . .
    . . . . . . . . . . . . . . . .
    . . . . . . . . . . . . . . . .
    . . . . . . . . . . . . . . . .
    . . . . . . . . . . . . . . . .
    . . . . . . . . . . . . . . . .
    . . . . . . . . . . . . . . . .
    . . . . . . . . . . . . . . . .
    . . . . . . . . . . . . . . . .
    . . . . . . . . . . . . . . . .
    . . . . . . . . . . . . . . . .
    . . . . . . . . . . . . . . . .
    . . . . . . . . . . . . . . . .
    . . . . . . . . . . . . . . . .
    `, SpriteKind.Player)
This creates a variable called 'mySprite' and stores a sprite of kind Player in the variable. There are different types of sprites such as:
- Player - for sprites that are your character in the game.
- Projectile - for bullets, rockets or anything you want to fire!
- Food - for health packs, potions etc.
- Enemy - for enemy sprites that you play against or attack you.
- or you can even create your own kind of sprite!
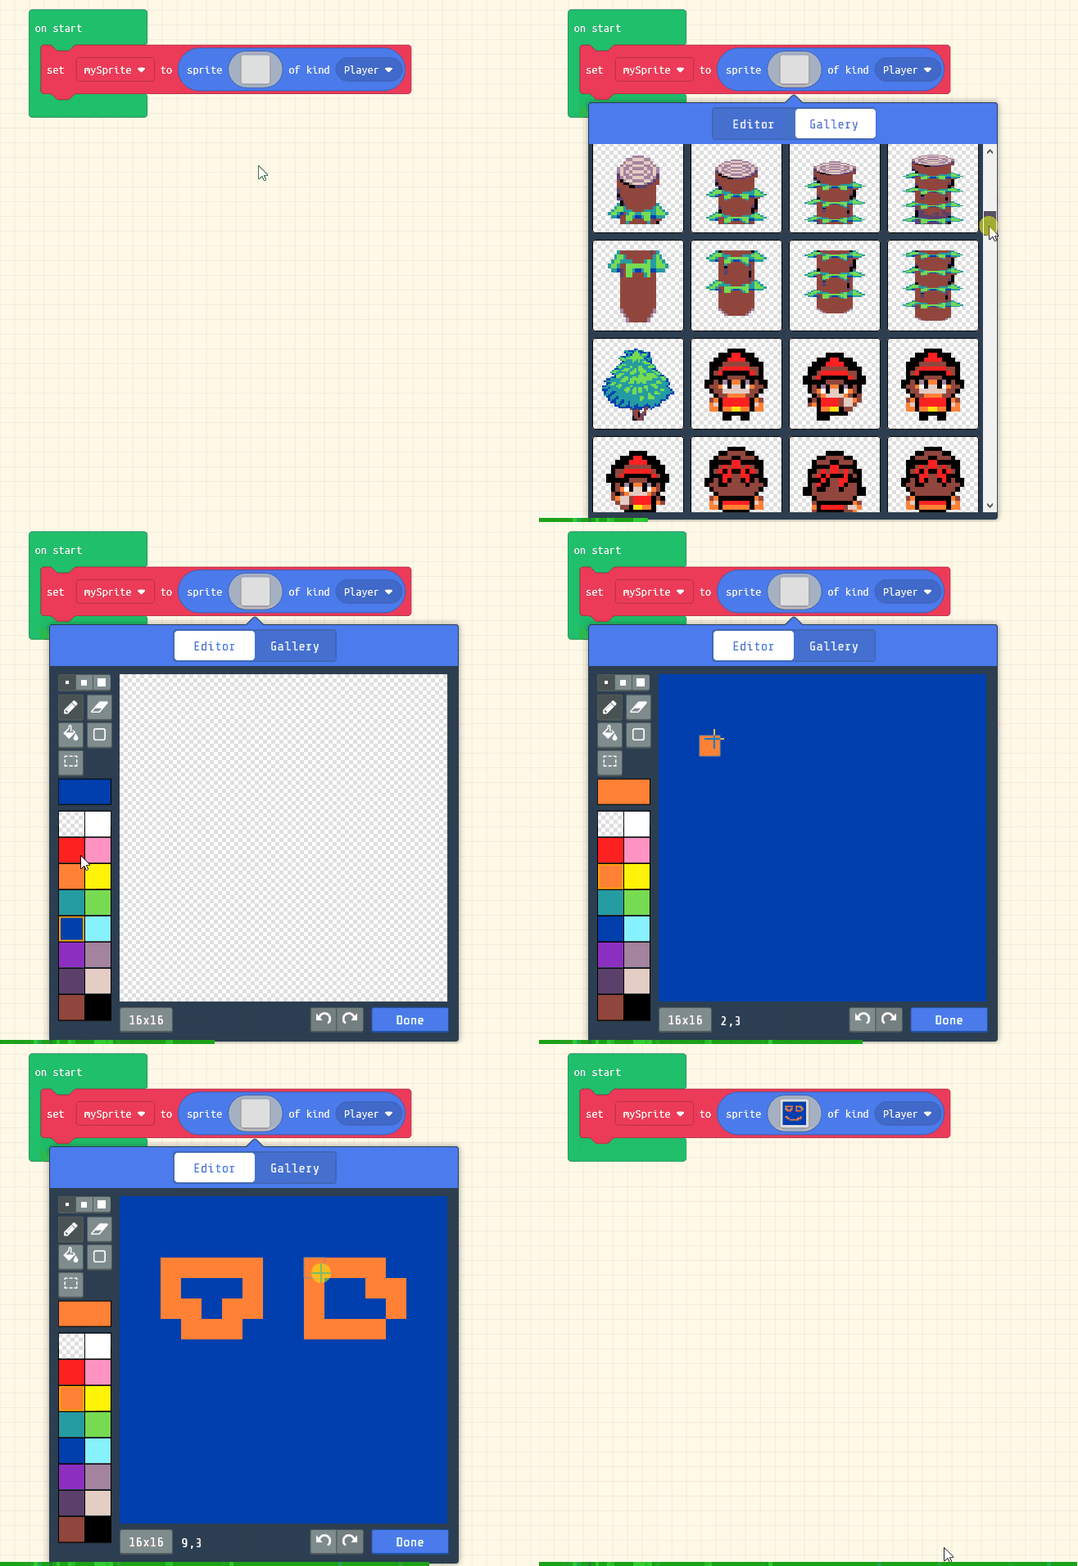
Click on the gray box in the sprite block to open the Editor. You can choose a sprite from the Gallery or you can paint your own sprite using the Editor.
Unlock the full learning experience
You're previewing this lesson. Get full access to this lesson and hundreds more — each one ready to teach, with interactive activities, printable resources and pupil progress tracking built in.
This lesson is copyright of Coding Ireland 2017 - 2026. Unauthorised use, copying or distribution is not allowed.