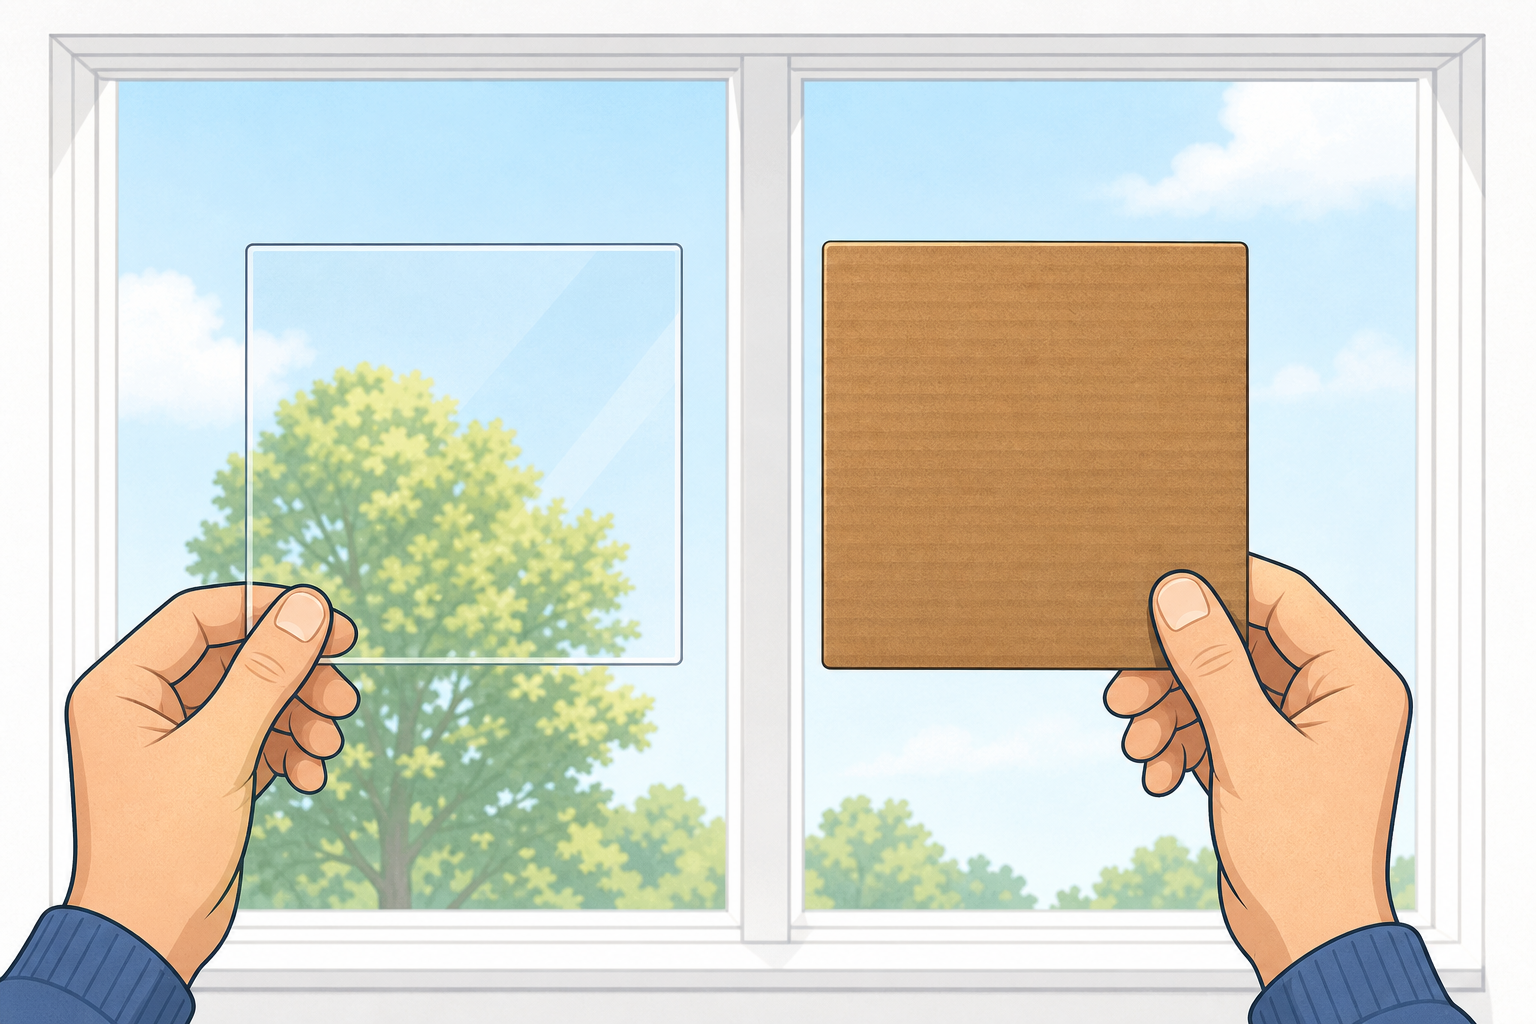
Look at our classroom window. What can you see through the glass?
Some materials let us peep through. Some do not. Today we will find out which ones.
Stand by the classroom window so the class can look out. Point to the glass and ask what they can see outdoors (a tree, the sky, the yard). Keep this beat light: one question and a quick look, not a materials set-up.
Have ready to show only: one scrap of cling film and one piece of card, held up briefly so the contrast is clear, then put them back for the next steps.
Nature of STEM weave: later in the lesson, name a window-maker who chooses glass so people can see out of houses and schools.
Today's words: see-through and not see-through.
Watch. Can we peep through this one? What about this one?
Keep the board to the two bold words only. Lock each word to a live demo with a real object in your hands:
Do not name the full five-sample list yet. Children meet those objects when the trays come out in the next steps. Guesses about the two you hold are never wrong; they are the start of the fun.
| Concept | Why it matters | Example |
|---|---|---|
| See-through — a material you can look through and still see what is on the other side | Windows, clear cups and packaging use see-through materials so we can see out or see what is inside | Cling film or a clear plastic cup held up to the window lets you peep at the yard |
| Not see-through — a material that blocks your view so you cannot see through it | Card and foil stop us seeing through, which is handy for wrapping a birthday present or for a solid wall so the classroom is not see-through like a window | Foil or thick card held up to the light stops you seeing what is behind |
Modelled cycle language (you will live this fully in the next step):
Misconception to head off: children may say something is see-through just because light makes it glow. Gently revoice: peeping means you can still make out what is on the other side, not only that it looks bright.
Ask: where at school do we already use something see-through? (The window is enough.)
Watch me hold each piece up to the light. Call out: can I still see the other side?
Whole-class teacher model only. Children stay on the carpet or at seats. You hold two samples only (cling film, then thick card) up toward the window or a lamp. Invite a choral call or thumbs: peep or blocked?
Live the short cycle out loud: I wonder… I think… I try… I noticed… I think it is see-through / not see-through.
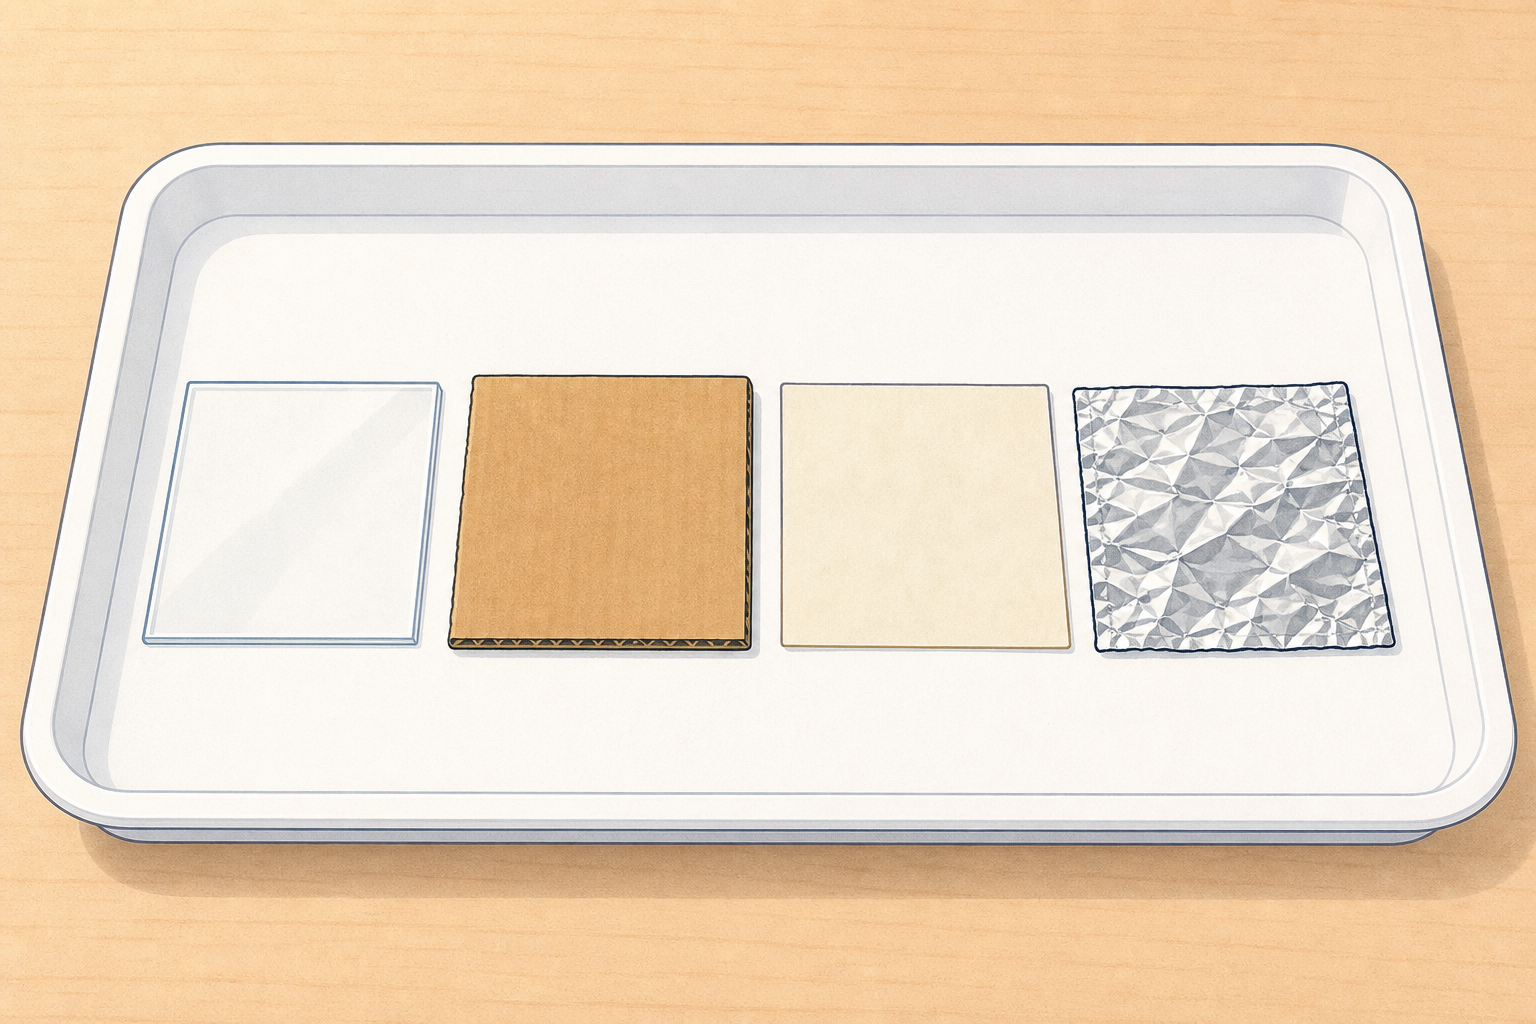
Then briefly show the full tray of five samples so children see what they will handle next: cling film scrap, ordinary paper, foil, clear plastic cup, thick card. Do not hand trays out until the next step.
Key questions: What can I still see? Is it clear, or is it blocked? Does a little light get through, or can I really peep?
No drawing or journal work in this step. Recording is oral only (pointing, calling out, thumbs).
Now it is your turn with your partner. Take turns holding each piece up to the window light. Feel it as well. Tell your partner which one surprised you.
Before this step: set one bright place by a window (or a lamp if the day is dull). Lay out trays with the five samples: cling film scrap, ordinary paper, foil, clear plastic cup, thick card. One tray between two children is enough.
This is the only pair hands-on peep. Children take turns holding one piece up toward the light and saying what they can still see. Stay close to help with cling film so it does not stick to faces or hair.
Rotate quickly if space is tight so every pair gets a turn at the brightest place; other pairs can hold pieces toward the same window from a short step back.
Guiding questions while you circulate: Which one surprised you? Does foil feel different from cling film? Can you still see your partner's face through the cup? Does paper glow a little, or can you really peep a clear picture?
What to expect: cling film and the clear cup are clearly see-through. Foil and thick card are not. Ordinary paper may glow a little but children usually cannot peep a clear picture through it; guide them toward not see-through.
Keep bursts short. After a few minutes, freeze the class with a quiet signal and invite two children to show one find: one see-through and one not.
Safety: cling film scraps stay in hands or on the tray, never near mouths; foil edges can be sharp if crumpled tightly, so bend gently; plastic cups are for looking through, not biting.
Differentiation: less confident children point to what they can see while you name it; confident pairs try two pieces and tell a partner which one lets them peep.
Recording: oral talk with a partner only. Sorting comes next; drawing is on the Investigation Journal page later.
With your partner, put each piece on the see-through side or the not-see-through side. Say why it goes there.
Default method (works in every infant room): each pair uses two paper place-mats, two sheets of paper, or two clear corners of their desk. You name the sides aloud: see-through and not see-through. No need for written labels the children must read.
Pairs place each real sample on a side and say a short reason, for example I can peep through the cup or the foil blocks the view.
Optional shared class check: if you have two shallow trays or hoops, invite pairs to bring one sample up in turn and place it in the class see-through or not-see-through tray so everyone can agree. Do not rely on two hoops per pair; a typical infant room will not have that many.
Agreed class sort to aim for:
If a pair puts paper in see-through because it glows, revisit the peep test together: can you make out a face or a tree through it?
Fast finishers: find one more see-through thing already in the room (a window, a clear water bottle) and point to it without leaving their spot.
You're previewing this lesson. Get full access to this lesson and hundreds more — each one ready to teach, with interactive activities, printable resources and pupil progress tracking built in.