Close your eyes for a moment. What sounds can you hear in our classroom right now?
Today we find out what a sound actually is, and how we can make one higher, lower, louder or quieter on purpose.
Keep this beat light. Invite three or four quick answers (a chair scrape, rain on the window, a cough, traffic outside). Do not hand out materials or name pitch and volume yet.
Key question: If sound is something we hear, what is the thing that is actually happening to make it?
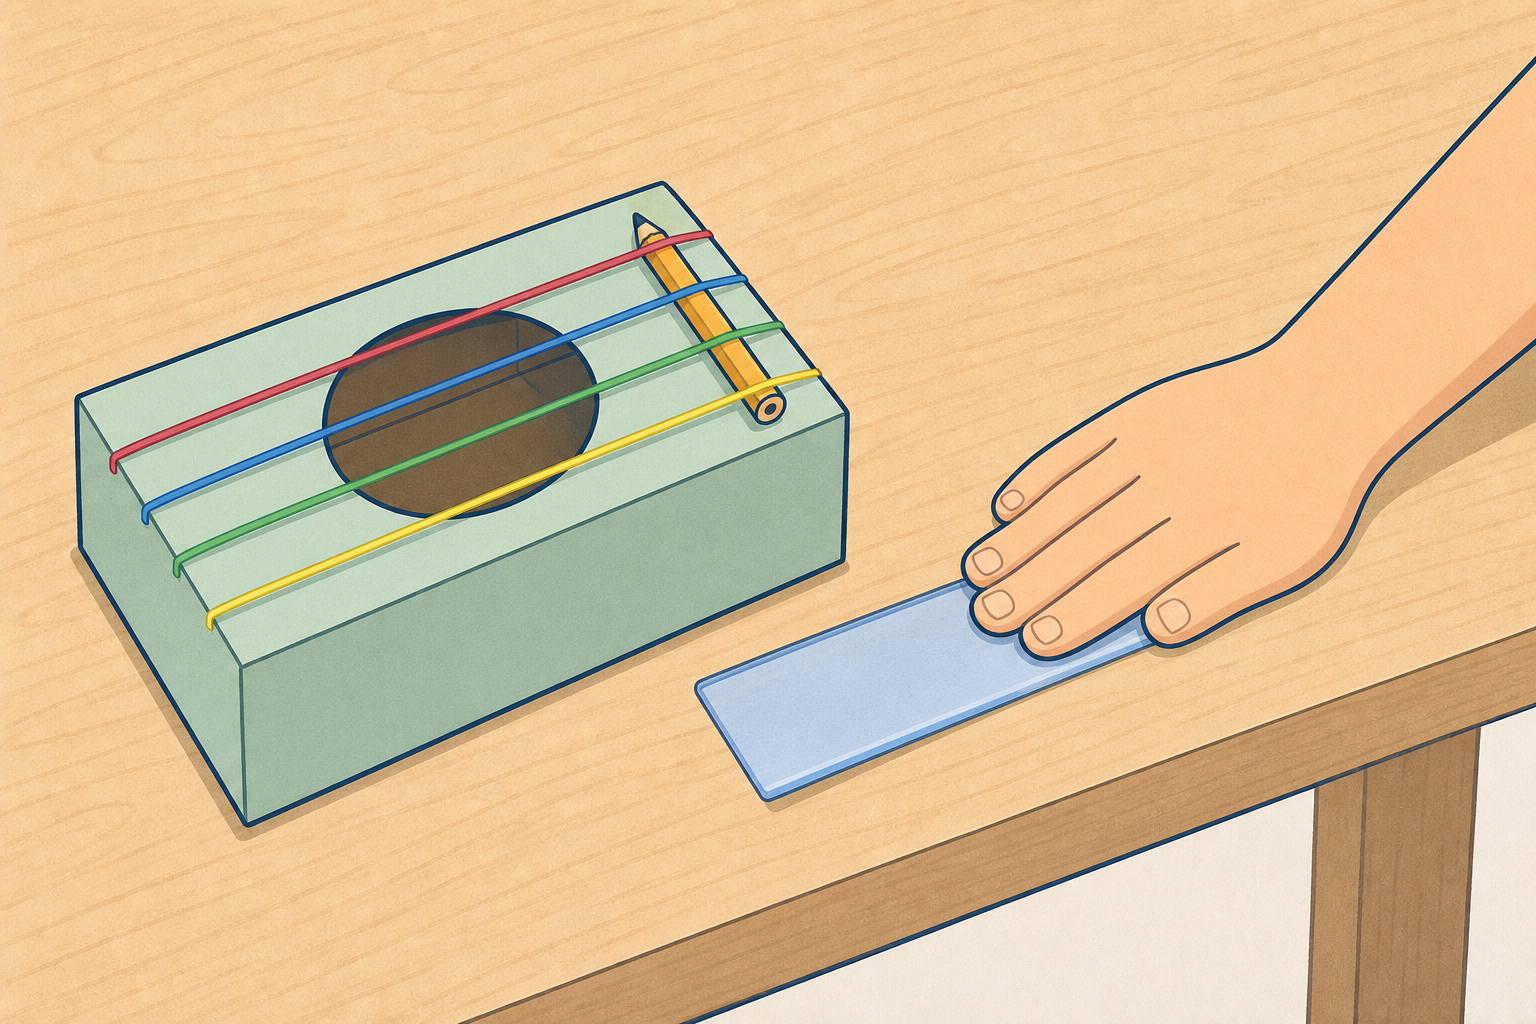
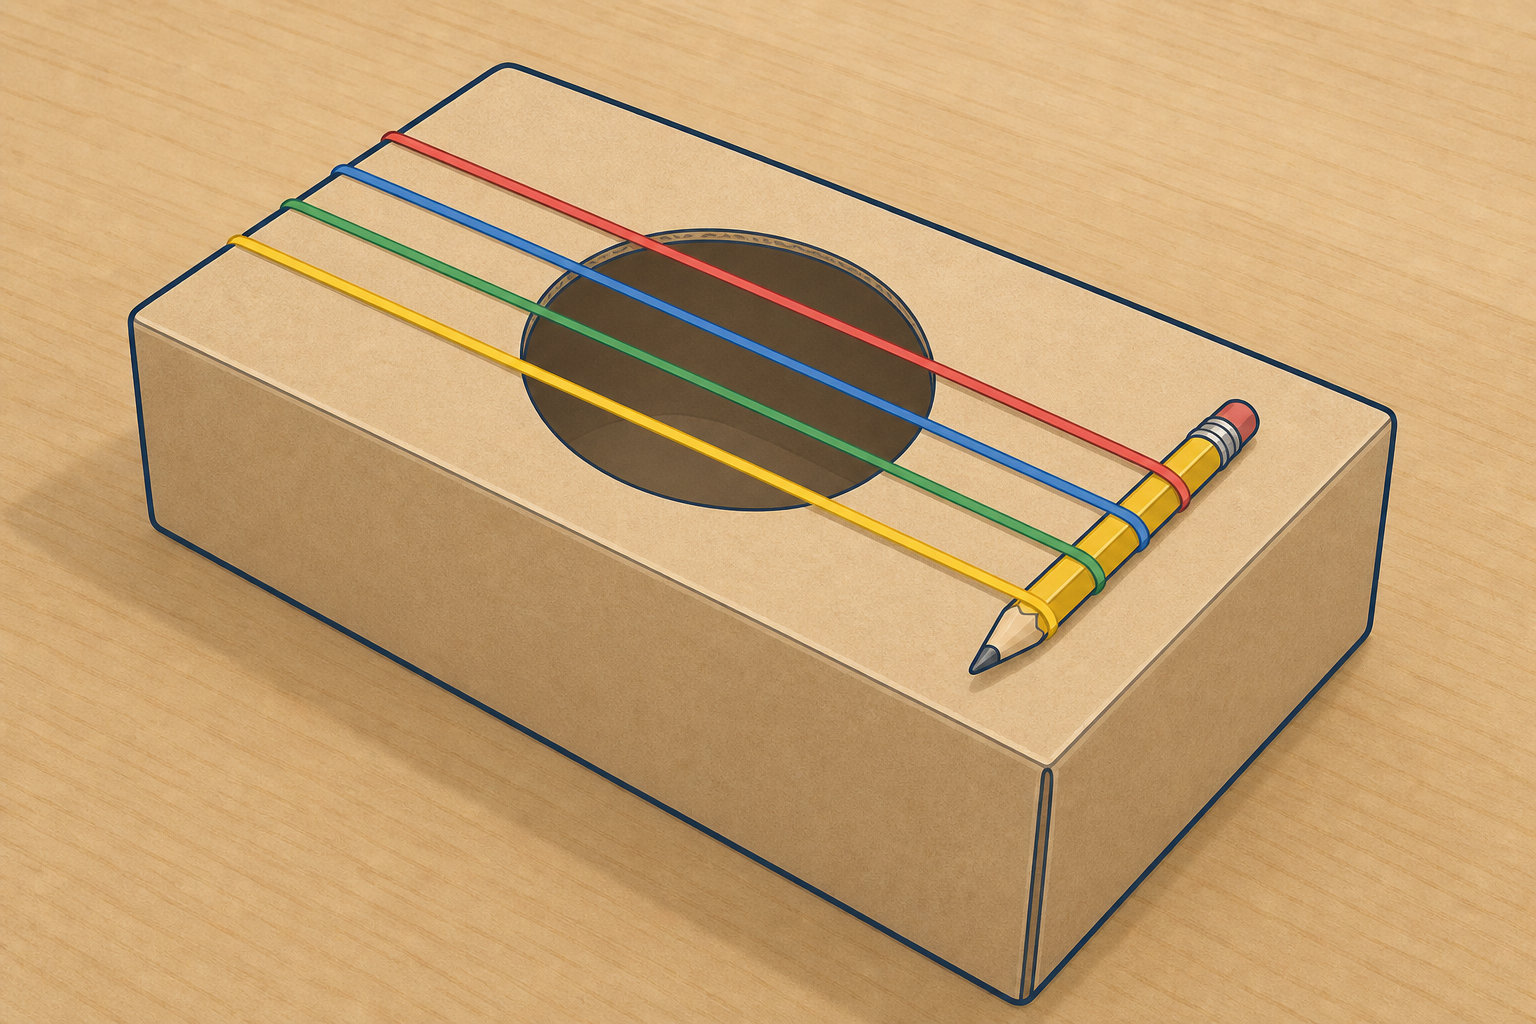
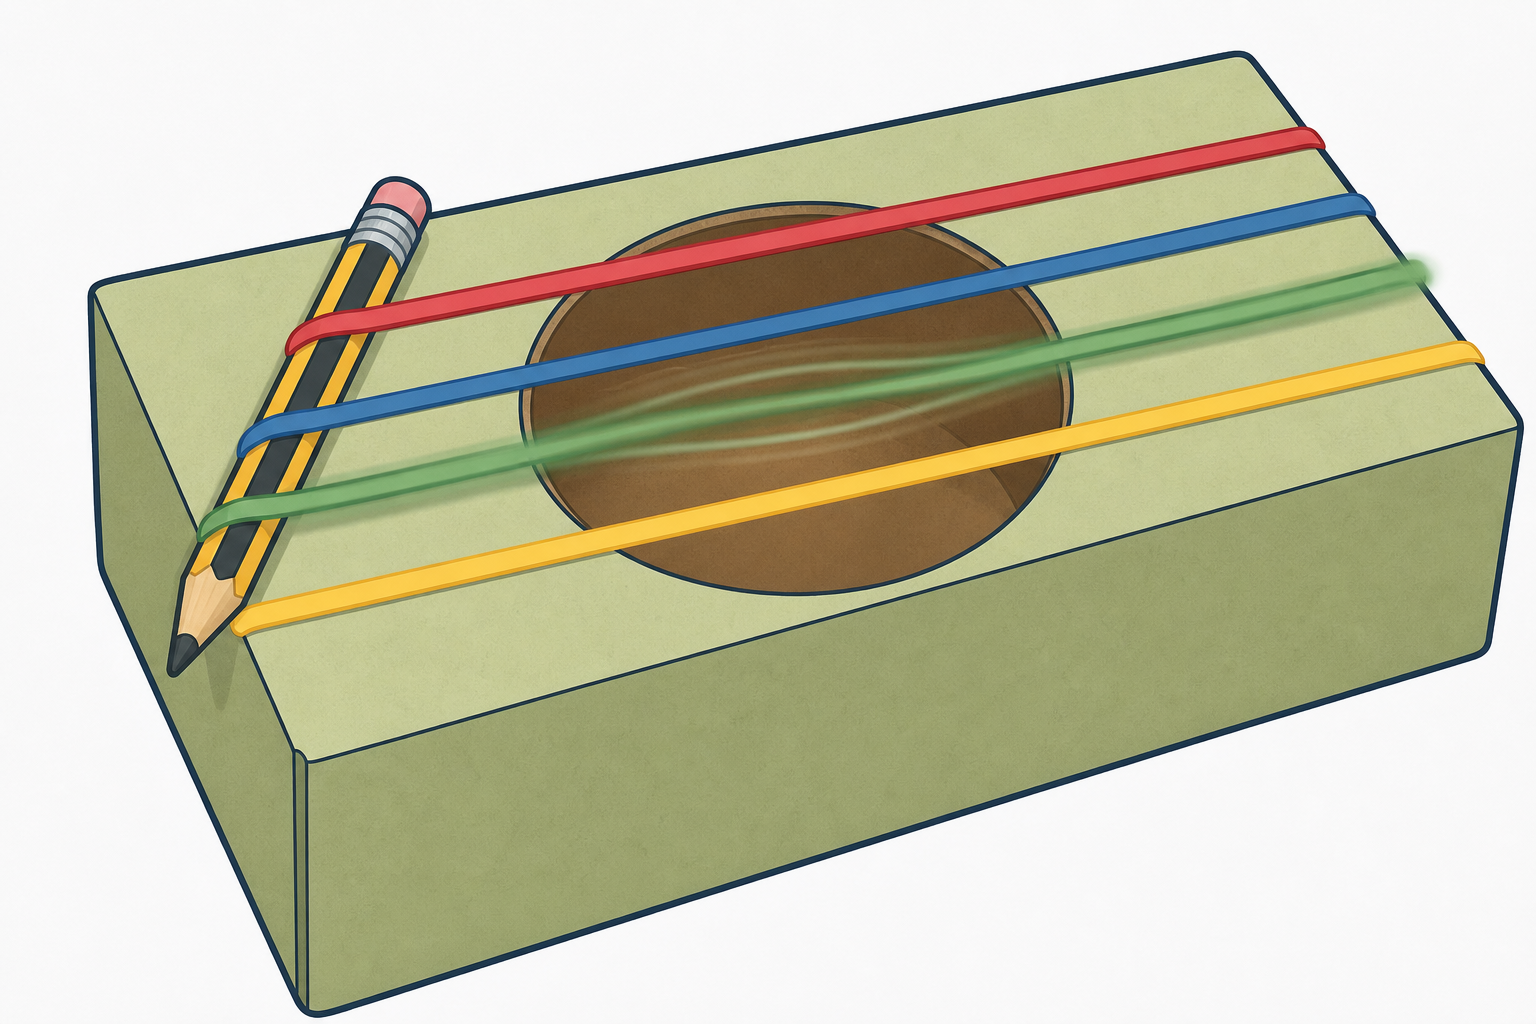
Teaser pluck (always do this): Have one elastic band already stretched over a small box. End the hook with one clean pluck so the whole class shares the same sound. Put the box aside but leave it visible on your desk so step 2 can point back to it. One pluck only.
When something wobbles fast enough for our ears to pick it up, we hear a sound. Scientists call that wobble a vibration.
Pitch is how high or low a sound is. Volume is how loud or quiet it is.
Think about the elastic band on the box we just heard. What could we change on that band to make the note higher or louder?
Project only the short board text. Use the table below yourself. Point to the elastic-band box from the hook when you ask the closing question — do not open group trays yet.
| Concept | Why it matters | Example |
|---|---|---|
| Vibration — a quick back-and-forth wobble. When something vibrates, it can start a sound that travels to our ears | Every sound we hear starts with something wobbling, even if the wobble is too small to see | Pluck a tight elastic band and watch it blur as it wobbles and you hear a note |
| Pitch — how high or low a sound is | Musicians and instrument makers change pitch on purpose by changing length or tightness | Less of a ruler hanging over the edge twangs higher than more hanging over |
| Volume — how loud or quiet a sound is | Volume and pitch are different ideas: hitting harder makes it louder, not automatically higher | Plucking the same band harder makes a louder sound without changing how high it is |
Misconception to head off: many children think louder means higher. Keep pitch (high/low) and volume (loud/quiet) as two separate ideas every time you model.
Worked example — model the full cycle once before groups work (use the ruler, matching Test A):
Think the cycle aloud. This model shows the inquiry cycle using length for pitch — the same path groups will use in Test A. Do not write the conclusion on the board before pupils predict for their own trials.
Nature of STEM weave (light): physicists study energy and forces. Sound is energy on the move — it starts when something vibrates and that vibration travels through the air to our ears. Keep it one sentence, not a mini-lecture.
Our questions today: What can we change to make a sound higher or lower? What can we change to make it louder or quieter?
On your Investigation Journal page, finish these two stems:
Print the Investigation Journal page. Set out group trays but keep them closed until the explore step.
Before anyone writes, hold up your desk box and pluck the band once so the class links the second stem to what they already heard. Then hold a ruler on the table edge with part hanging over and give one gentle flick. Name the variable in plain words: how much of the ruler hangs over the edge. Point to the free part as it twangs. Put both instruments down. Do not open group trays yet — this is a 10–15 second show-and-name only so the stems have a shared referent.
Agree the two questions as a class. Leave the two stem predictions on the board. Pupils write predictions on the Investigation Journal page before anyone plucks or twangs in groups.
Board stems (keep visible):
Predictions are never wrong; they start the science. Circulate and push for a because clause: I think… because…
Differentiation: pairs can share one spoken prediction with the teacher if writing is slow; still capture both ideas (pitch and volume) somehow on the page.
In your group, try the rubber-band guitar and the ruler twang.
Pick one change only each time: how tight the band is, or how much of the ruler hangs over the edge, or how hard you pluck or twang. Then listen and look. Can you see or feel the vibration?
When you hear the freeze signal, stop and listen only — no plucking until the teacher says go again.
One tray per group of three or four: a small cardboard box or tissue box with two or three elastic bands of different thicknesses stretched across; one 30 cm plastic ruler; a clear edge of the table for the ruler overhang.
Agree a clear freeze signal before trays open (e.g. hand up, lights flicker, or a soft chime). Pattern for the explore beat: about 45–60 seconds of group trials, then freeze-and-listen so the room goes quiet and each group can hear one clean pluck or twang. Repeat that cycle a few times. Stagger if needed: half the groups trial while the others watch hands-off, then swap. Do not rely on "sensible volume" alone.
Safety: elastic bands stay on the instruments — no shooting. Rulers stay low over the table edge. Use the freeze signal so groups can hear their own trials.
What to expect: tighter band or less ruler hanging over sounds higher; harder plucks sound louder; the band or ruler is visibly or tangibly vibrating while the sound lasts.
Close of explore: freeze signal, hands off instruments, trays stay on desks ready for the two careful tests next.
Hands off for a moment. We will run two clean tests only.
Test A — pitch: use the ruler. Change only how much hangs over the edge. Keep the flick the same. Your group chooses the two overhang lengths to compare (for example about 10 cm and about 20 cm). Listen for higher or lower. After the two lengths, jot one line: what you changed and what you heard or felt.
Test B — volume: use one elastic band. Keep tightness the same. Change only how hard you pluck. Your group chooses the order: gentle then harder, or harder then gentler. Listen for louder or quieter. Jot one line again.
Watch or feel the vibration as well as listening. Freeze signal still applies between trials.
Stop free explore cleanly with the freeze signal. Agree the path as a class so both tests fit the slot:
That shared path is the scaffold; groups still own the two length choices, the pluck order, the listening, the vibration check, and the short jot after each test.
Light capture during investigate: after each test, one short line on the journal page or a sticky corner note (changed… / heard… / vibration…). This is not a full write-up — just enough so details do not blur before the observe-and-record beat.
Look-fors: pupils separate high/low from loud/quiet; they can point to the vibrating part; they catch themselves if they changed two things at once.
If a group changes two things: pause them and ask what would make the comparison unfair, then redo one clean trial.
You're previewing this lesson. Get full access to this lesson and hundreds more — each one ready to teach, with interactive activities, printable resources and pupil progress tracking built in.