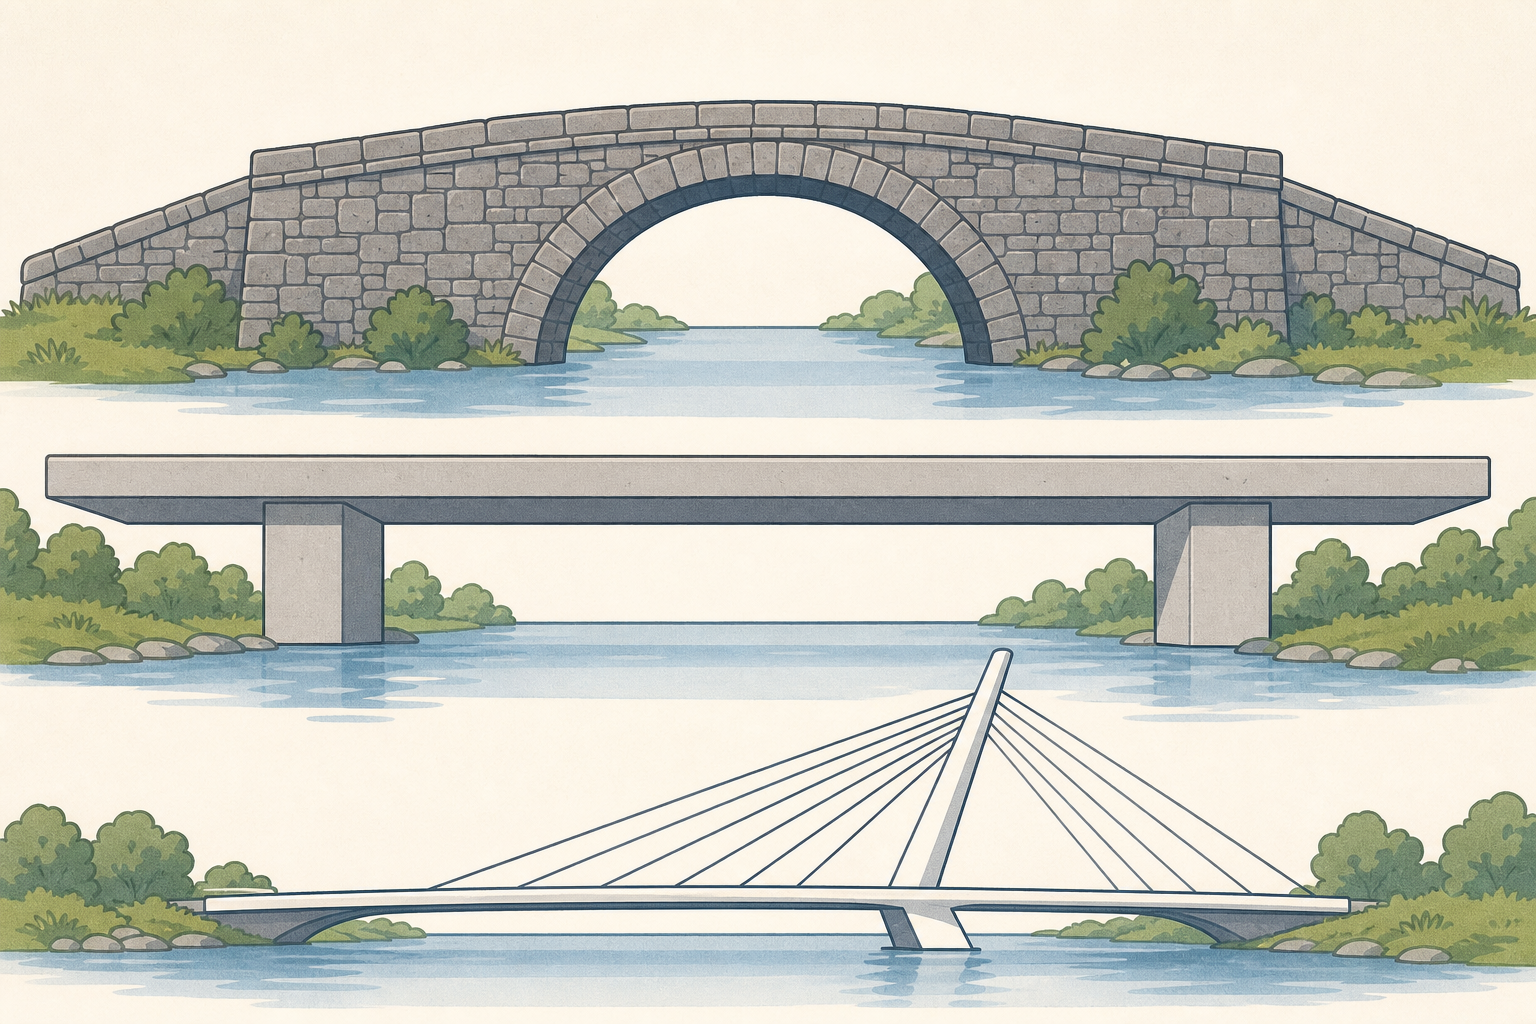
 Think of a stone arch like many older Irish road bridges, versus a flat beam bridge or a modern cable-stayed bridge such as the Samuel Beckett Bridge in Dublin. Why do engineers bother with different shapes?
Today we will build four paper bridges across the same gap and find out which shape holds the most load before it fails.
 Our question: Which bridge shape holds the most load before it fails?
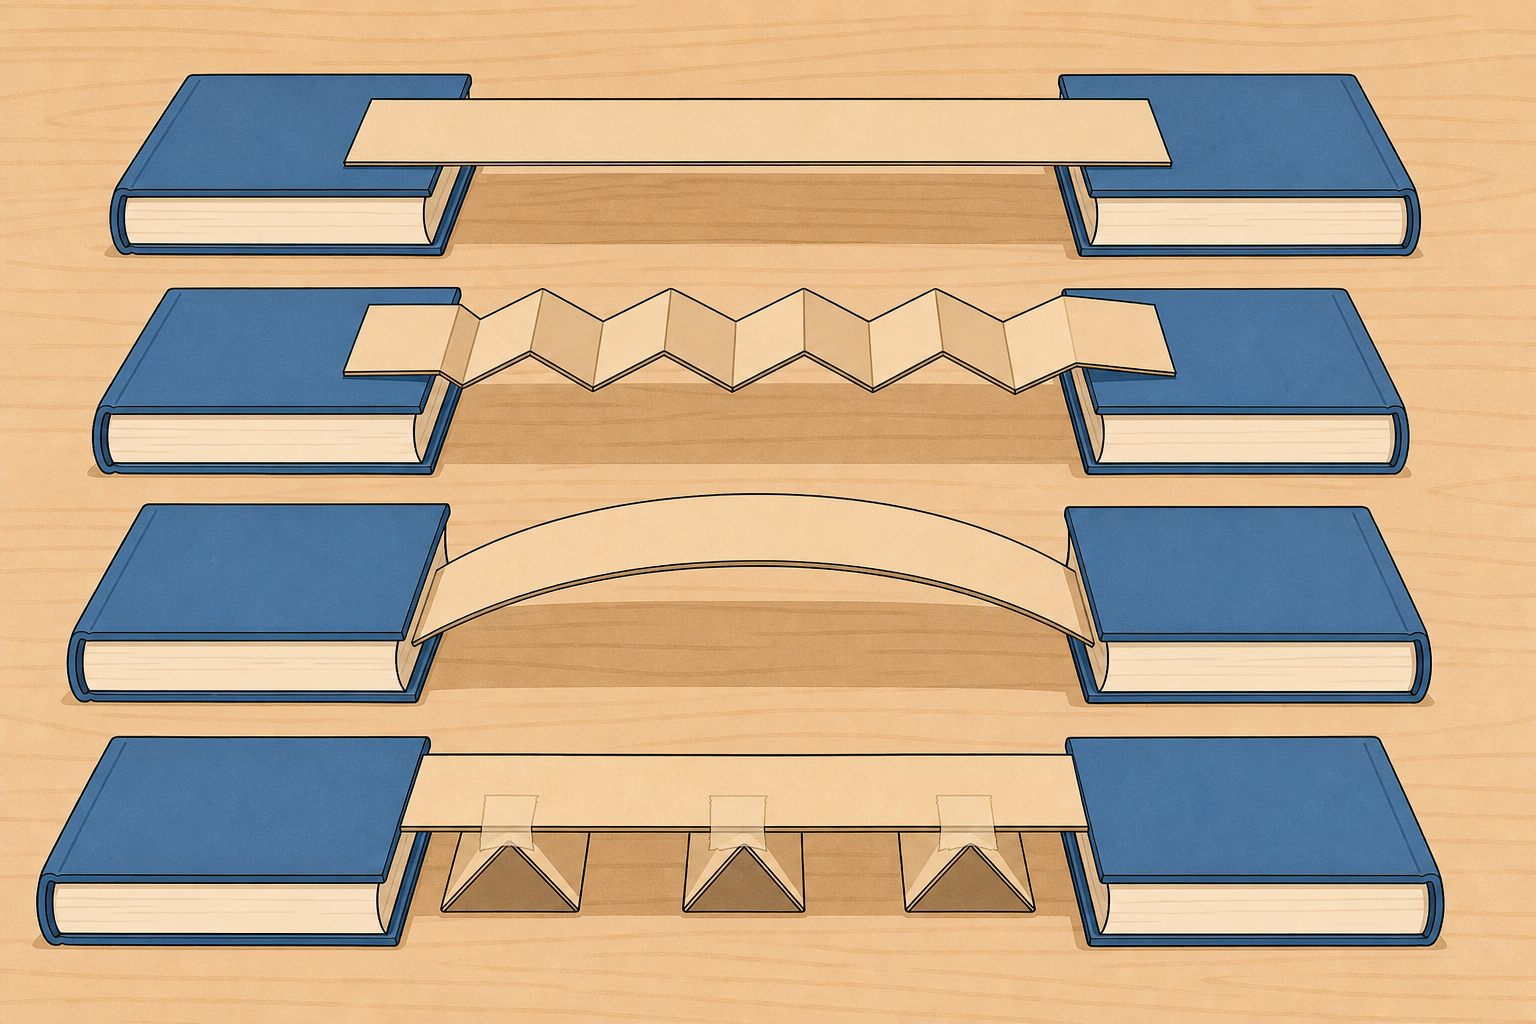
These are the four forms you will build:
- Flat: a plain strip laid straight across, like a simple plank.
- Folded: a strip with zigzag ridges along it (like corrugated roofing) that still reaches both ends.
- Arched: a strip bent into a smooth curve, like a rainbow over the gap.
- Trussed: a top path with triangles taped under or beside it to share the weight.
All four come from the same pile of equal strips, cross the same gap and are loaded the same way, so we are testing shape.
Predict with your group: which shape will hold the most? Say why you think so.
In your group, build four bridges from your equal card strips across the same gap. All four bridges, plus any braces or end wedges, must come from your group's strip budget only.
Strip plan (keep this in mind so the truss is not left short): about 1 strip each for flat, folded and arched; keep about 5 strips for the truss's flat top, its triangle braces and any tiny arch wedges.
Before you cut or fold, write one design choice on your Investigation Journal page: how will you form the folded ridges, and how will you make the truss triangles from your leftover strips?
- Flat: one strip laid straight across the supports.
- Folded: fold one strip into even zigzag ridges along its length (like corrugated roofing), so the strip still reaches both supports at full span.
- Arched: one strip bent into a smooth curve. Rest the ends on the supports. If the ends slip, tuck a thin wedge of scrap card under each end.
- Trussed: one strip as the top path, with triangle braces cut from the remaining strips and taped underneath or along the sides. Triangles should touch the top strip and the ends near the supports.
Keep the supports 20 cm apart, rest each bridge on its ends only, and label all four. Leave the coins and washers until every shape is built.
 This is the exciting bit: listen for the creak and watch which shape gives way first.
Test one shape at a time. Place coins or washers gently in the centre of the bridge, one at a time. Count how many it holds just before it fails (sags to the table or collapses).
Keep the same: 20 cm span, same card budget, load always in the middle, same counting rule. Change the form you test.
As you finish each shape, write the load count on your Investigation Journal page straight away.
Aim for one clean trial of each shape. If you have time for a second trial of a shape, add the two counts and halve them, then record that number.
Your load counts should already be on your Investigation Journal page from the tests.
Now add one short note on the same page: which shape held most in your group, and whether that matched your prediction. Were you surprised, or did the winner match what engineers might expect? Keep what you measured separate from what you think it means.
Unlock the full learning experience
You're previewing this lesson. Get full access to this lesson and hundreds more — each one ready to teach, with interactive activities, printable resources and pupil progress tracking built in.
This lesson is copyright of Coding Ireland 2017 - 2026. Unauthorised use, copying or distribution is not allowed.