 Today you are coding in Scratch. You will build a Racing Car at your device, step by step.
You can already add sprites and run a project with the green flag. Today the focus is on testing as you go and fixing bugs with a clear routine when something does not work.
Before you run anything new, think: what should the car do when it is on the track, and what should change on the grass?
Create a new Scratch project and delete the cat sprite.
Included with this step is a red car picture that we're going to upload into our Scratch project. First download the picture file onto your computer and then upload it into your project.
To download a picture to your computer, right click on the picture and then click on 'Save image as...'

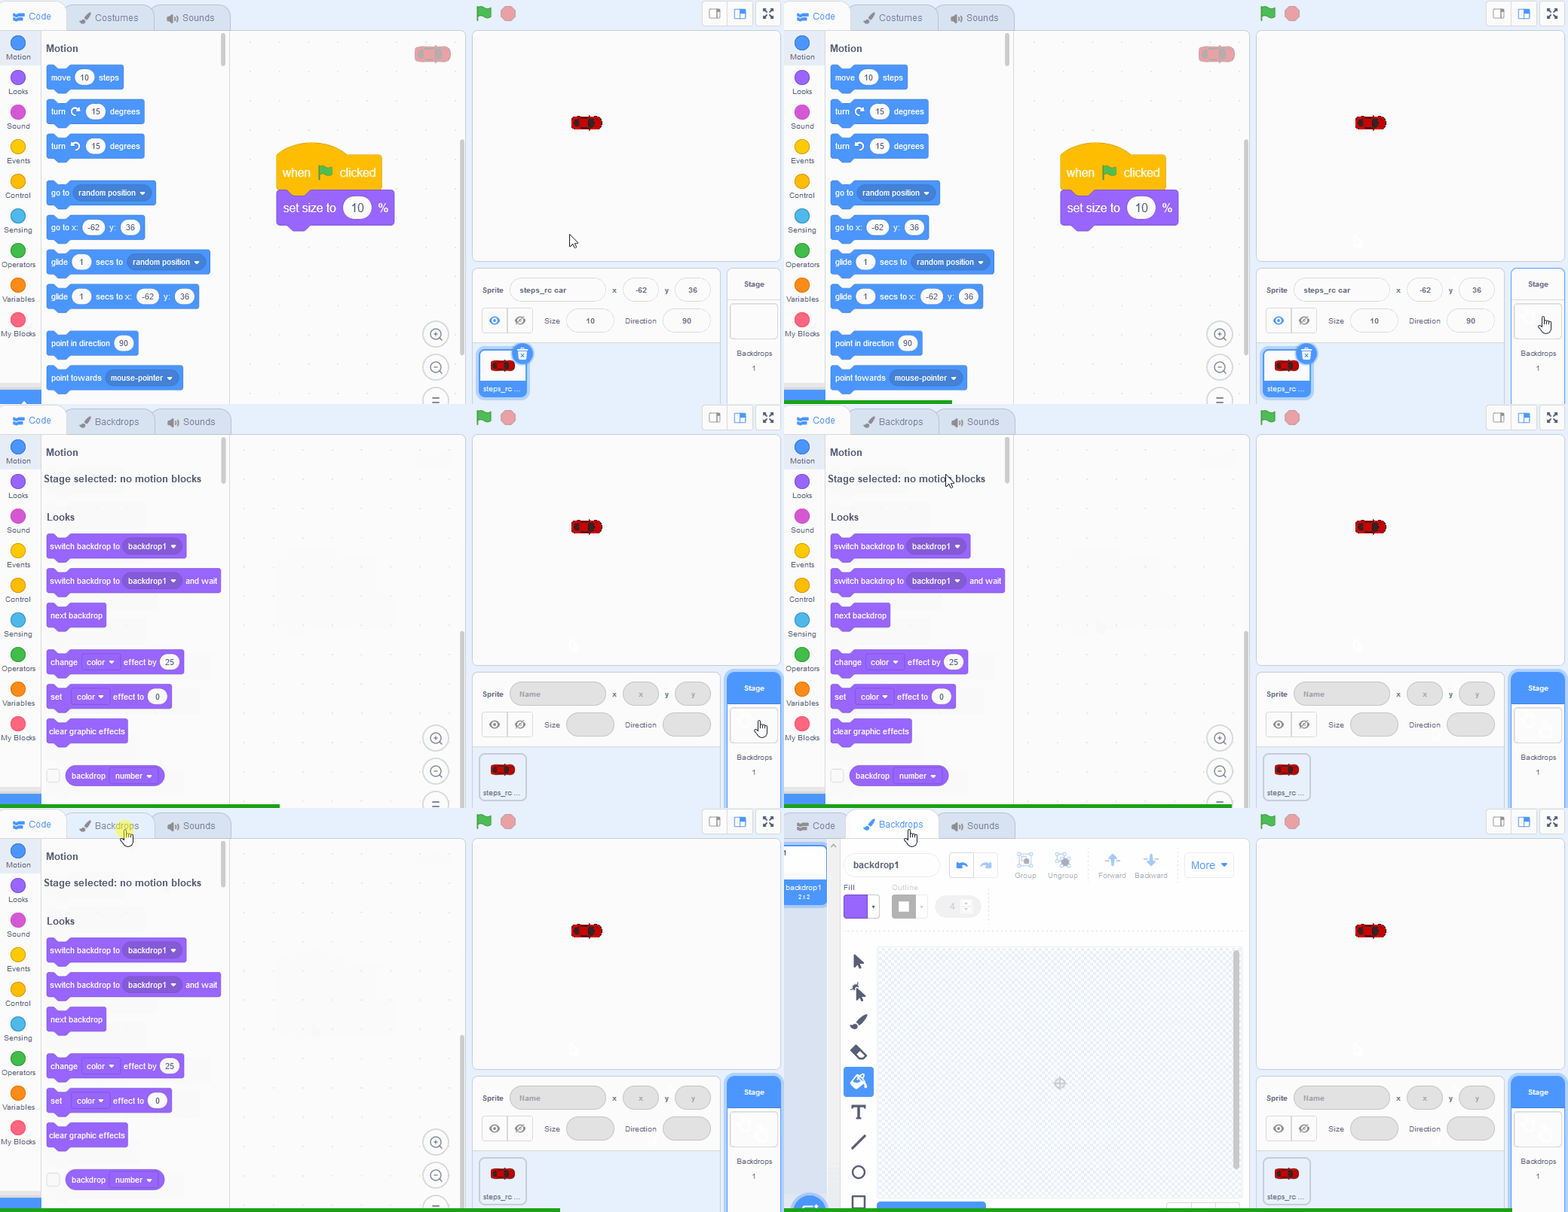
As the car sprite is very large, we'll need to shrink it so that it has room to move around. We're going to shrink it to 10% of it's original size. Add the following code to the car sprite.
when green flag clicked
set size to (10) %
Click on the green flag and the car will shrink to a smaller size.

We're going to use the backdrop editor to draw a racing track. To open the backdrop editor do the following:
- Click on the stage backdrop in the bottom right. A blue box should appear around it.
- Click on the backdrops tab in the top left. You should now see the backdrop editor.
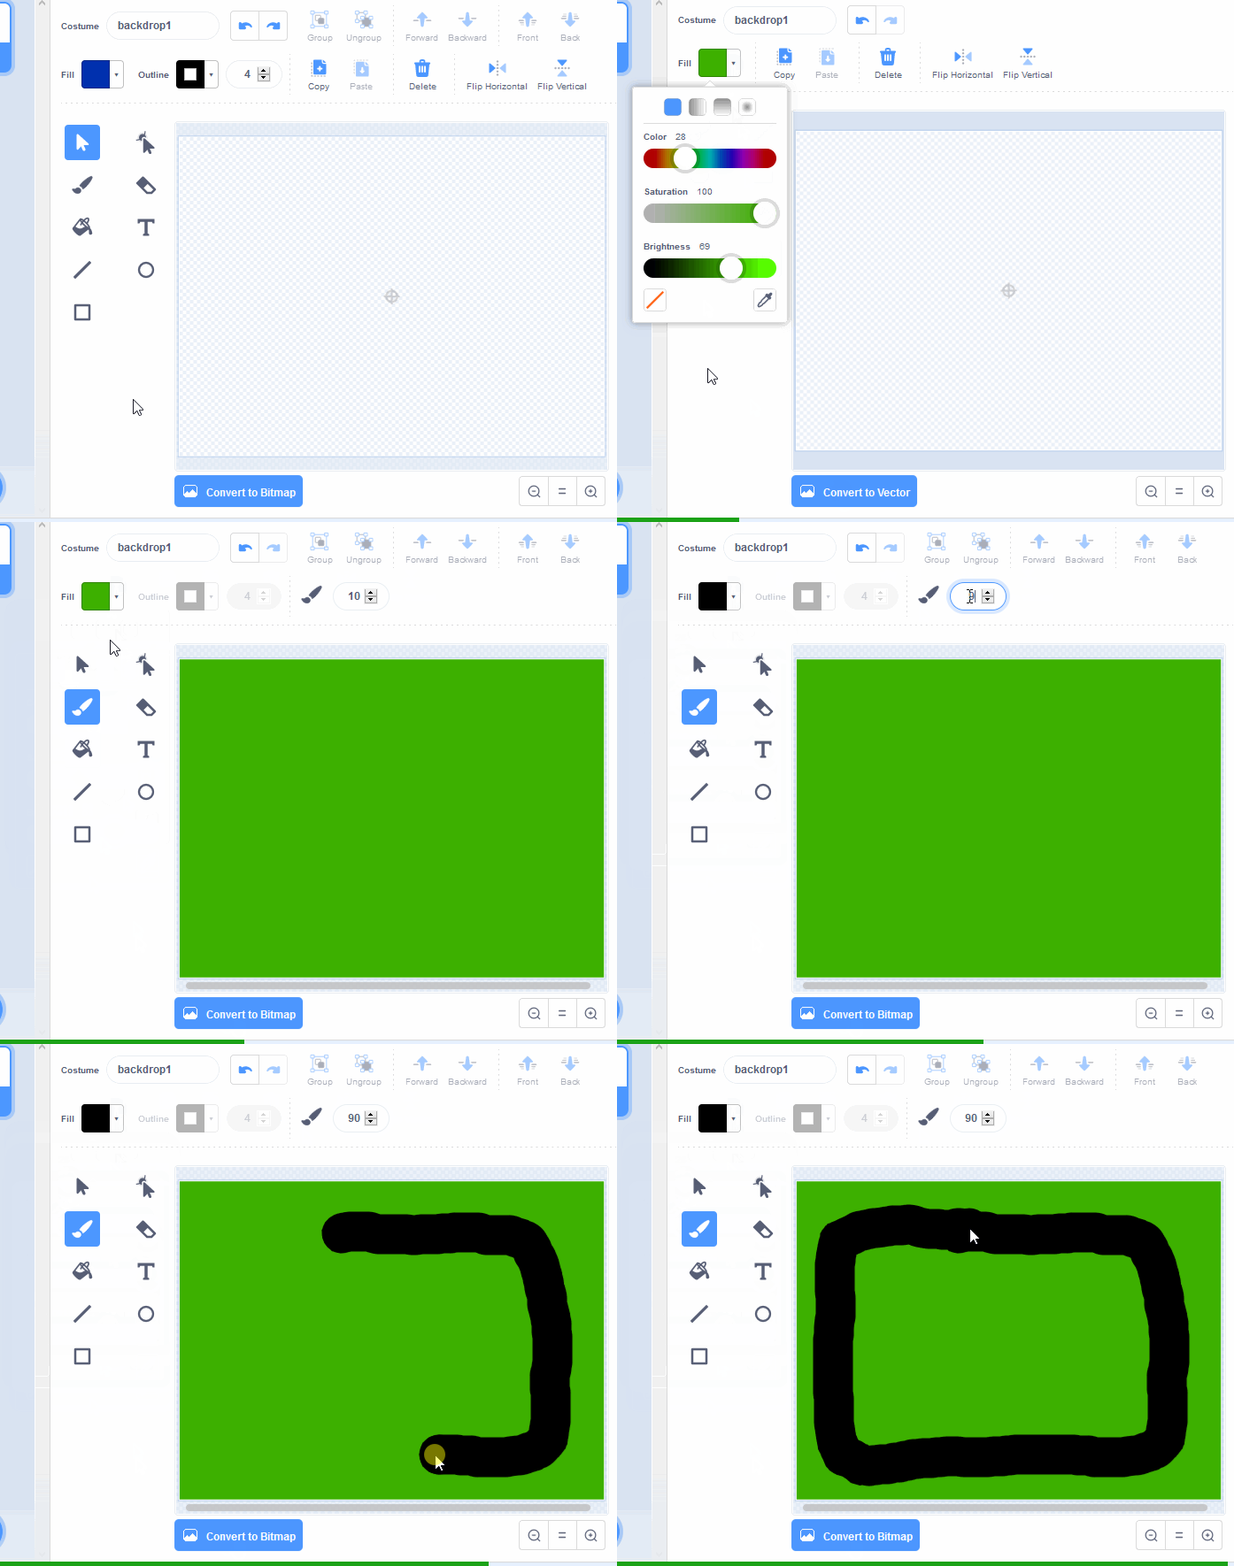
Next we're going to draw a race track. First we will colour the background green and then we will draw a black track. Follow these steps:
- Click the Convert to Bitmap button.
- Select the colour green in the Fill tool.
- Click on the Paint Bucket tool.
- Click on the backdrop to change it's colour to green.
- Click on the Convert to Vector button.
- Click on the Brush tool.
- Select the colour black in the Fill tool.
- Set the thickness of the brush to be 90.
- Draw a simple loop track by holding down the left button, moving your mouse and then releasing the left button.
Unlock the full learning experience
You're previewing this lesson. Get full access to this lesson and hundreds more — each one ready to teach, with interactive activities, printable resources and pupil progress tracking built in.
This lesson is copyright of Coding Ireland 2017 - 2026. Unauthorised use, copying or distribution is not allowed.
Scratch is developed by the Lifelong Kindergarten Group at the MIT Media Lab. It is available for free at https://scratch.mit.edu